

Activating Webservices Follow

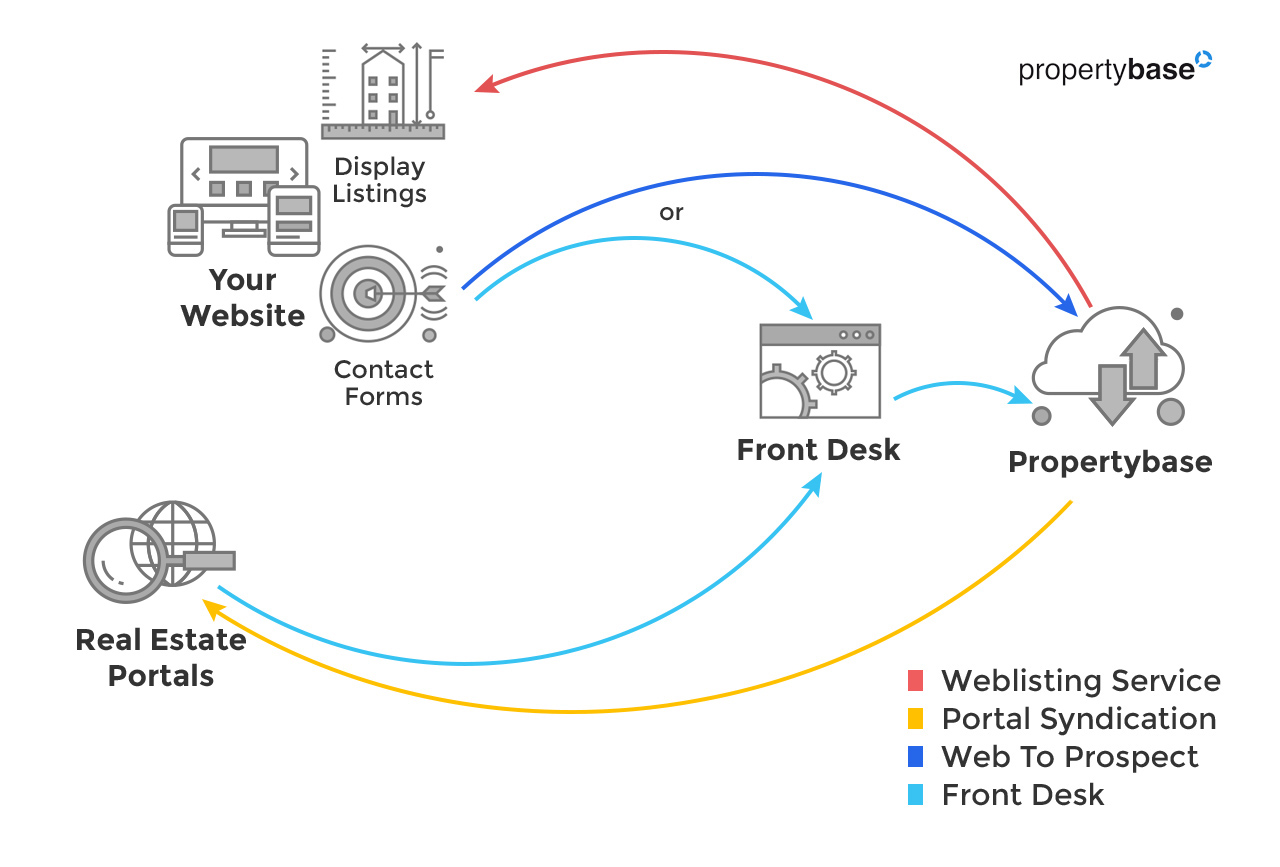
Activating Propertybase Webservices gives you access to several powerful features like Weblisting Services, WebToProspect, Front Desk and Facebook Lead Ads Integration. This guide is for Propertybase Administrators with a solid understanding of the Salesforce.com platform. Please note that Lightning customers do not need to activate Webservices to use Front Desk or related integrations.
Note: You might need to request an additional (free) site license before activating Webservices.
Please email Propertybase support and include your Propertybase ORG ID to request your complimentary site license.
Have your complimentary site license? Wearing your Webservices configuration hat? Great - let's get started.
As of Propertybase version 1.617 we simplified the following setup process by adding a Permission Set which grants permissions to all out-of-the-box fields on objects required to run Webservices.
If you don't want to or can't upgrade at the moment, you need to start and follow the Manual Process (each step below from "Modify Object Settings") to ensure all permissions have been granted.
Simplified Setup Process:
- Assign Permission Set to Guest User
- Assign License
- Define Endpoints
- Generate Tokens
- Required: Sharing Rules!
Manual Process to Setup all Webservice Permissions:
If you are on version 1.617 or higher and want to use the Permission Set please continue here:
Assign Permission Set to Public API Guest User
Note: If you haven't previously registered a public API site, click here to do that now.
Next, we need to update the access settings for our API site.
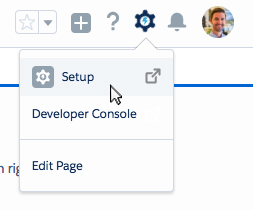
- Click the gear icon in the top right of the screen, then click Setup.
- Type 'sites' in the Quick Find menu, then click Sites.
- Scroll to the bottom of the page and click the name of your PB public API site.
For example, it might be called "Webservices" or something else.
- From the next page, click Public Access Settings.
- Click on the Assigned User button
- Click on the Site Guest User. Note: This user can be named differently in your org.
- On the user, scroll down to Permission Set Assignments and click on Edit Assignments
- Select Propertybase Webservices V2, move it to the right box Enabled Permission Sets and then click Save
This permission set ("Propertybase Webservices V2") contains all necessary Visualforce Pages, APEX Classes and Custom Managed Object Permissions necessary for using Webservices.
Note: if you have created custom fields (so, not "out-of-the-box fields") and want your Webservice to use such a field (read a field on a listing, write to a field on the contact), please review "Modify Object Settings" below to understand that you may need to give your "Guest Site User" access permission to read or even write to those fields. You can also decide to remove permission to sensitive fields (e.g. on the listing).
You are not quite done, please continue:
Assign Propertybase License
Next we will assign a Propertybase license to our new site user, as well as adjust time zone and currency.
- Click the gear icon in the top right of the screen, then click Setup if you are not already in Setup.
- Type 'sites' in the Quick Find menu, then click Sites.
- In the list of sites, click the name of your PB public API or Webservices site.
- Click Public Access Settings.
- Click the Assigned Users button.
- Click on the user Site Guest User, PB public API or Webservices.
- Scroll down to "Managed Packages" and click Assign Licenses.
- Check the box next to Propertybase V3.
Note: if you don't see an available license, you may have not requested the complimentary license or you already have used it on another endpoint or are using too many users. In all cases reach out to support for clarification if you can't figure it out yourself.
- Click Add.
Define Endpoint URLs
One of the final steps in configuring Webservices is to locate your site endpoint URL. The first half of this URL is the domain name of the new Webservice site we created and configured in this article. Follow the steps below to locate your endpoint URL as you will want to share this with your developer.
- Click the gear icon in the top right of the screen, then click Setup.
- Type 'sites' in the Quick Find menu, then click Sites.
- In the list of sites, click the name of your PB public API or Webservices site.
Under Custom URLs, in the Domain Name column, the first half of your endpoint URL will be the second domain listed. In our case this is 'pbexample.secure.force.com'.
The table below lists the second half of the endpoint URL that allow your web developer to connect to the corresponding service:
| Service Name | Endpoint URL |
| Weblistings | https://pbexample.secure.force.com/pba__WebserviceListingsQuery |
| Web To Prospect* | https://pbexample.secure.force.com/services/apexrest/pba/webtoprospect/v1/ |
By combining the custom domain we created in this article, with the data in the table above - we get our complete endpoint URLs for the Weblistings and Web-to-Prospect* services.
*Most clients will want to use newer Front Desk Webforms instead of Web-to-Prospect, but currently the option still exists.
Generate Tokens
Lastly we need to generate unique access tokens and save them as Propertybase Settings.
- Click here to open a free Hash Token Generator. You can use MD5, SHA-1 or SHA-256.
- Enter some text in the Hash Token Generator to generate a random token
- Keep the Hash Generator page open, so you can copy/paste the generated token to the Setting you will create next.
- Add Propertybase Settings for both the settings listed below.
Note: Click here to learn how to add settings to Propertybase.
| Setting Name & Key | Setting Value |
| webserviceListingsQuery_token | (the hash token that has been copied to your clipboard) |
| webserviceWebToProspect_token | (the hash token that has been copied to your clipboard) |
You will need to share the token with your web developer, so they can use it with the endpoint URL to access the endpoint.
There is one last step, then you are done:
Congratulations! You have successfully activated Webservices for your Propertybase account.
If you activated this for Front Desk Web-To-Prospect (but remember notes about this above), send an email to support@propertybase.com with your complete endpoint URL and your tokens, so we can connect your ORG for lead capturing.
At the bottom of this article are some of the features available once you have webservices activated.
-----------------------------------------------------------------------------------------------
Manual Process to Setup all Webservice Permissions:
Modify Object Settings
First we will make sure all objects have the correct permissions. Setting object permissions involves checking a lot of boxes. For the next section we will switch to Propertybase Classic and install the Salesforce Admin Check All extension for Google Chrome. Once you have installed the extension, continue with the steps below. If you can't or don't want to install the Addon, skip this and continue further below. You will simply have to tick each box manually then where instructed.
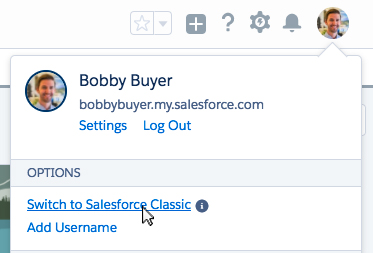
- Click on your portrait in the top right corner of the screen and then click Switch to Salesforce Classic.
- Next click Setup in the top right corner of the screen.

- Type 'sites' in the Quick Find menu and under Develop, click Sites.
- In the list of sites, click the name of your PB public API or Webservices site.
- Click Public Access Settings.
- Under Apps, click Object Settings.
- In the list of Object Settings, click Accounts.
- Click Edit.
- Copy the settings below for Record Types, Page Layout Assignments and Object Permissions.
- Under Field Permissions, make sure all fields have Read Access. (You can leave Edit Access at their default values.)
Note: This step is where we use the "check all" box and take advantage of our Chrome extension.
- Click Save.
- Using the arrow next to Accounts, switch to the Contact Object.
- Click Edit.
- Copy the settings below for Record Types, Page Layout Assignments and Object Permissions.
- Under Field Permissions, make sure all fields have Read and Edit Access.
- Click Save.
Note: For the remaining objects in this section, we will leave the Record Types and Page Layout Assignments at their defaults. We will only be updating Object Permissions and Field Permissions.
- Using the arrow next to Contacts, switch to the Inquiry aka Enquiry aka Request Object.
- Click Edit.
- Copy the settings below for Object Permissions.
- Under Field Permissions, make sure all fields have Read and Edit Access.
- Click Save.
- Using the arrow next to Inquiries, switch to the Linked Listings Object.
- Click Edit.
- Copy the settings below for Object Permissions.
- Under Field Permissions, make sure all fields have Read and Edit Access.
- Click Save.
- Using the arrow next to Linked Listings, switch to the Listings Object.
- Click Edit.
- Copy the settings below for Object Permissions.
- Under Field Permissions, make sure all fields have Read Access. (You can leave Edit Access at their default values.)
- Click Save.
- Using the arrow next to Listings, switch to the Properties Object.
- Click Edit.
- Copy the settings below for Object Permissions.
- Under Field Permissions, make sure all fields have Read Access. (You can leave Edit Access at their default values.)
- Click Save.
- Using the arrow next to Properties, switch to the Property Media Object.
- Click Edit.
- Copy the settings below for Object Permissions.
- Under Field Permissions, make sure all fields have Read Access. (You can leave Edit Access at their default values.)
- Click Save.
- Using the arrow next to Property Media, switch to the Settings Object.
- Click Edit.
- Copy the settings below for Object Permissions.
- Under Field Permissions, make sure all fields have Read Access. (You can leave Edit Access at their default values.)
- Click Save.
- Using the arrow next to Settings, switch to the SObject Work Queue Object.
- Click Edit.
- Copy the settings below for Object Permissions.
- Click Save.
- Using the arrow next to SObject Work Queue, switch to the SystemLogs Object.
- Click Edit.
- Copy the settings below for Object Permissions.
- Click Save.
- Using the arrow next to SystemLogs, switch to the SystemStructs Object.
- Click Edit.
- Copy the settings below for Object Permissions.
- Click Save.
Next we have to switch to Visualforce Page Access.
- Use the drop-down "Object Settings" and click Visualforce Page Access.
- After the page loads, click Edit next to Visualforce Page Access.
- Using the right arrow button (Add), move those selected below to the Enabled column.
Additionally:
Consider adding all pba.ClickToClaim pages if you plan to use the Lead Routing feature
Consider adding pba.Unsubscribe if you plan on using Email Campaigns or Automated Emails
- Click Save.
Next we need to repeat that same process for the Apex Classes.
- Click the arrow next to Visualforce Page Access, then click Apex Class Access.
- Next to Apex Class Access, click Edit.
- Using the right arrow button (Add), move those selected below to the Enabled column.
Additionally:
Consider adding pba.PublicRouteDispatcher if you plan to use the Lead Routing feature
Consider adding pba.UnsubscribePublicRouter if you plan on using Email Campaigns or Automated Emails
- Click Save.
Now, let's switch back to Lightning Experience.
- You may see a quick link Switch to Lightning Experience at the top or click on your name in the top menu and select Switch to Lightning Experience.
Please continue:
Assign Propertybase License
Next we will assign a Propertybase license to our new site user, as well as adjust time zone and currency.
- Click the gear icon in the top right of the screen, then click Setup if you are not already in Setup.
- Type 'sites' in the Quick Find menu, then click Sites.
- In the list of sites, click the name of your PB public API or Webservices site.
- Click Public Access Settings.
- Click the Assigned Users button.
- Click on the user Site Guest User, PB public API or Webservices.
- Scroll down to "Managed Packages" and click Assign Licenses.
- Check the box next to Propertybase V3.
Note: if you don't see an available license, you may have not requested the complimentary license or you already have used it on another endpoint or are using too many users. In all cases reach out to support for clarification if you can't figure it out yourself.
- Click Add.
Define Endpoint URLs
One of the final steps in configuring Webservices is to locate your site endpoint URL. The first half of this URL is the domain name of the new Webservice site we created and configured in this article. Follow the steps below to locate your endpoint URL as you will want to share this with your developer.
- Click the gear icon in the top right of the screen, then click Setup.
- Type 'sites' in the Quick Find menu, then click Sites.
- In the list of sites, click the name of your PB public API or Webservices site.
Under Custom URLs, in the Domain Name column, the first half of your endpoint URL will be the second domain listed. In our case this is 'pbexample.secure.force.com'.
The table below lists the second half of the endpoint URL that allow your web developer to connect to the corresponding service:
| Service Name | Endpoint URL |
| Weblistings | https://pbexample.secure.force.com/pba__WebserviceListingsQuery |
| Web To Prospect* | https://pbexample.secure.force.com/services/apexrest/pba/webtoprospect/v1/ |
By combining the custom domain we created in this article, with the data in the table above - we get our complete endpoint URLs for the Weblistings and Web-to-Prospect* services.
*Most clients will want to use newer Front Desk Webforms instead of Web-to-Prospect, but currently the option still exists.
Generate Tokens
Lastly we need to generate unique access tokens and save them as Propertybase Settings.
- Click here to open a free Hash Token Generator. You can use MD5, SHA-1 or SHA-256.
- Enter some text in the Hash Token Generator to generate a random token
- Keep the Hash Generator page open, so you can copy/paste the generated token to the Setting you will create next.
- Add Propertybase Settings for both the settings listed below.
Note: Click here to learn how to add settings to Propertybase.
| Setting Name & Key | Setting Value |
| webserviceListingsQuery_token | (the hash token that has been copied to your clipboard) |
| webserviceWebToProspect_token | (the hash token that has been copied to your clipboard) |
You will need to share the token with your web developer, so they can use it with the endpoint URL to access the endpoint.
There is one last step, then you are done:
Please Note! Recent updates to Propertybase and Salesforce may need to be taken into account. Please review this article regarding Winter '21 Sharing Rules and follow the steps indicated there.
Congratulations! You have successfully activated Webservices for your Propertybase account.
If you activated this for Front Desk Web-To-Prospect (but remember notes about this above), send an email to support@propertybase.com with your complete endpoint URL and your tokens, so we can connect your ORG for lead capturing.
At the bottom of this article are some of the features available once you have webservices activated.
Available Webservice Features
- Check your Webservice configuration by "connecting" to our demo website
- Show Listings on your Website
- Capture your Website Contact forms in Propertybase
- Capture your Contacts from your favorite real estate portals
- Capture your Facebook Leads
FAQs
How do I connect to the endpoint URLs in a sandbox environment?
Endpoint URLs for sandbox accounts should look like this: https://mysandbox-mycompany.my.salesforce-sites.com (Replace 'mycompany' with the custom Force.com domain name you created in this article.)
Comments
0 comments
Please sign in to leave a comment.