

Updating Permission Sets and Sharing Rules for Guest Users Follow

Summary
In order to ensure certain Propertybase services continue to work for your org, you will need to assign a new permission set to your guest user and create sharing rules for the Guest User to access other objects, like listings, within your org.
Context
With the Winter ‘21 release of Salesforce, Salesforce will be making changes to their Guest User security policies, including removing some permissions that Guest Users are allowed to have, as well as enabling the settings “Secure guest user record access”, “Assign new records created by guest users to the default owner”, “Assign new records created by the Salesforce Sites guest users to a default owner in the org”. These permissions cannot be re-granted to Guest Users and these settings cannot be disabled after the Winter '21 release.
For full details on the changes that Salesforce is making see this Salesforce help center article.
These changes will affect the following services unless you make changes to your Propertybase Salesforce org:
-
- Weblistings
- Web2prospect
- ClickToClaim lead routing
Step by Step - Video
Step by Step - Instructions
Step 1 of 3: Update Propertybase to the latest version
First, check that your Propertybase org is the newest available version at http://update.propertybase.com/ . The newest version of Propertybase includes a new permission set that is needed for this guide. If you do not update, you will have to create the permission set necessary for these changes manually.
Note: If you are unable to update to the latest version, follow these instructions below in 1.a to manually create the permission set needed.
Step 2 of 3: Create Sharing Settings for All Objects with “View All” Permissions
We need to create sharing settings to allow our Salesforce Site, usually called “Webservices”, to view records from each of these objects: Contacts, Inquiries, Linked Listings, Listings, Properties (this automatically includes PropertyMedia!), User, and Settings.
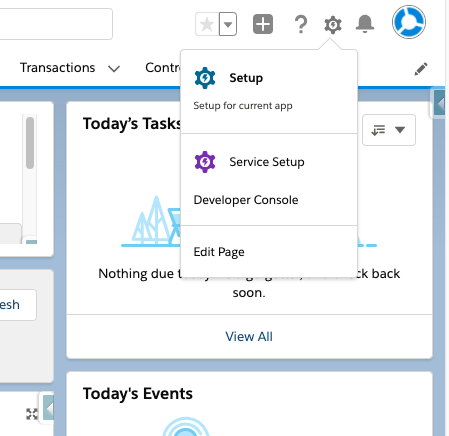
Using the “gear” icon in the top right, navigate to Salesforce “Setup”
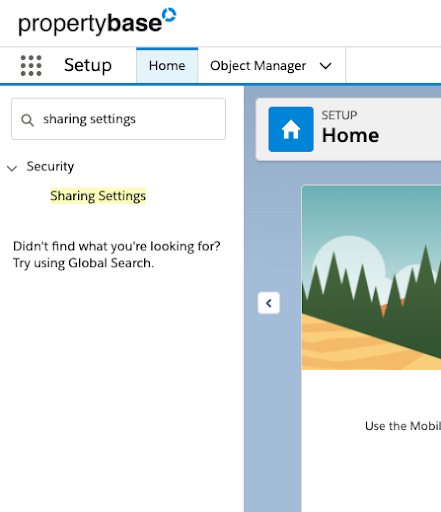
To do this, in the “Quick Find” box, search for “Sharing” and select “Sharing Settings” under “Security”.
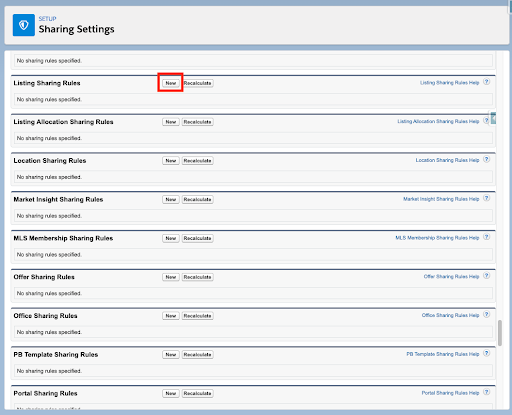
On the “Sharing Settings” page, scroll down to each of the above objects, and click “New” to create a new sharing setting for that object. We’ll use the “Listing” object for this example.
On the new sharing rule page:
- In step 1, for “Label”, enter “Allow Webservices Access”, and leave the “Rule Name” as the auto-generated value.
- In step 2, for the “Rule Type”, select “Guest user access, based on criteria”.
- In step 3, for “Field”, select “Owner ID”, For “Operator”, select “not equal to”, and for “Value” type 1234567890.
- In step 4, ensure “Webservices Site Guest User” is selected.
- In step 5, ensure “Read only” is selected.
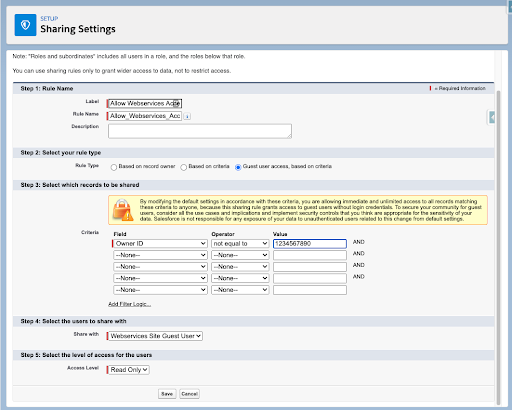
After filling in steps 1-5, click “Save”.
Important! Repeat the creation of sharing rules for each of the “Listings”, “Property”, "User", and “Setting” objects. “Linked Listings” and “Property Media” will inherit their sharing settings from their parent objects, ”Listings” "Property", and “User”, respectively.
Step 3 of 3: Assign the Guest User a New Permission Set
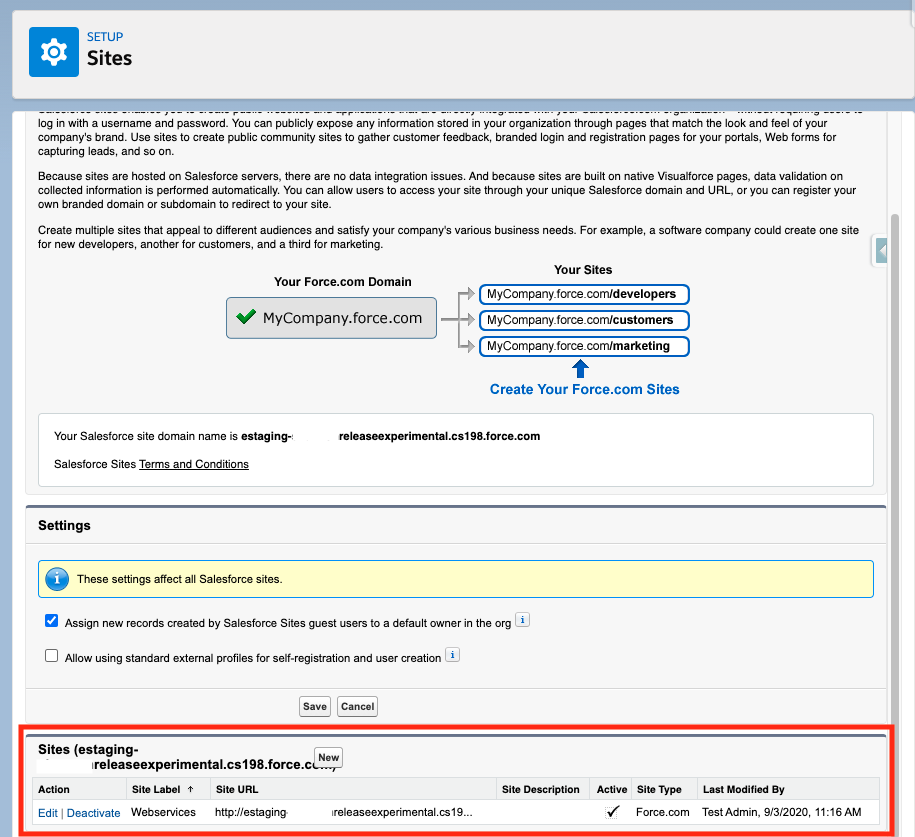
In the “Quick Find” box, search for “Sites” and select “Sites”.
Scroll down to the bottom of the page, and click on your site name, often called “Webservices”, next to your site domain in the “Sites” section.
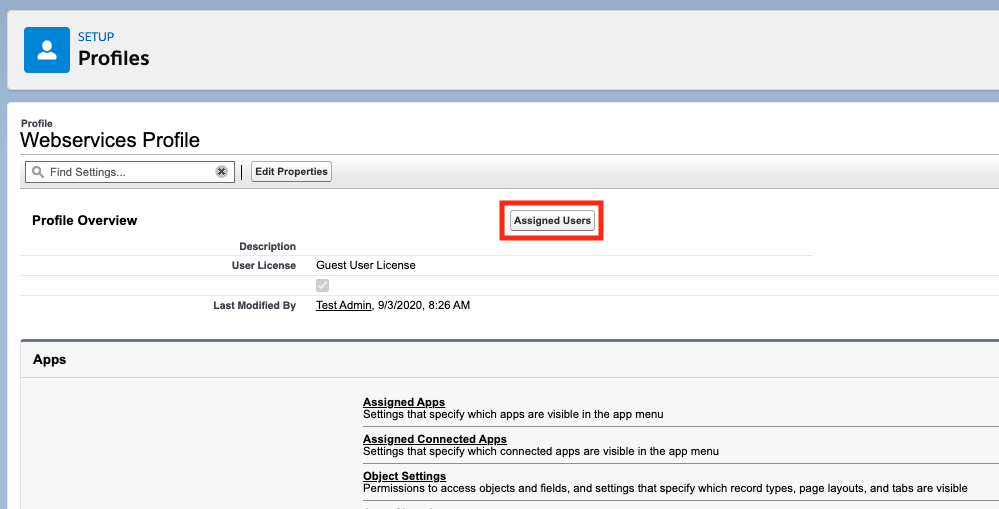
On the “Webservices” site page, click “Public Access Settings”.

On the “Webservices Profile” page, click “Assigned Users”. On the next page, click “Site Guest User, Webservices”.

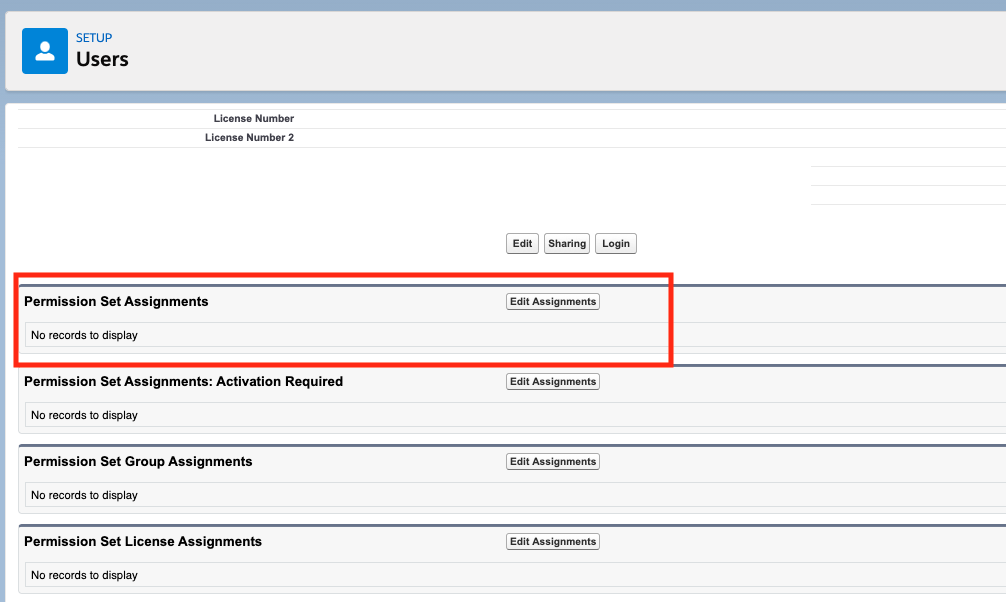
Scroll down to the “Permission Set Assignments” section of the “Webservices Site Guest User” profile, and click “Edit Assignments”.
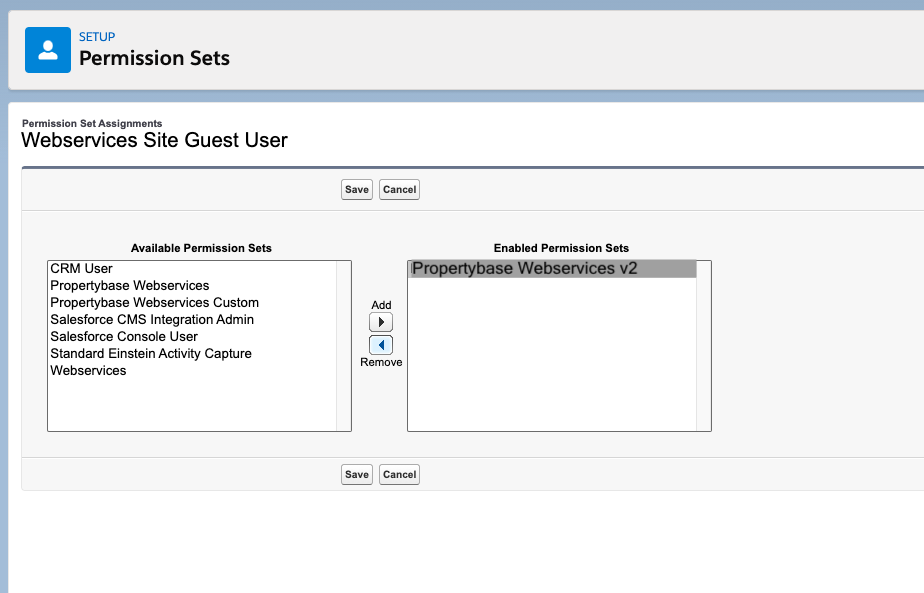
From the “Available Permission Sets” on the left, select the permission set included in the newest Propertybase update, “Propertybase Webservices v2”, and click the “Add” button in the middle to add it to the “Enabled Permission Sets” box on the right. Then remove the old “Propertybase Webservices” permission set by selecting it and clicking “Remove”. Save these changes.
After these steps are completed, the Guest User has the proper permission set and Sharing Settings to access the necessary objects!
Appendix:
Step 1.a of 3: Cloning and Modifying the Propertybase Webservices Permission Set
This step is only necessary if you cannot update to the latest version of Propertybase, which contains the necessary permission set.
Salesforce will remove a permission set from the Guest User if it contains permissions they have disabled with the Winter '21 release. For more details on this, see this Salesforce Help Center article.
To ensure the permission set is compliant with Salesforce's requirements, we need to remove all "Edit" "Delete", "Modify All Data", "View All Data" permissions from the permission set. To do so, we need to clone the permission set, and then we can remove the permissions from the set.
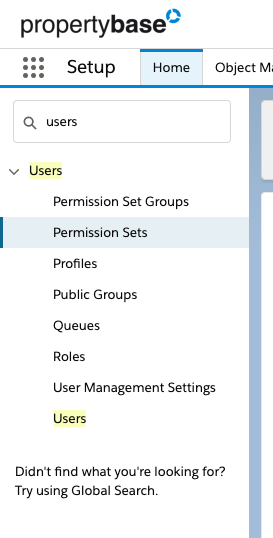
In the “Quick Find” search box, search for “Permission Sets”. Select the “Permission Sets” option under the “Users” section.
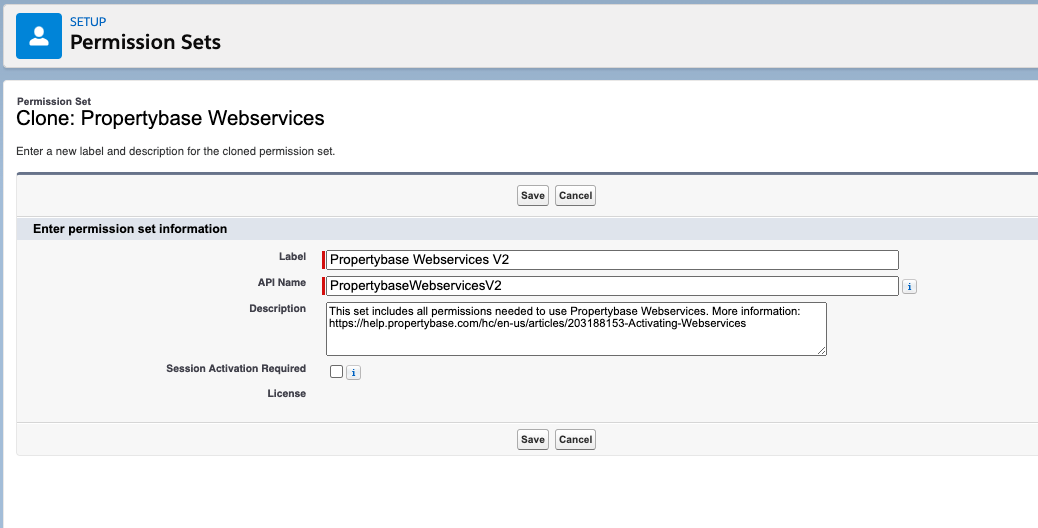
Under the “Permission Sets” setup, click “Clone” on the “Propertybase Webservices” permission set.
For the “Label”, enter in a name for the permission set. We recommend “Propertybase Webservices V2”.
For the API name, enter in the same name you used for the label, without spaces. We recommend “PropertybaseWebservicesV2”.

Save the permission set. After the save, we’ll be taken back to the list of permission sets.
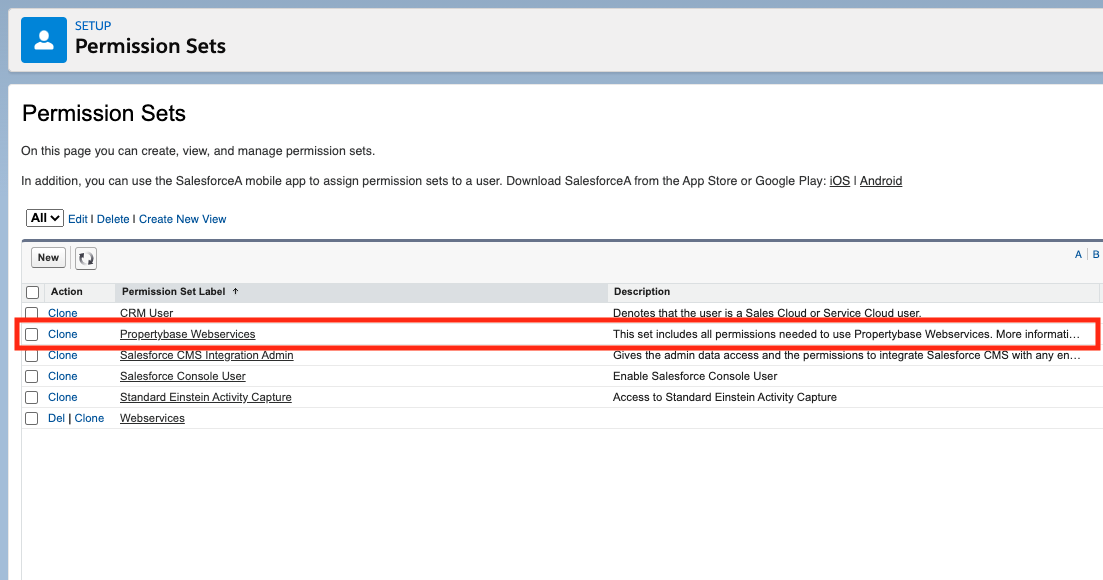
Click on the permission set we just created called “Propertybase Webservices v2”.
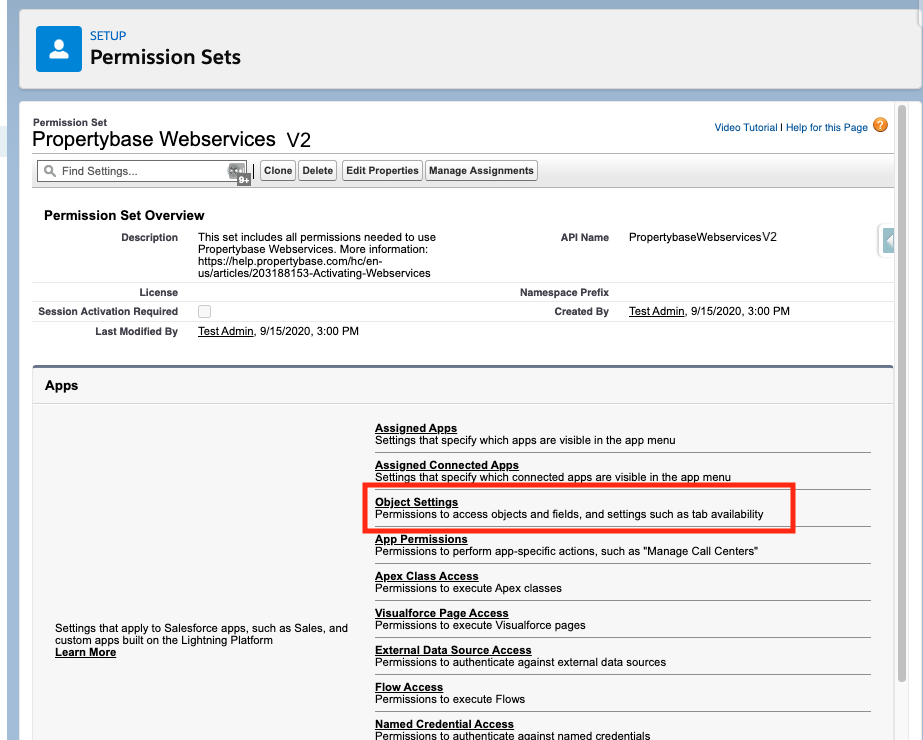
Under the “Apps” section on the permission set’s page, go to “Object Settings”.
All objects that contain the above permissions will need to be modified. These include:
- Contacts
- Inquiries (Request)
- Linked Listings (Favorites)
- Listings
- Properties
- Property Media
- Settings
We recommend that you open each of these objects in a new tab, to make it faster and easier to edit them, by right clicking on them and selecting “Open in New Tab”.
Once you have opened the object, click “Edit”. Uncheck the “View all” and "Edit" check boxes under “Object Permissions”. Then click save.
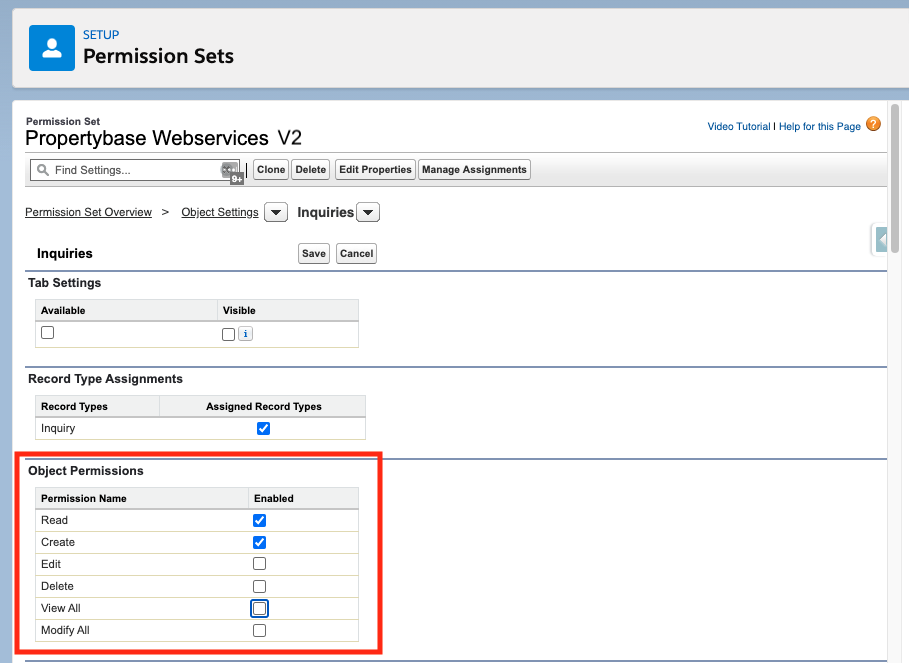
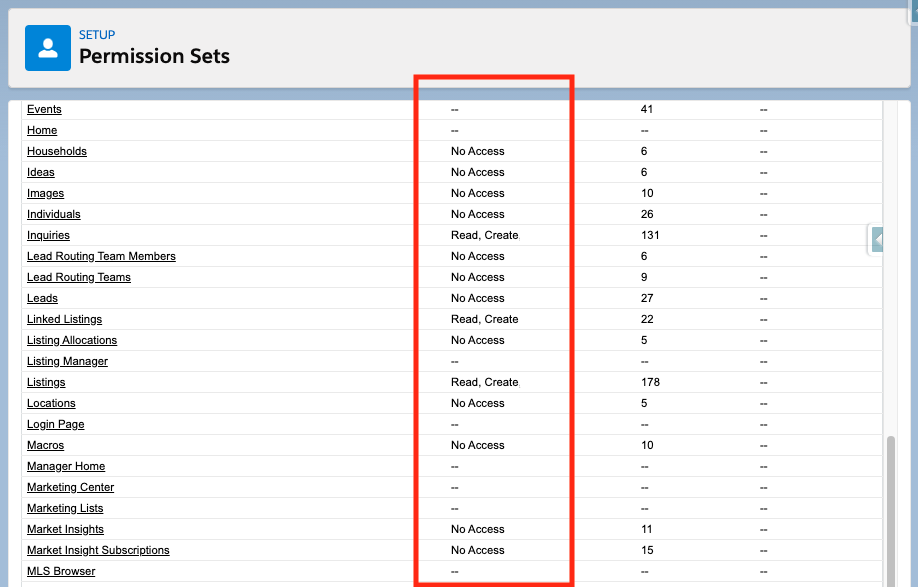
Once you have removed the “View All” and "Edit" permissions for each of these objects, verify that they no longer have these permissions on the “Permission Sets > Object Settings” overview page.
After verifying the you have properly cloned the permission set and removed all "Edit" "Delete", "Modify All Data", "View All Data" permissions, follow the instructions above to assign the permission set to the Guest User
Comments
0 comments
Article is closed for comments.