Register & Configure Public API Site Follow
In order for some Propertybase features to work correctly, a public API website must be created in your account. This provides a secure way for features like webservices, email unsubscribe and lead routing to access your account, externally, without a username and password. Follow the steps below to configure a public API site for your account.
Note: Throughout Propertybase documentation we use the terms "Public API" and "Webservices" interchangeably.
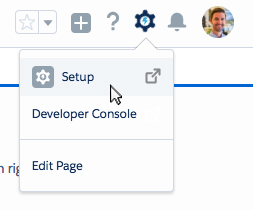
- Click the gear icon in the top right of the screen, then click Setup.
- Type 'sites' in the Quick Find menu, then click Sites.
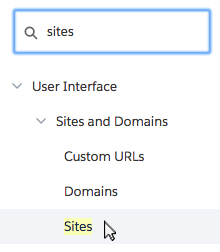
On this page we will register a Force.com domain for your organization. This domain will be used for other features in Propertybase, if configured. For this reason it's important to choose a name that is relevant to your organization. We recommending using the name of your company or brokerage. If that isn't available, keep it as close to your organization's name as possible.
Note: In this article we will register and use the domain 'pbexample'. Whenever you see this, use the domain name you registered instead.
- Choose a domain name and then click Register My Force.com Domain.

- When prompted click Ok.
- Click New next to Sites.

- For site type, select Guest User License.
- Click Continue.
Note: If you don't have the option to select site type, simply continue with the next step below.
- Duplicate the highlighted information from the image below. (All other options not shown below can be left at their default values.)
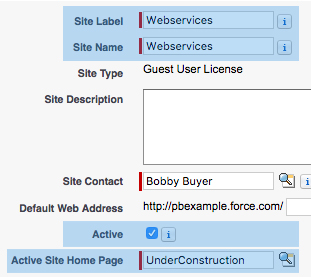
Note: Make sure you check the box next to 'Active' as shown in the image above.
- Click Save.
- Next click Public Access Settings.

- Under Apps, click Apex Class Access.
- Next to Apex Class Access, click Edit.
- Using the Add button, move pba.PublicRouteDispatcher to the Enabled column.
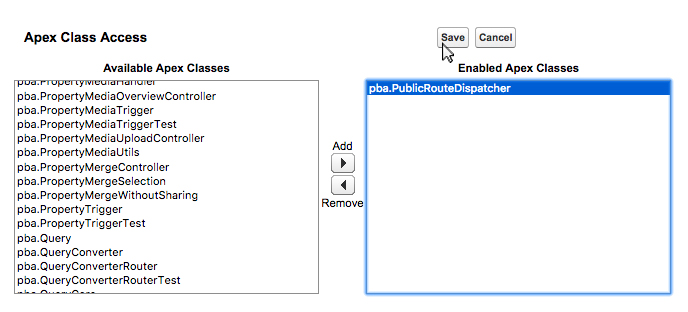
- Click Save.
- Click Profile Overview to return to the main screen.

- Next click Assigned Users.

- Click Site Guest User, Propertybase Public API.

Note: Your site may have a different name than "Propertybase Public API".
- Scroll to the bottom of the page and click Assign Licenses.
- Toggle the checkbox next to Propertybase V3.
- Click Add.
Now we need to return to the sites page we started on.
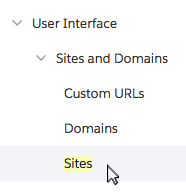
- In the setup menu, select Sites. (You can find this under User Interface > Sites and Domains.)
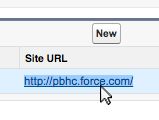
- Right-click the site URL and copy it to your clipboard.
- Click the app launcher in the top left of the page.

- Select Settings.
- Click New in the top right corner of the screen.
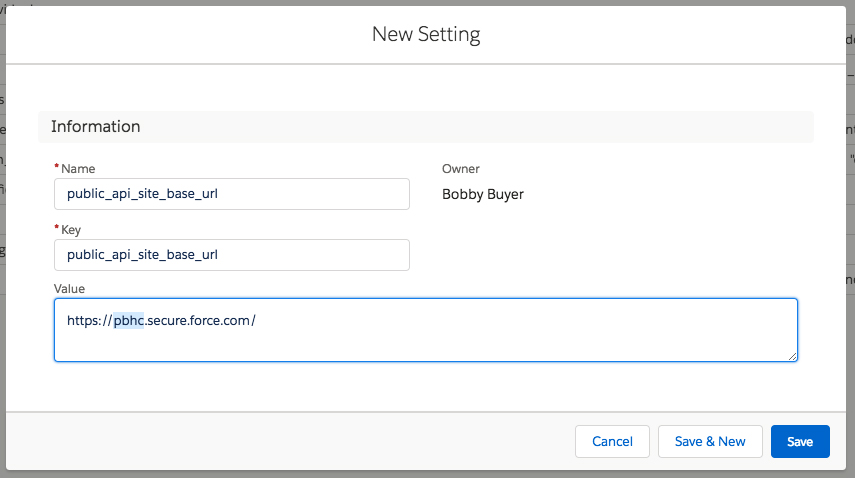
- Using the screenshot below, create a new setting.
- Name and Key enter "public_api_site_base_url"
Note: For "Value" use the domain you just copied to your clipboard, but remember to append ".secure". See the image below for an example. "HTTPS" is required.
- Click Save.
Done! You have successfully configured a public API site for your Propertybase account.
Note: Many of the features that require this public API or "webservices" will have additional configuration steps. Pay close attention to all documentation and configuration for those features (email unsubscribe, lead routing, etc.)


Comments
0 comments
Article is closed for comments.