Tracking Outside Email Activity Follow
While we encourage customers to use Propertybase Quicksend for their email needs, we understand that sending email correspondence outside of Propertybase is still necessary. To account for this, Propertybase provides a feature that allows you to track email activity within Propertybase even if the email was sent using a third-party application.
Note: For a complete feature overview, please review all tabs on this page.
Setup
To activate this feature, follow the steps below.
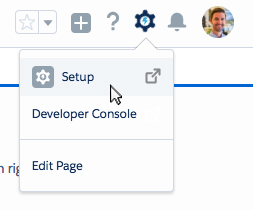
- Click the gear icon in the top right of the screen, then click Setup.
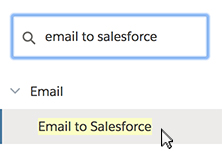
- In the setup menu, select Email to Salesforce.
- Click Edit.
- Select "Active" and then click Save.

- Next click Send Email Notification. This will notify your agents and prompt them to set up this feature.

You should receive an email shortly prompting you to set up this feature for yourself.
- Click the setup link in your email.

- On the next page, double check the list of "My Acceptable Email Addresses". You can add multple email addresses by seperating them with a comma.
Note: Only email addresses listed here will be able to use this feature.

On the same page you will see "Your Email to Salesforce address" - save this for your records. Use this address in the BCC (or any other field) on any email coorispondance that you would like to track in Propertybase. When used,
Note: Save the email address as a contact in your email client, with the name of "Email to Propertybase" (or something similar), to save time and your memory!

Testing
After using this feature for the first time, there are two ways to test if it is working correctly.
Confirmation Email
If this feature was setup correctly, you should receive a confirmation email shortly after sending the first email. (See example below.)

Check Activity History
Another way to make sure this feature is working correctly, is to simply use the feature!
After sending an email to a Contact, you should see a copy of the email under "Past Activity" on that Contact record. (See example below.)

Emails to Non-Contacts
Occasionally you will send correspondence to an email that is not associated with a Contact record. Propertybase will keep track of these emails for you. You should periodically check for these and assign to a Contact record. Use the steps below will show you how to do so.
- Click your user image at the top of the screen, then click Settings.

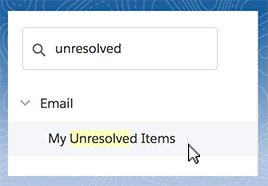
- Next click My Unresolved Items in the settings navigation menu.
On this screen you will be able to see all emails sent to non-contacts, as well as assign them to a Contact record.

You can look up Contact records by clicking the "magnifying glass" icon.

If the contact is not already in Propertybase, click New to create a new Contact record.

Settings
You can access individual user settings for this feature, at anytime, by following the steps below.
- Click your user image at the top of the screen, then click Settings.

- In the menu (left side of screen), click My Email to Salesforce.
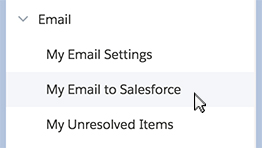
That's it! This is your personal settings screen.
On this page you can modify email associations, modify a list of acceptable email addresses and locate your personal "Email to Salesforce Address".
What is My Email to Salesforce?
My Email to Salesforce is a feature that allows you to paste a unique email address into the bcc field when communicating with your leads or customers. This automatically associates the email record with the related contact record to preserve all of your communication with your customers.
Activating Email to Salesforce
Email to Salesforce is a great feature that allows you to sync emails you send from third party email services (e.g. Outlook or Google Mail) to contact records in Propertybase.
This feature must be first activated for use. To activate navigate to: Setup/ Administration Setup/ Email Administration/ Email to Salesforce
Once in the page simply mark the Activate check box.
The next step is to add your acceptable email addresses that SF should recognize to sync to Propertybase and get your Email to Salesforce address to add to your emails sent from your third party account.
Navigate to: Setup/ Personal Setup/ Email/ My Email to Salesforce
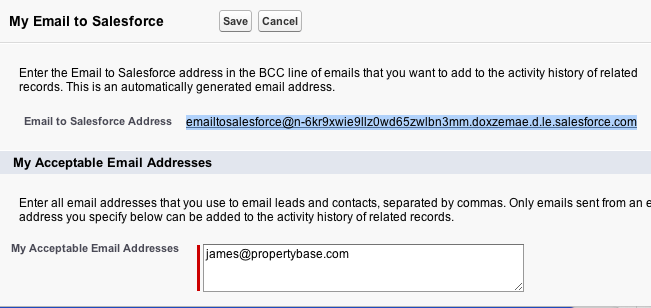
Add all email address (for your particular login credentials) that will be used to email contacts and sync to the system. You will also see your new Email to Salesforce address, which will look something like this:
emailtosalesforce@nkr9xwie9llz0wd65zwlbn3mm.doxzemae.d.le.salesforc...
Add this to the BCC section of the email you write and it will be synced with the contact record.
Once you send your email to your contact, you will receive a follow up email confirming the sync. If Propertybase does not associate the email to a particular account, it will be put into your Unresolved Issues section found on your Home Page. Then you will be able to create the new contact or associate it manually.


Comments
0 comments
Article is closed for comments.