Getting Started Series: Managing Listings Follow
Propertybase gives you the power to create your own Listings or automatically import data from popular listing services. Every Listing automatically creates a corresponding Property record and data is synchronized between the two. This allows you to manage your inventory more efficiently and focus your energy on closing more deals.
Within Propertybase there are two objects related to your real estate inventory: Properties and Listings. While they share similar attributes, they are separate objects because they each contain unique fields related to physical and sale attributes respectively.
Property records contain information related to the physical and geographical attributes of a home, apartment, land, etc. For example: address, number of bedrooms, size, etc. Additionally, Properties can also contain Units (e.g. a single apartment.)
Listing records include all the information of a Property record, plus additional information required to sell or rent. For example: price, marketing description, move-in date, seller, etc.
Listings Overview
When you create a new Listing record a corresponding Property record is automatically created. Fields related to selling or renting (not found on the Property object) are also available to Listing records. (E.g. price, marketing description, move-in date, seller, etc.) When a field is updated on a Listing record, the corresponding Property record is automatically updated.
Note: You can block specific fields from synchronizing between the two objects if needed.
Accessing Listings
Listings can be viewed by clicking the Listings tab.

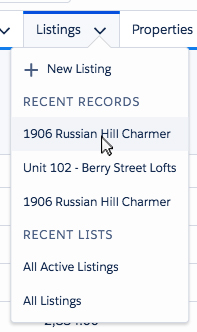
You can also access individual Listing records directly by clicking the drop down arrow.

Creating a Listing
To create a new Listing, the steps are very much simliar to creating any other new record. You can use the 'New Listing' link via the Listing tab or the 'New' button on the Listing list view page. See below.

|

|
Listing Creation Wizard
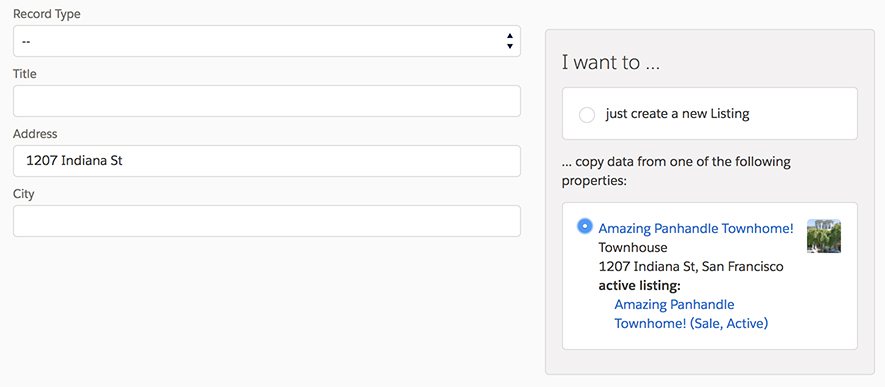
When you create a new Listing, the Listing Creation Wizard gives you the opportunity to copy existing data from a previous Listing record. Take advantage of this to save yourself valuable time!
Click here to learn how to modify the fields that appear on the Listing Creation Wizard.
Simply fill out one or more of the available fields (title, address or city) and Propertybase will automatically check for previous Listings that match those fields. As you can see in the example below, we entered the Property address and Propertybase automatically detected a previous Listing. Now we have the opportunity to copy over the data from that Listing.

Primary Features
Actions
When you open a Listing record in Propertybase you will see actions at the top of the page. Here you can perform a variety of actions based on the record selected.

Details
Immediately below actions you will see Listing details. This section displays the most relevant data for a Listing so that you can reference the information quickly and regularly.

Listing Path
Below Listing details is the Listing path. This is a visual representation of the current record's Listing status. You can update this by clicking any stage and selecting “mark status as complete”.

Details Tab
Underneath Listing details is a series of tabs. The first tab, Details, displays additional information for the current record. This includes everything from title and property type, to description, as well as other information like address, latitude and longitude.
Related Tab
Under the Related tab, you will find a list of objects containing records that relate to the current Listing record. The Related tab is one of the most powerful features of Propertybase. Here you can cross-reference data and view relationships between separate objects.
For example: if you have previously shown the current Listing (and created a Linked Listing record) you will see that listed here along with the latest client feedback.
Images and Media Tab
Under the Images and Media tab, you will find the Media Manager. Here you can manage all images and links related to a Listing. Click here to learn more about the Media Manager.
Matching
The Matching tab shows a list of Inquiries that match the current Listing. You can search and filter these results as well as send this Listing to any matching Inquiries directly from this screen.
The Email tab, also known as Quicksend, is your one-stop shop for sending email within Propertybase. From here you can draft an email that automatically attaches the current Listing along with various formatting options via templates and layouts. Click here for more information on Quicksend.
Properties Overview
A Property record contains information related to the physical and geographical attributes of a home, apartment, land, etc. For example: address, number of bedrooms, size, etc. Additionally, Properties can also contain Units (e.g. a single apartment.)
Accessing Properties
Properties can be viewed by clicking the Properties tab.

You can also access individual Property records directly by clicking the drop down arrow.

Primary Features
Actions
When you open a Property record in Propertybase you will see actions at the top of the page. Here you can perform a variety of actions based on the record selected.

Details
Immediately below actions you will see Property details. This section displays the most relevant data for a Property so that you can reference the information quickly and regularly.

Details Tab
Underneath Property details is a series of tabs. The first tab, Details, displays additional information for the current record. This includes everything from title and property type, to description, as well as other information like address, latitude and longitude.
Related Tab
Under the Related tab, you will find a list of objects containing records that relate to the current Property record. The Related tab is one of the most powerful features of Propertybase. Here you can cross-reference data and view relationships between separate objects.
For example, if the current Property has been listed previously, or is currently listed for sale, you will find that information here. Additionally, you can view Property history, action plans, notes and files here.
Images and Media Tab
Under the Images and Media tab, you will find the Media Manager. Here you can manage all images and links related to a Property. Click here to learn more about the Media Manager.
Building Stack Tab
Under the Building Stack tab, you can manage multiple units within a single Property (e.g. townhomes or apartments.) To create a Property with multiple units, simple select "Building" for record type when creating a new Property. Next, create a new Property and select the corresponding building as the "Master Property."
Activity & Chatter
In addition to the primary features listed in this article, Properties and Listings have access to secondary features like activity and chatter. These are located on the right side of the screen.
Activity
Under the Activity tab, you can perform a variety of tasks associated with the current record. These tasks are then tracked and displayed under Past Activity.
Chatter
Chatter is a miniature social network within Propertybase, specifically for your organization. Chatter shows all activity within the organization with the option to like and comment on each post.
Shared Data
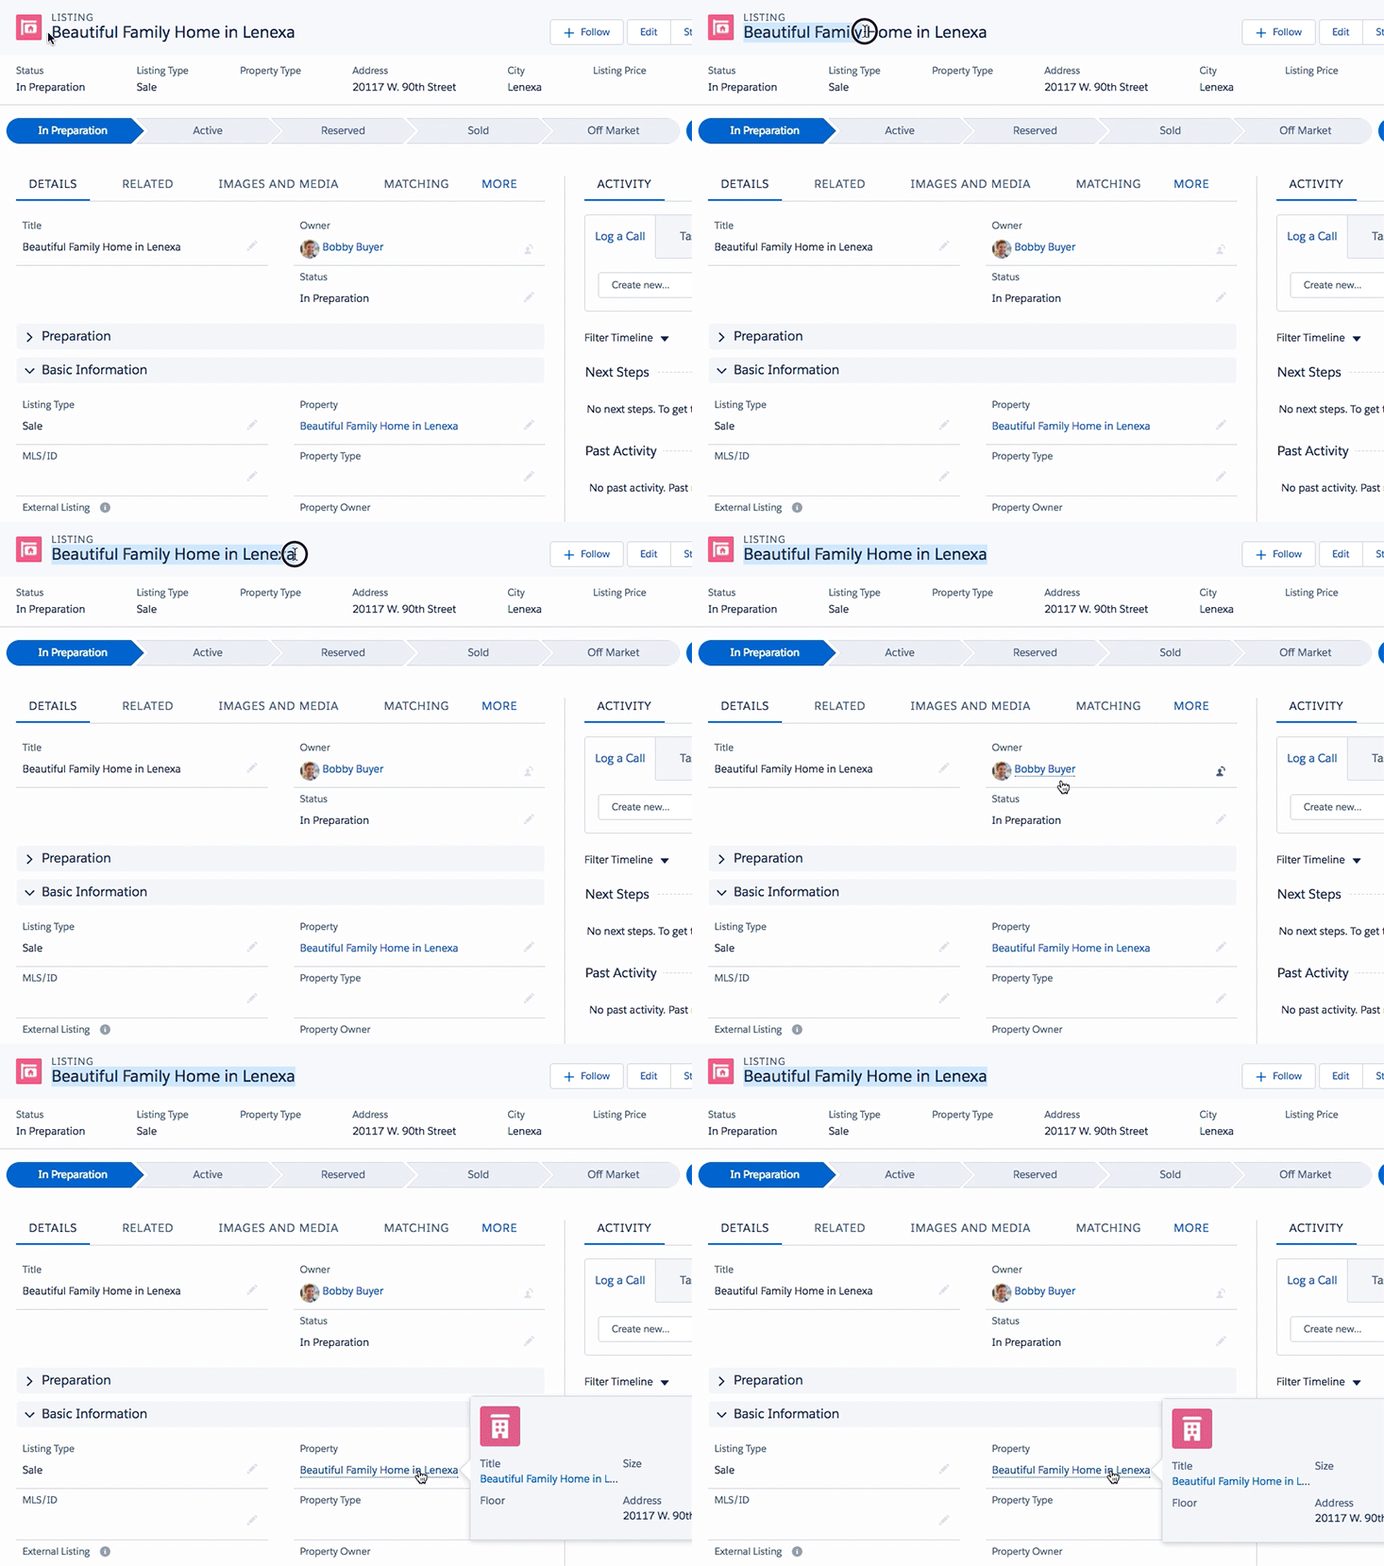
When you create a new Listing in Propertybase a corresponding Property record is automatically created. This relationship is recorded in the property field on the new Listing record, as seen in the image below.

Note: When you update a Listing field, that same field is updated on the Property record. This is because Listings are treated as the most up-to-date information. Updating a field on a Property record does not update related Listing records.
Adding Images & Media
Images and other media can be added through a listing or the property via the Media Manager. But please note: all files uploaded to Media Manager are related to the corresponding property. So if you change an image on it, it will change for all related listings. If you want to use different images/media on listings, you must use separate properties. Usually, this is done for units like apartments, studios and flats. Please read more about managing images here: Manage Image & Media
This is Part 8 of 12 in our Getting Started with Propertybase series. We recommend you continue to follow along, in order, as we walk through the entire Propertybase process, from lead to close.
Getting Started with Propertybase: Table of Contents
Next Up: Managing Offers (Coming Soon)
Now that you understand the basics of real estate inventory management in Propertybase - it's time to learn how to receive and manage offers on that inventory using Propertybase.


Comments
0 comments
Article is closed for comments.