How to Configure Portals Follow
Note: Propertybase now offers a new way to publish to external portals. Click here to learn more.
With thousands of real estate portals around the world, we are always working to build connections with as many as possible. Depending on your region - we may already have a connection established. If not, we leverage third party aggregators to connect with all other portals.
View our list of portals to see if we already support yours.
If you don't see your portal on our list, please contact our support staff. We would be happy to assist you with the installation. If you prefer to do your own integration, you can follow our step by step article regarding third party aggregators.
Setup with Field Package Installation
After installing the field package have your admin complete the following configurations:
1. Each field package comes with new record types that need to be setup. Configure the packaged record type for Listings, Properties and Requests to your profiles and define which record types shall be usable and/or default.
E.g. if you are a residential broker you have no need to make all the commercial record types available.
2. For the listing object we have a checkbox field: "System Allowed For Portals". You can create two workflow rules for updating this field, e.g. depending on the listing status.
Workflow 1:
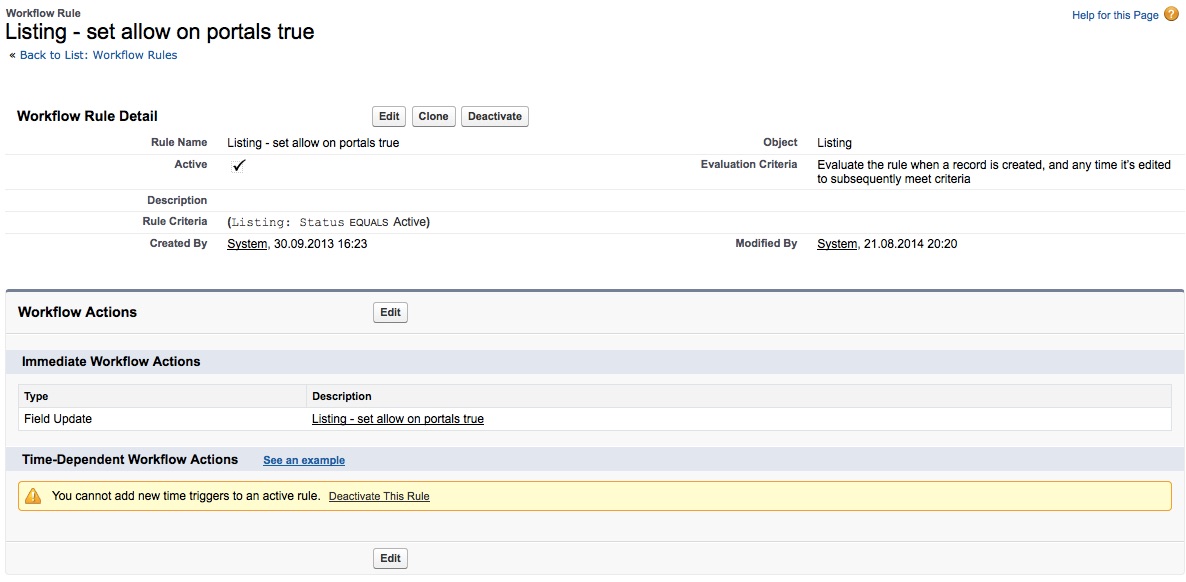
and then create the workflow Action: Field update
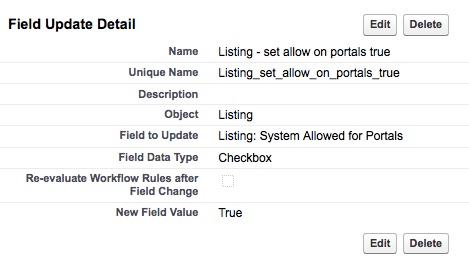
Workflow 2
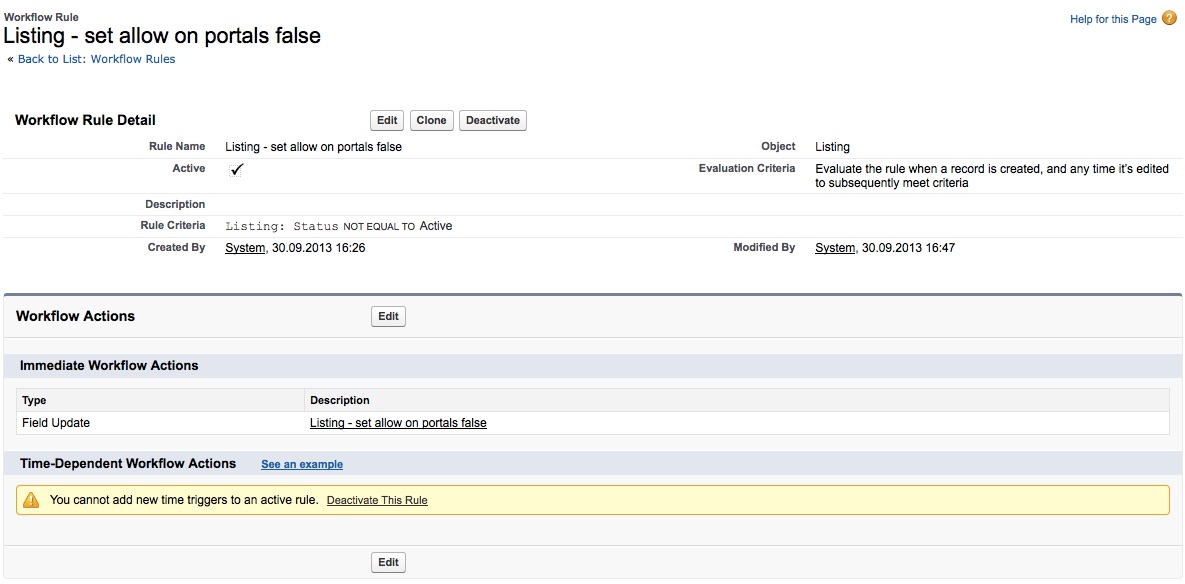
Again create the workflow actions with a field update.
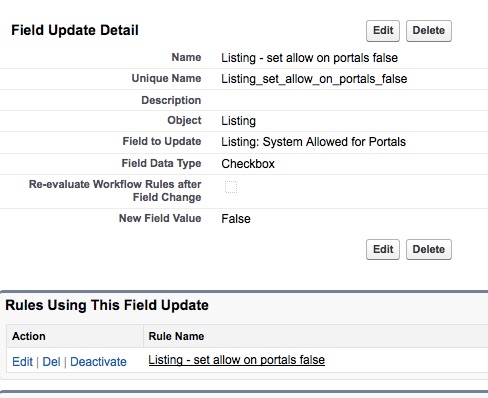
Please do not forget to "Activate" the workflows after creation!
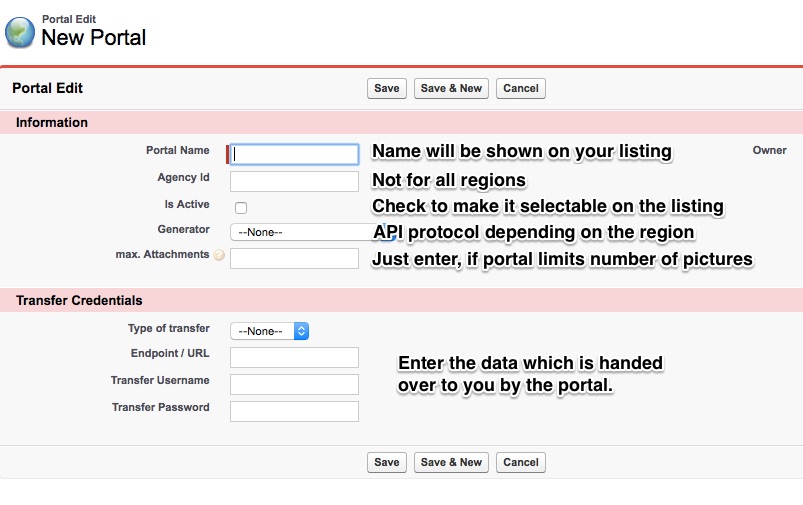
3. Enter the login credentials for your portals:
Open the tab "Portals". If it´s not shown: click the "+" in the application menu and click then on Portals. Create a new portal record and follow the instruction in the following screen shot.
4. Adjust your listing page layout:
a) Add a new section (e.G. Portals) and add the Visual Force Page "PortalSyndicationOverview"

b) Add the related list "Listed on these portals"

Ready to publish :-)
In the listing you can now add or remove listings to your portals:

You will see the active listings and the history per portal by clicking on the portal:
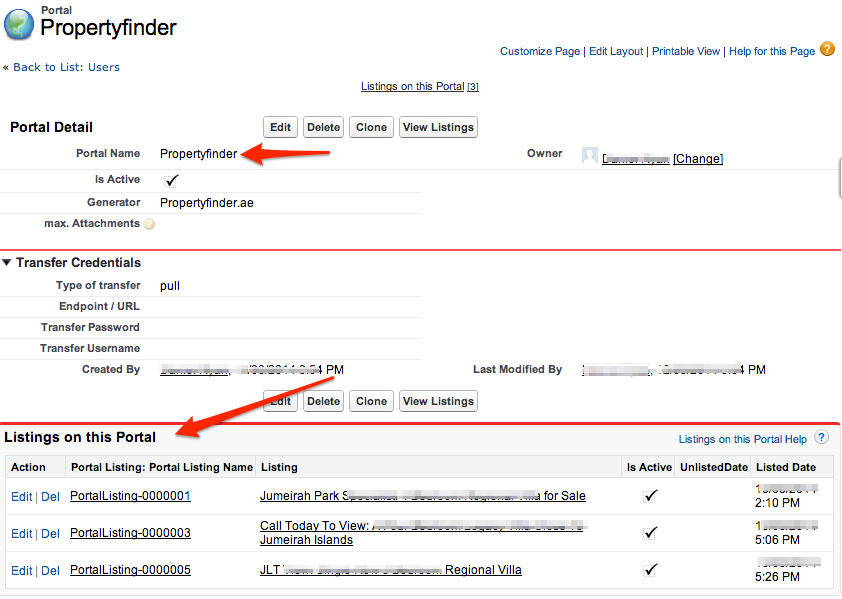
On every listing you can see to which portals it was published and when:

Process Builder Rule
1. Go to Setup > Process Builder and click "New"
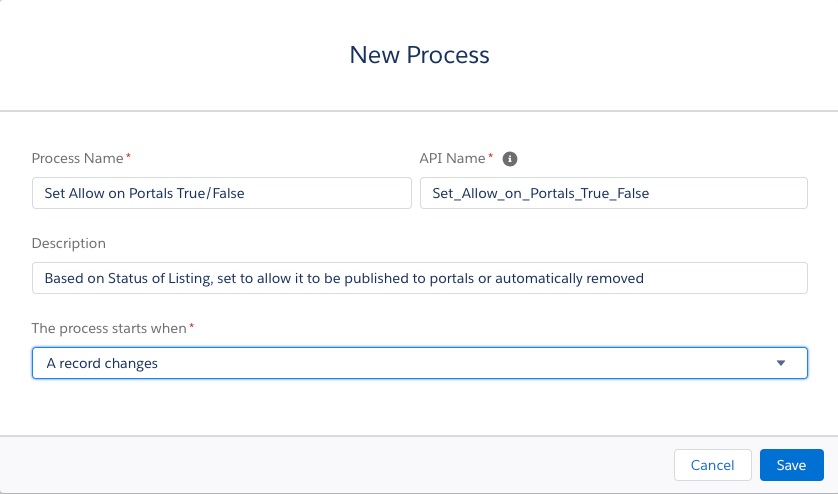
2. Name the new Process e.g. "Set Allow on Portals True/False", give it a description you understand and change to start the process when "A record changes" and click "Save":
3. Choose "Listing" as the Object and make sure it runs whenever the "record is created or edited". Click "Save" to get to the next point.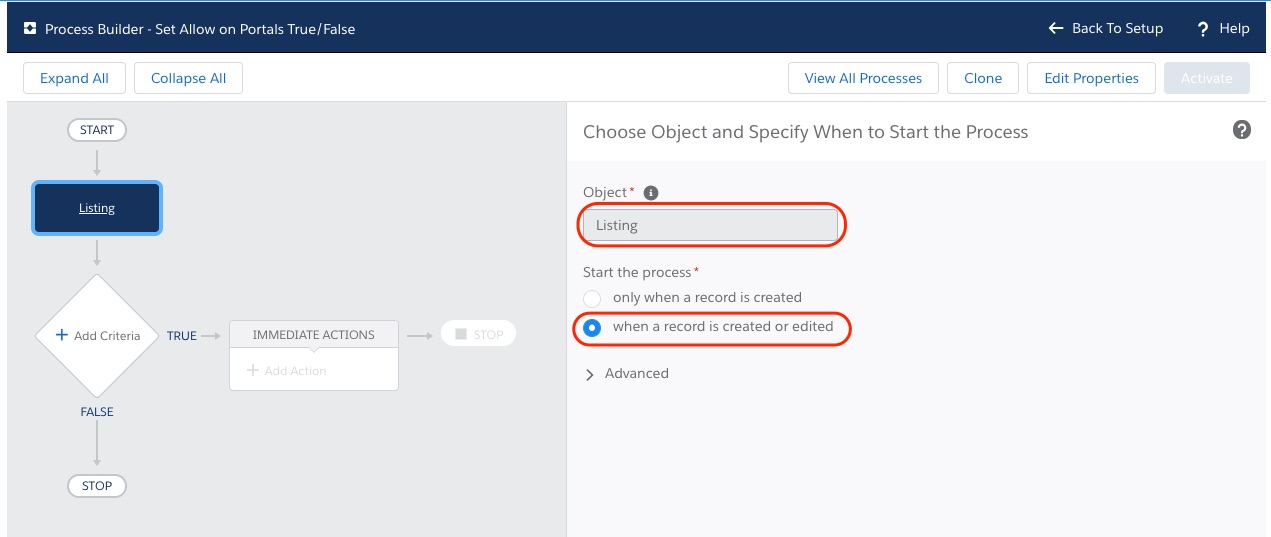
4. Click on "+ Add Criteria" and name it e.g. "Status = Active (for marketing)" and add the conditions to check for: If the field "Status" equals "Active".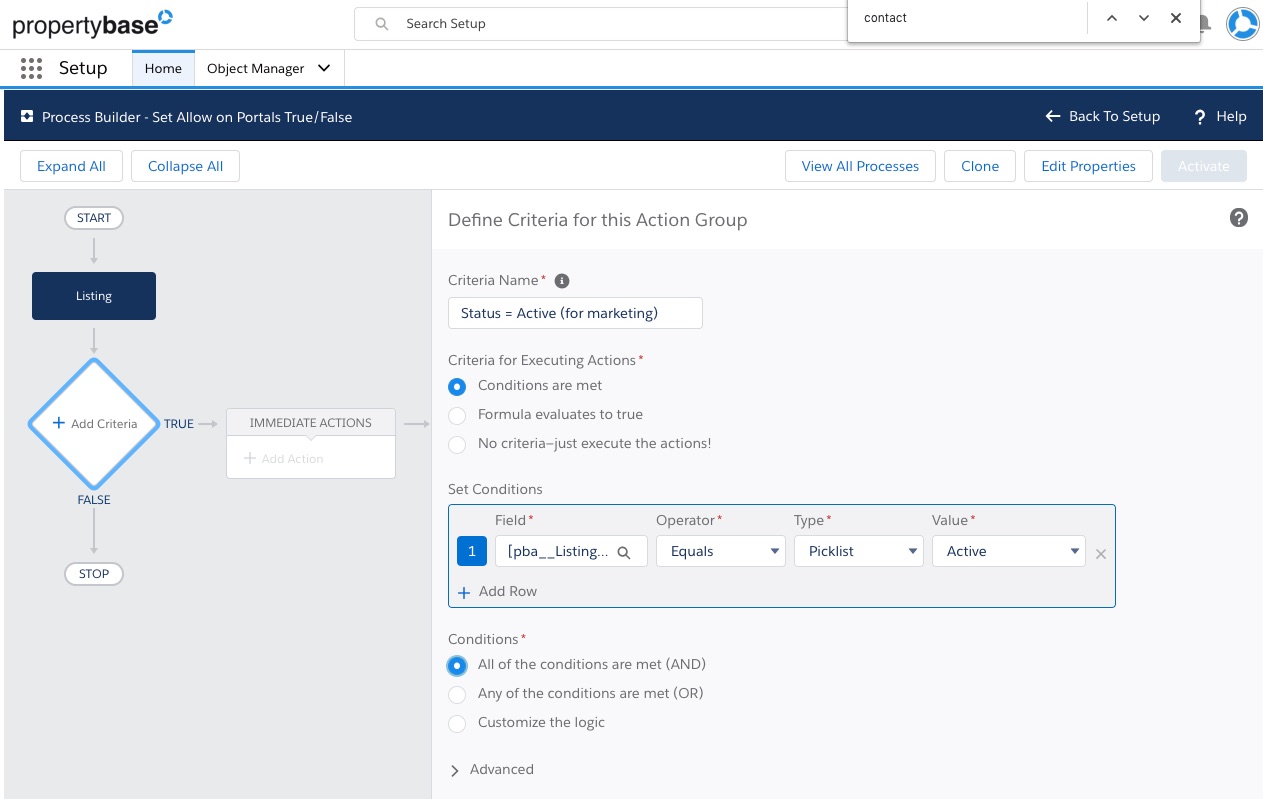
The field selector will open in a layover. Simply type "Status" (or the field you are using for this) to select it from the list in the dropdown. This way of field selection will repeat in the next steps and will not be pointed out again.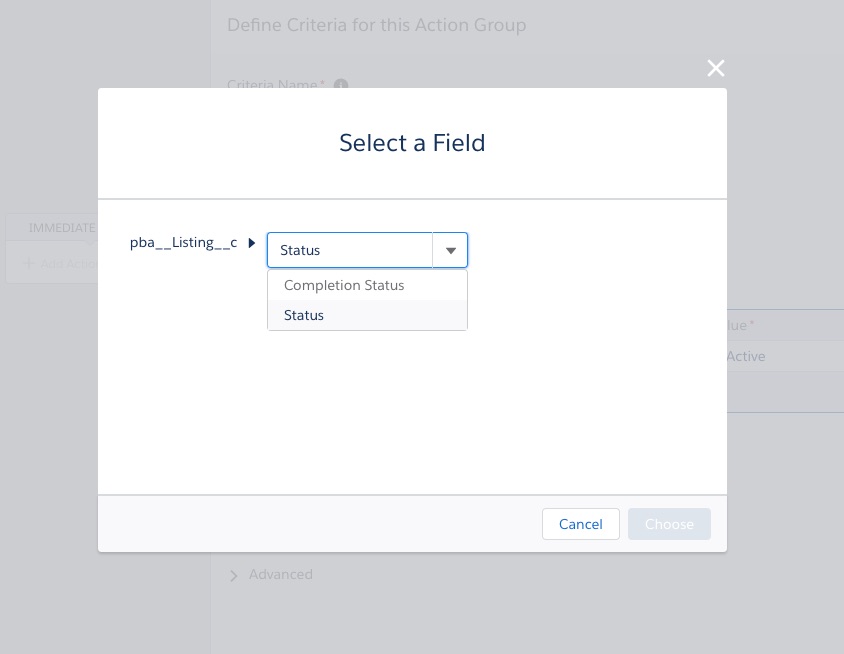
If you have multiple statuses that you want to be able to show the listing on a portal, add more rows for each status you consider "active" and change it to check on each by switching to "Any of the conditions are met (OR)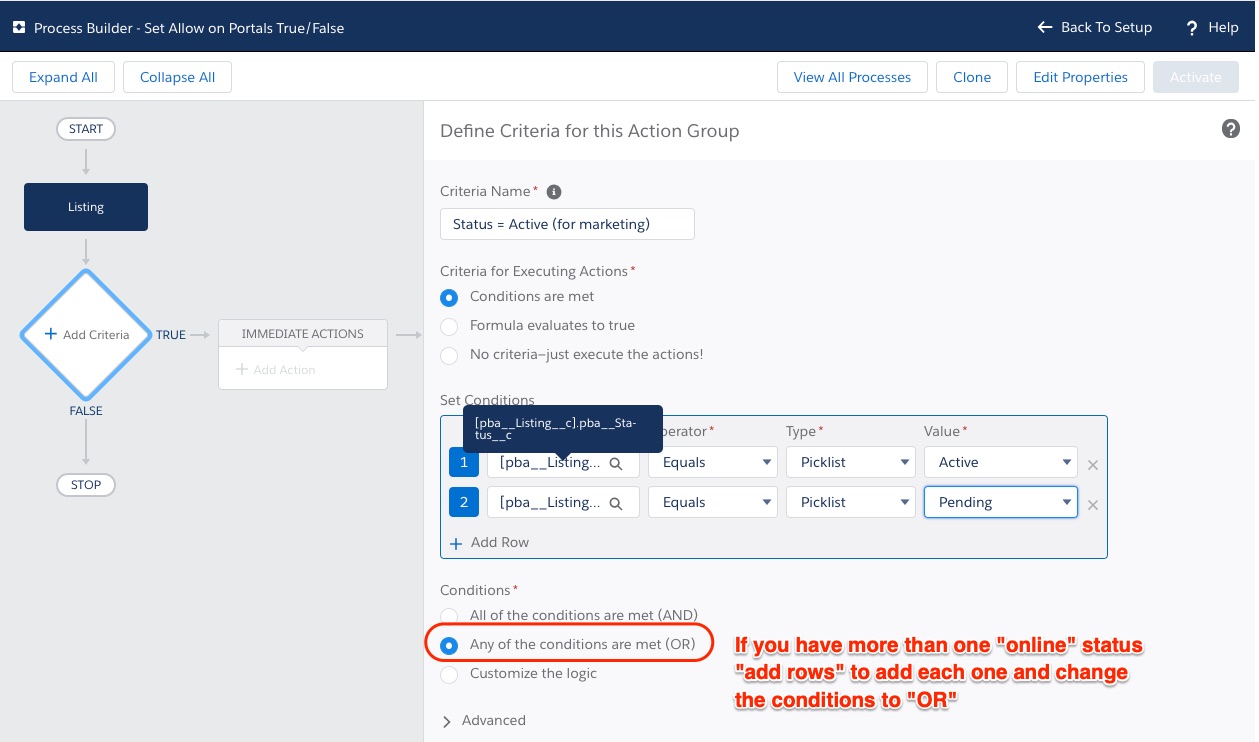
Save the changes to get to "Immediate Actions"
5. Click on "+Add Action" and choose "Update Records", then give it a name e.g. "Set SystemAllowedForPortals to TRUE" and choose the record it should work on.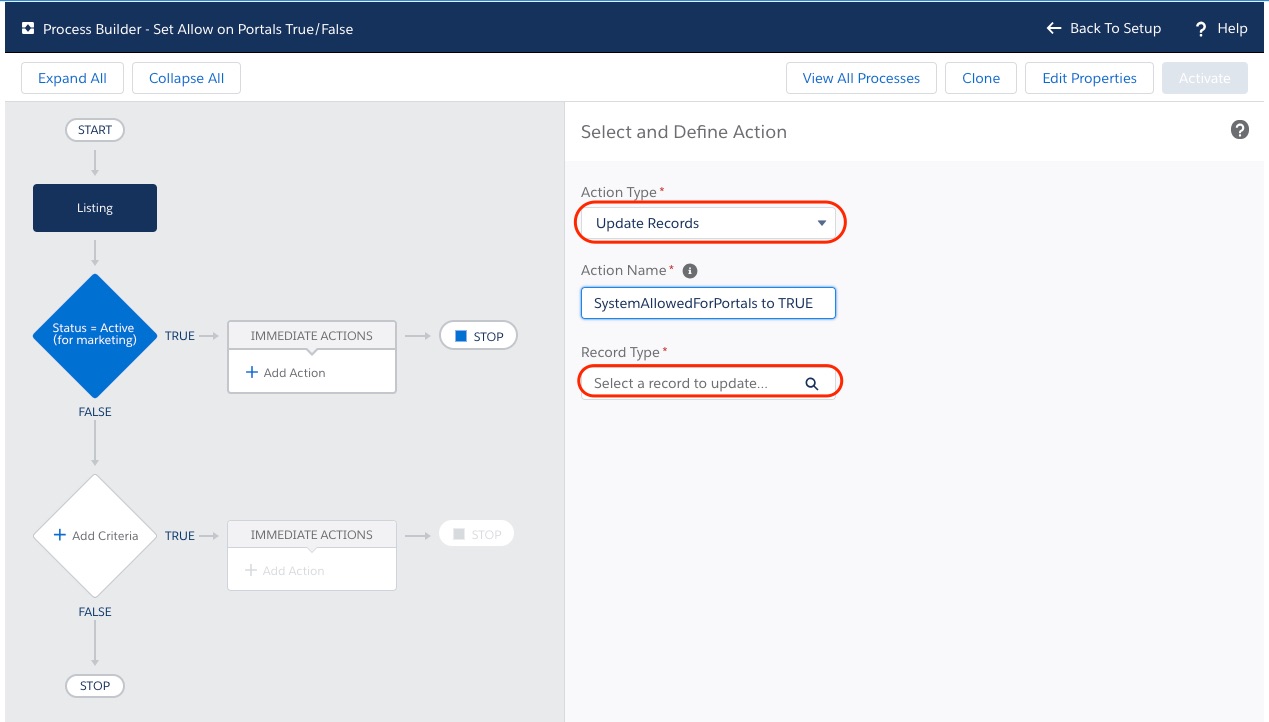
This will offer you to select whether the listing that started the process should be updated or a related record. Choose "Select the pba__Listing__c record that started your process":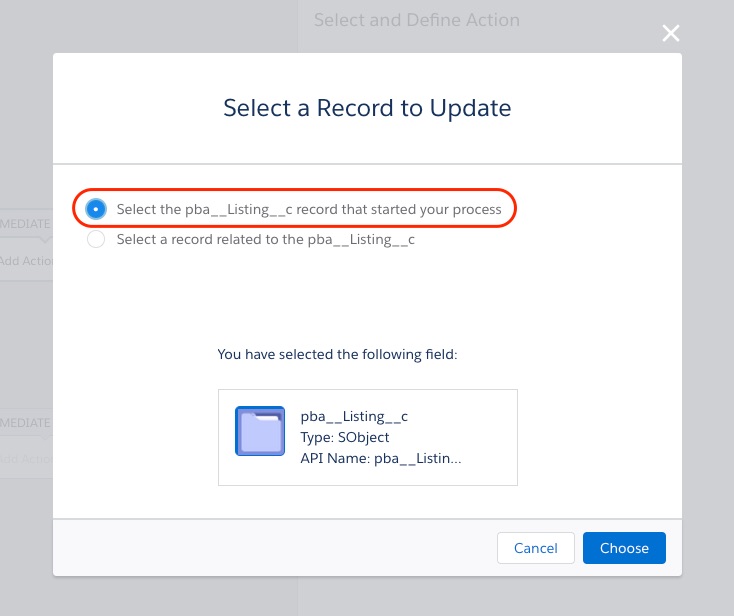
6. Then add the update it should do: select the field "System Allowed for Portals" and set it to "True" and click "Save"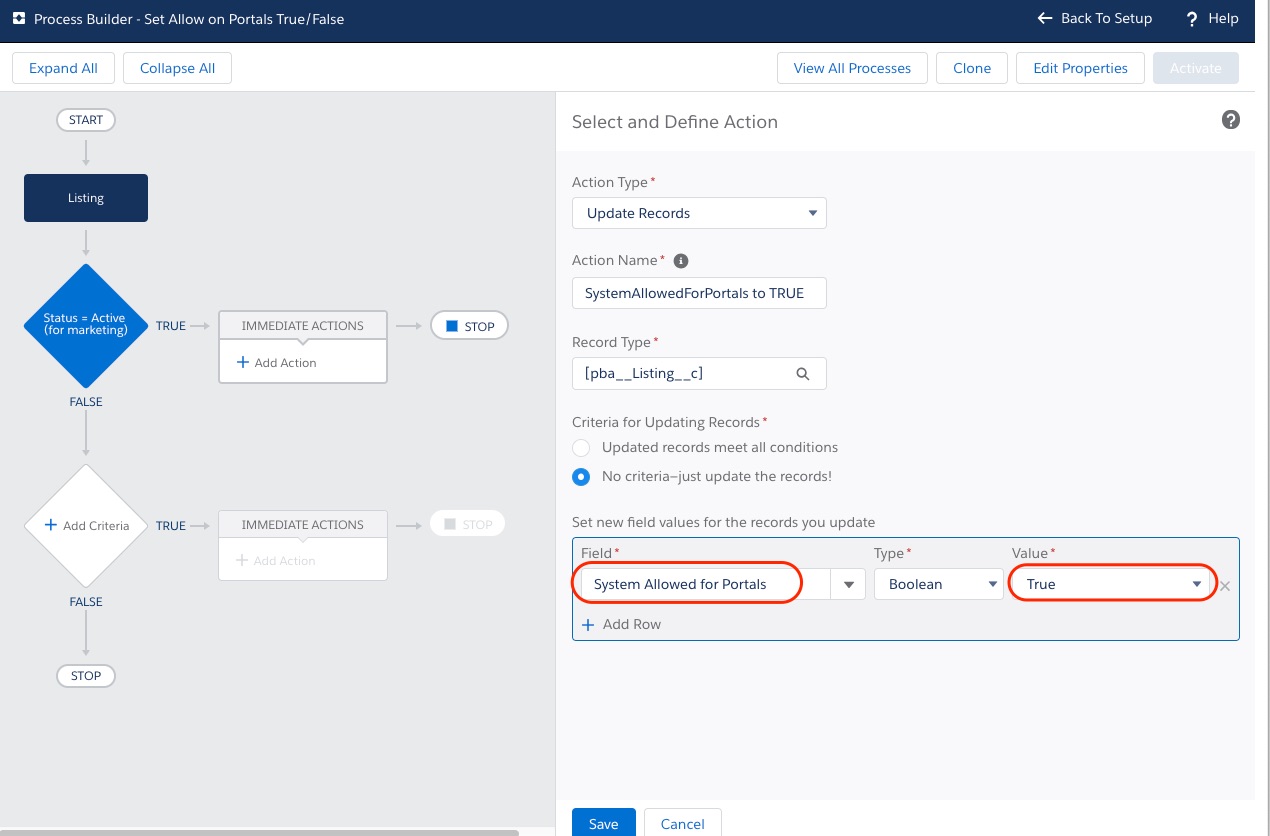
Perfect! You have added the first part to allow listings to go to portals. Now we will add a second "node" to make sure the listings are not allowed to go to portals if the status does not equal an active status. In the same process continue and
7. Click on "+Add criteria" below your first node, name it e.g. "Status ≠ Active (for marketing) and now add the opposite criteria compared to the first one, so when status does not equal Active. If you have multiple "active" statuses add them as well and change the conditions to "OR":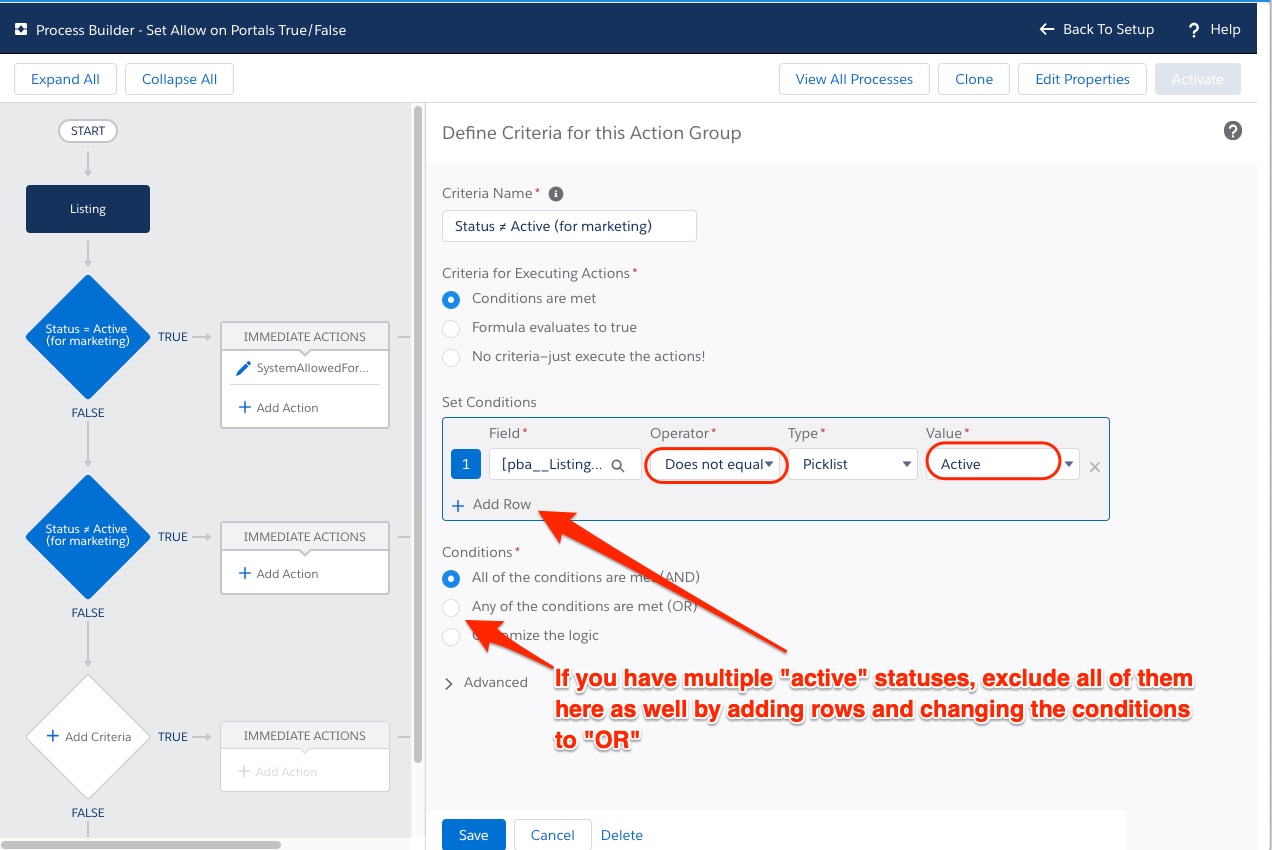
Save the change and
8. Click on "*Add Action" to define the change to "SystemAllowedForPortals" to "False" in this case: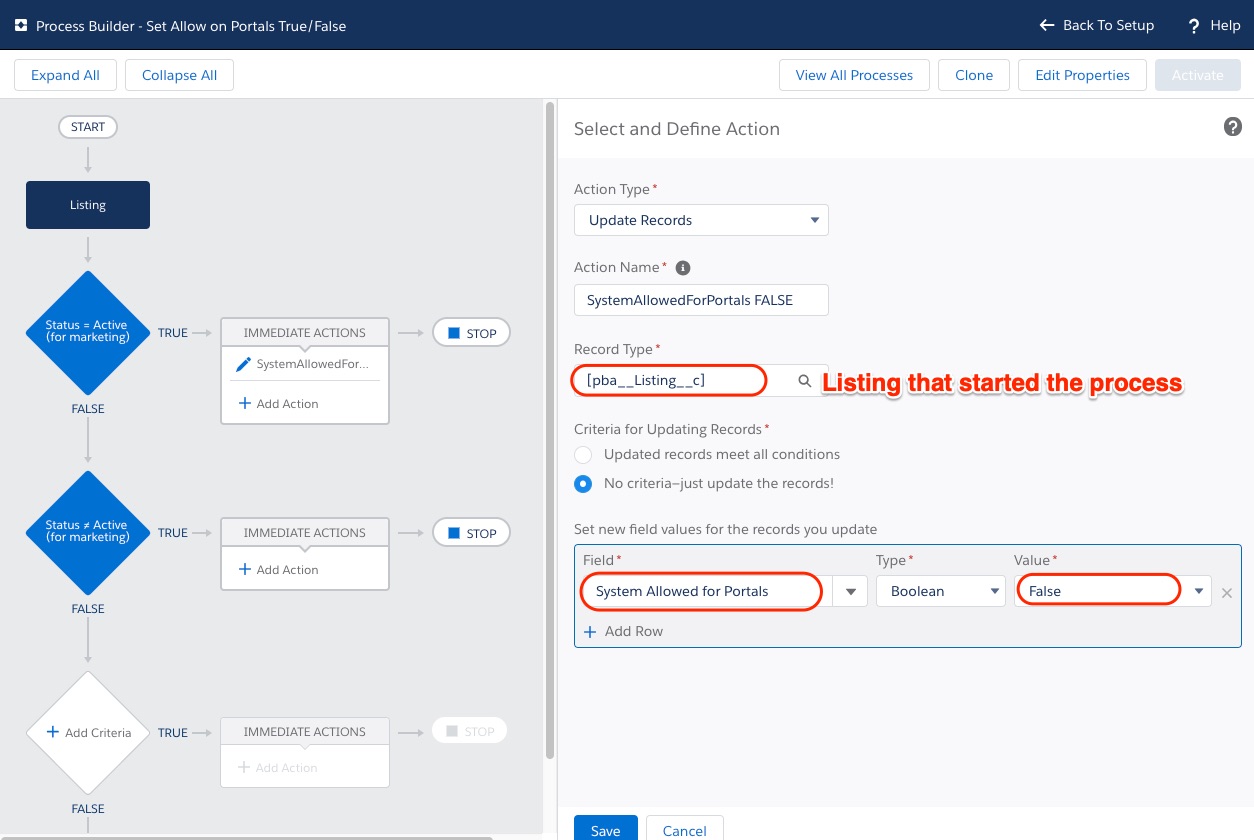
Save the last step as well.
9. Activate the process with the button in the top right corner and confirm activation.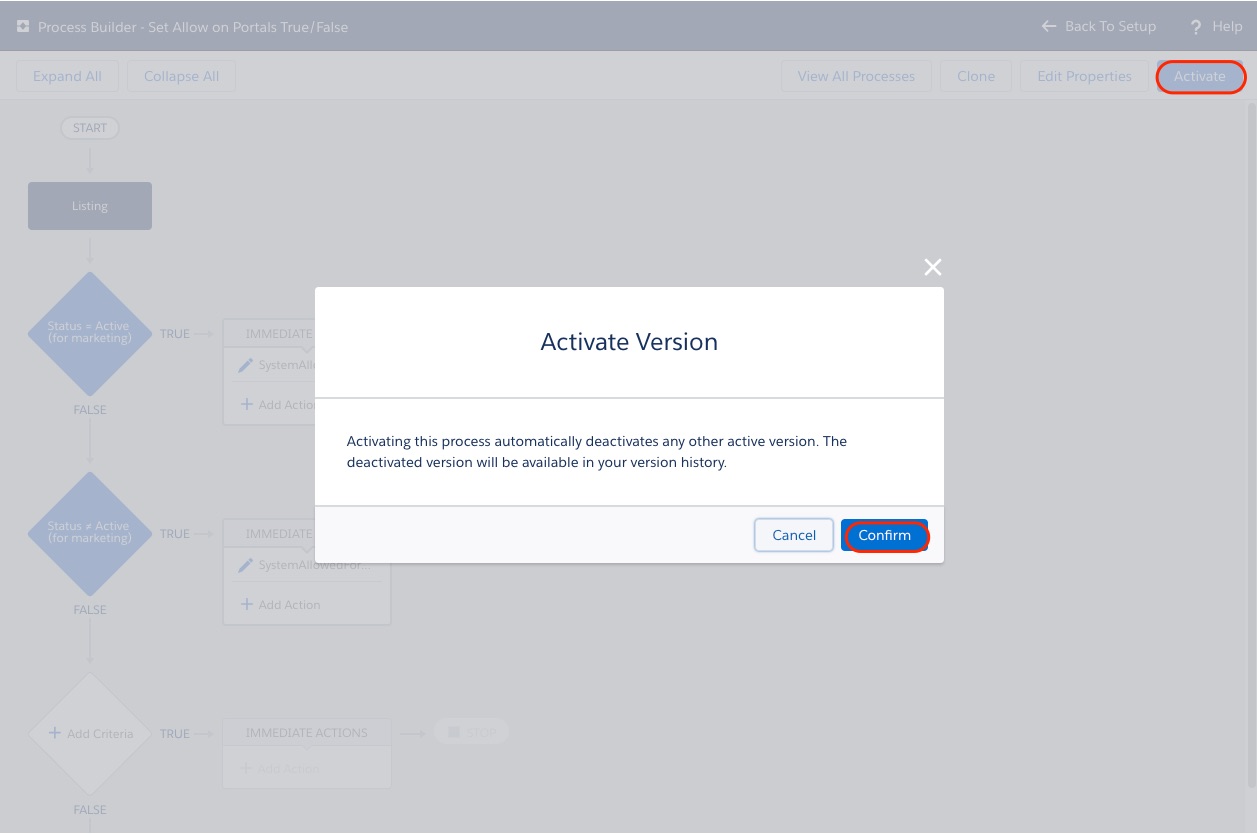
Check your process to work by changing a listing status e.g. to active from any inactive status and vice versa. If you have the SystemAllowedForPortals field on the layout you will see it check and uncheck depending on the status you choose for the listing.
Note: The Visualforce component "Portal Syndication" will only update after a page refresh.
FAQ:
- How often is my listing published? - It completely depends on the portals. We have "real-time" connections so every "Save" on the listing will update the portal. But we also support portals, who just update once a night.
- My pictures are not shown on the portal? - Make sure that you have check the "Portal Feed" checkbox next to the picture in the listing media manager.


Comments
0 comments
Please sign in to leave a comment.