

Send Wizard - General Overview (Classic v1.348-1.398) Follow

Propertybase Send Wizard is the built in email wizard that allows agents to email out multiple contacts at once, with content and customized templates in an easy 5 step process. Using Propertybase Browsers you can quickly and efficiently create lists of records to send e-mail to.
Depending on which browser you come from a different step of the process will be updated:
- Selecting a list or filter from the Contact Browser will add your contact records to Step 1. Audience.
- Selecting a list or filter from the Listing Browser will add your listing records to Step 3. Content
Step 1. Select Audience
No matter where you come from you will always start at Step 1. Select Audience. The following image displays step one:
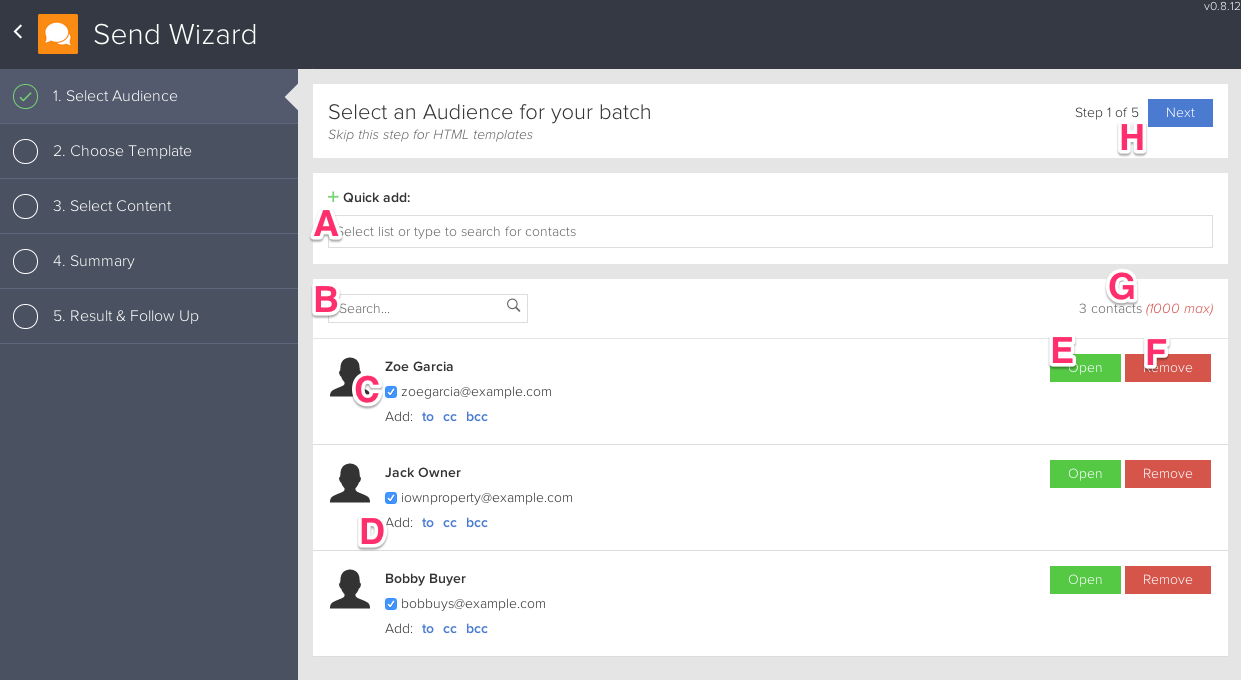
A. Quick Add - By clicking "Select list or type to search for contacts" you will be presented with all of the different lists that have been created or shared with you. Select any of the lists to add the contacts to your mailing list.
B. Search - Allows you to look up specific contact records that might not be in your list or if you just want to send an email to a random set of contacts.
C. Use main email - If the checkbox is marked, the main email will be used for the send out. Marking the checkbox false, will eliminate the main email.
D. Adding additional emails - If you want to send the email to the contact, but using a different email then is associated to the contact or perhaps CC or BCC in a partner or 3rd party contact to the mail it is possible by select on of the 3 options and add the address.
E. Open - This button will open the contact record in a new tab.
F. Remove - Deletes the contact from the emailing list.
G. Contact Count - Displays the number of contacts in your emailing list.
H. Next - Takes you to the next step of the process.
Step 2. Choose Template
The Send Wizard comes with a basic bundle of customized email and PDF (Expose) templates. Each one with its unique styling can be configured to have your company logo and colors.
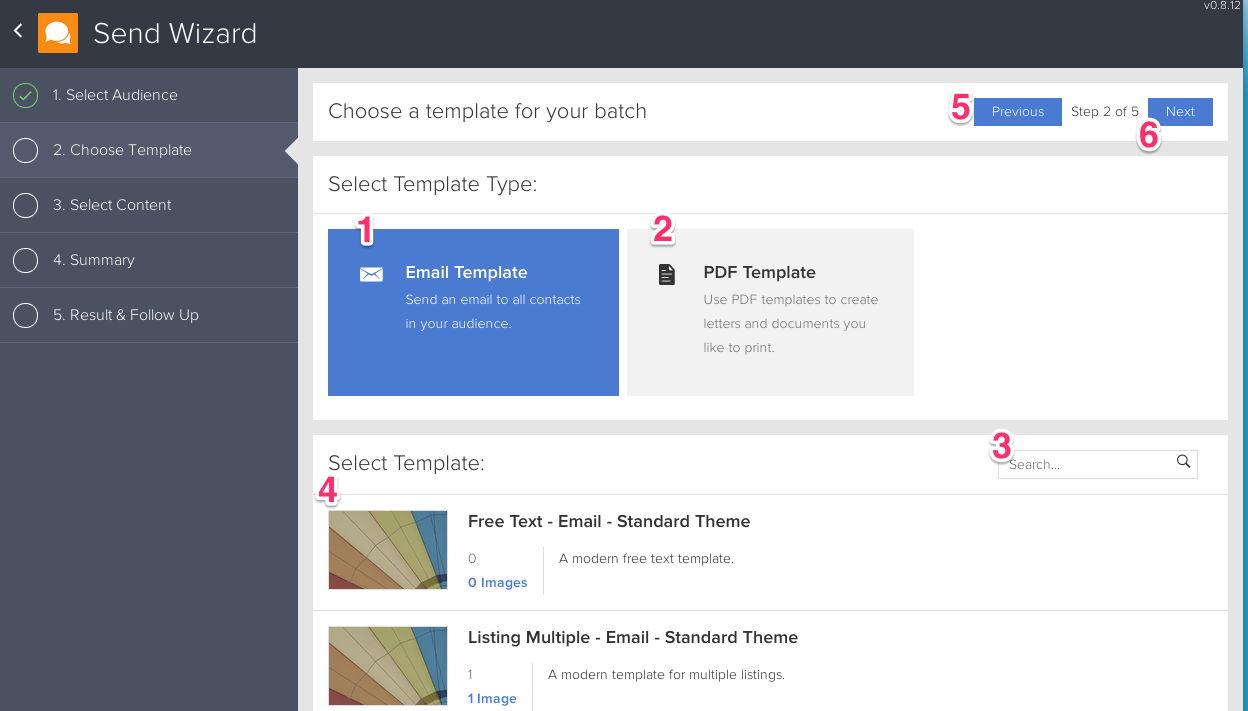
1. Email Template - Upon clicking the Email Template button a list of email templates will be available for selection.
2. PDF Template - Upon clicking the PDF Template button a list of expose templates will be available for selection.
3. Search bar - Fuzzy search bar to easily bring up the exact template you are looking for.
4. Select Template - Under this section you will find all available templates. Each with a name, small description, amount of images it holds and a thumbnail preview of what it will look like.
5. Previous - Takes you back to the previous step of the process
6. Next - Takes you to the next step of the process.
Step 3. Custom Fields
This page is based off of the custom template selected. In the majority of the cases you will have a Welcome Message, where you are able to enter a customized message for the recipient. Additional custom fields may be available to populate.
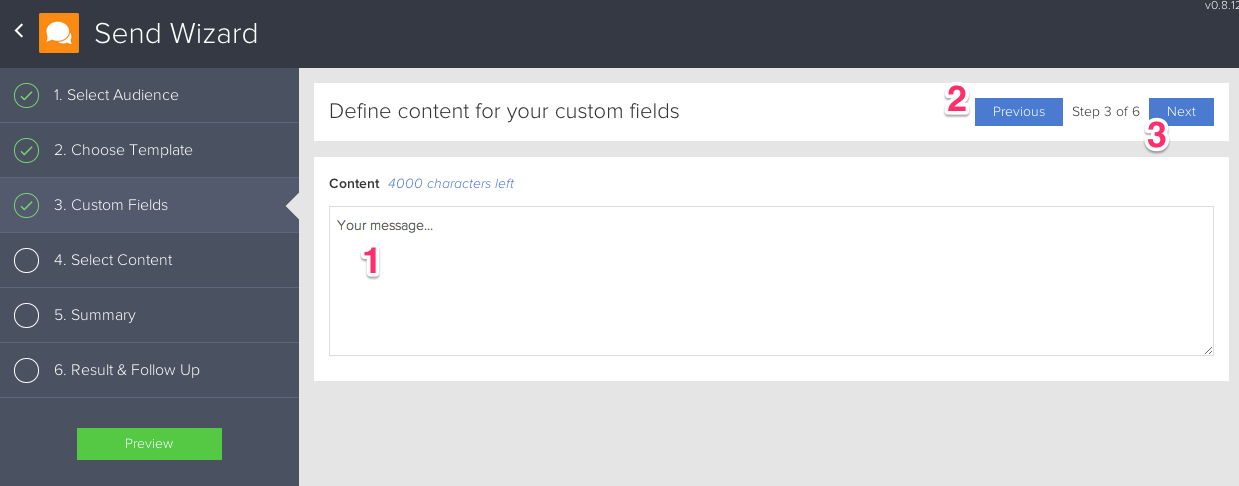
1. Custom Fields - Allows you to enter you personalized message or text on supported custom fields found in the selected template.
2. Previous - Takes you back to the previous step of the process
3. Next - Takes you to the next step of the process.
Step 4. Select Content
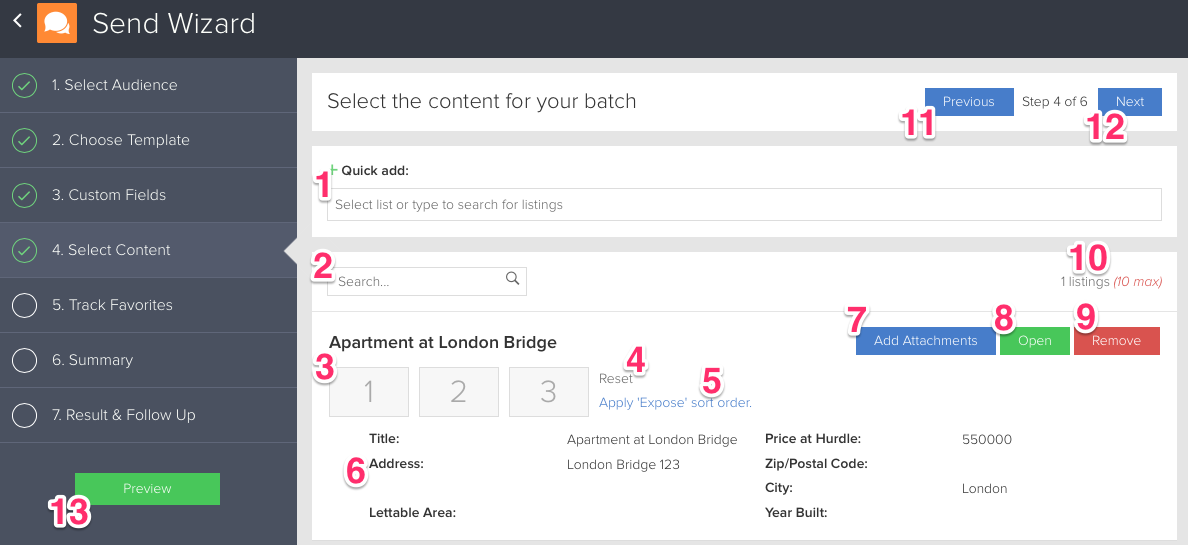
This step allows you to add the listing records to your selected email template. Whether it be for a client showing or an expose any listing can be added.
1. Quick Add - By clicking "Select list or type to search for listings" you will be presented with all of the different lists that have been created or shared with you. Select any of the lists to add the contacts to your mailing list.
2. Search - Allows you to look up specific contact records that might not be in your list or if you just want to send an email to a random set of contacts.
3. Available Images - This section displays the number of images that the selected template supports. The numbering (1, 2, 3, etc.) is the sort order of how the images will be displayed in the template.
4. Reset - Removes all listings from the available images
5. Apply 'Expose' sort order - On the listing record the media manager is found. Within the media manager a sort order can be applied for all expose images. This quick link will automatically set the sort order found in the expsoe pool of the media manager.
6. Listing Details - Provides the details that will be displayed from the listing record the email or pdf template.
7. Add Attachments - Allows you to add an attachment from the selected listing to the email being sent. It will be received by each member of your sending list. The attachment will be available from the "Notes and Attachments" related list on the Listing detail page.
8.Open - This button will open the listing record in a new tab.
9. Remove - Deletes the contact from the emailing list.
10. Listing Count - Displays the number of listings in your emailing list.
11. Previous - Takes you back to the previous step of the process
12. Next - Takes you to the next step of the process.
13. *Preview - Will open up a new tab displaying a preview of exactly what the email template will look like after sending it to the select audience. *Please keep in mind that in order to view the preview you will need to allow popups for this website.
Step 5. Summary
The summary page displays the details of your email to be sent out. It reviews each step and provide the opportunity to edit any of the previous steps before sending out the email.
1. Audience - Provides the number of contacts that will be sent the email from Reach. Clicking the Edit button next to the title will bring you back to step 1 to do any final modification.
2. Templates - Displays the template that will be used for the email with name, small description, amount of images it holds and a thumbnail preview of what it will look like. Clicking the Edit button next to the title will bring you back to step 2 to do any final modification.
3. Custom Fields - Displays each custom fields with the information you have written in. Clicking the Edit button next to the title will bring you back to step 3 to do any final modification.
4. Content - Provides the title and main image thumbnail of all listing records that will be added to the template. Clicking the Edit button next to the title will bring you back to step 4 to do any final modification.
5. Send Emails - This red button will officially send the email out. Warning: This cannot be reverted or stopped, so once this button is pushed the email goes out. Only push this when you are ready to send off the emails.
Result & Follow Up
After sending out your emails, the Result & Follow Up page will display. Here you will receive specific information about the email being sent out as well as the functionality to create a follow up on the email.
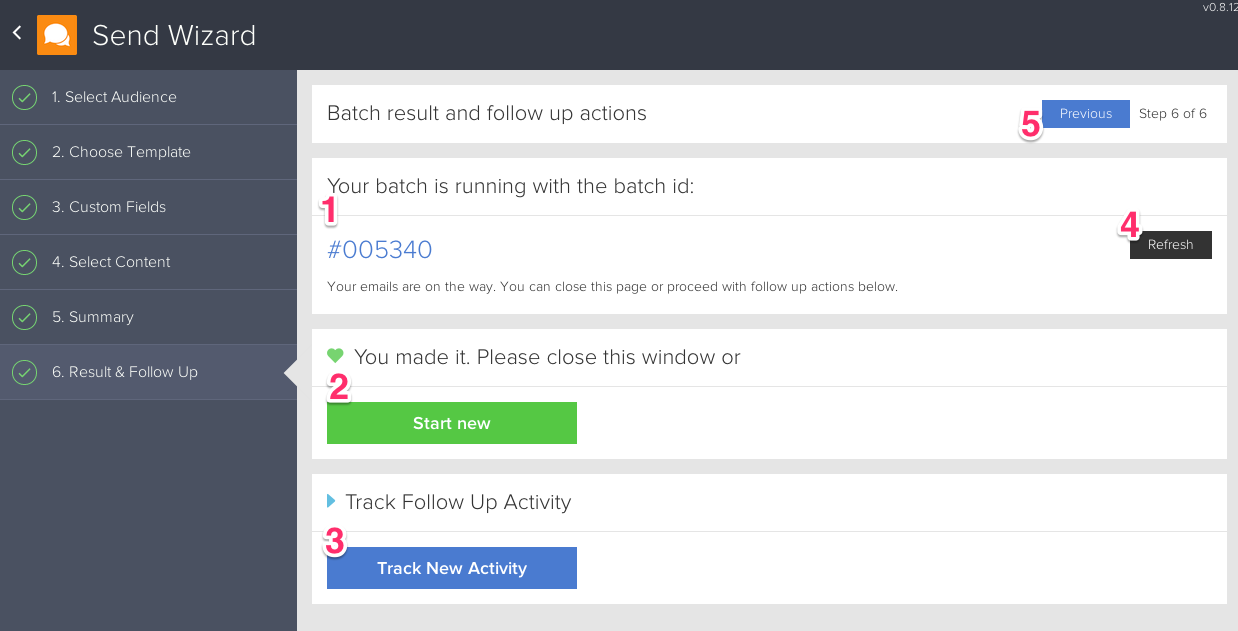
1. Batch ID - Each email sent out will generate its own unique batch ID, so tracking is made simple.
2. Start new - Will reset Reach and you can begin an entire new email to be sent out and add a new audience, template and content to be sent out.
3. Add Follow Up Task - Provides you the means of creating a task to follow up on this email. Within this email you will be able to select:
- Task Type: This field can be customized to have your generic task types. Typical types are call, email, mail.
- Subject: Add a subject that will easily identify this follow up task in the future.
- Date - Select the due date of that follow up task
- Details - Enter a comment to provide you an idea of what you want to follow up on.
4. Create - Once you have filled in the details for you follow up task, clicking this button will generate it and attach to all contacts and listings associated to this email.
5. Refresh - Depending on the size of the email it may take some time to provide the final results. Clicking Refresh will update the page, so you can see the progress.
6. Previous - Takes you back to the previous step of the process
Summary
With Propertybase Reach communication with contacts about new real estate possibilities is simple and fast.
Comments
0 comments
Please sign in to leave a comment.