Managing Images & Media: Advanced Features Follow
The media manager in Propertybase allows users to manage images, media and external links on Listing and Property records. This article will cover advanced features available to the media manager.
For a general overview of the Media Manager see: Managing Images & Media.
Note: The custom settings explained in this article are not retroactive. They will apply to future uploads only.
- Resizing Images (Resizing, Explicit Cropping, Explicit Resizing)
- Adding Watermarks
- Accessing Resized Images
- Limiting File Types
- Custom Solutions
- FAQ
Resizing Images
When uploading images through the media manager, Propertybase resizes images to 800x600 by default (meaning width by height in pixels). Additionally, thumbnails are created at 100x100. See instructions below how to open these and other image sizes.
Images are always stored by Propertybase at their original size. All images created are available for public use (website, pdf, emails etc.)
You can specify further additional image sizes creating the setting propertyMedia_imageSizes. Doing so will instruct the media manager to create these sizes when uploading through the media manager.
Note: Changes made to propertyMedia_imageSizes will only be applied to future uploads and is not going to create new images for already uploaded images (it is not retroactively applied)! Please also make sure to refresh the page you are uploading images to after making changes to the setting propertyMedia_imageSizes (or it will continue to use the old setting until you reload the page).
Click here to learn how to add custom settings to Propertybase.
You can specify any custom sizes using this setting, however, the syntax must match the example below. (WxH and all consecutive dimensions must be separated by a semi-colon.)
| Setting Key | Example Values |
| propertyMedia_imageSizes | 2048x1536;900x700;300x300 |
Note: You must clear your Propertybase cache and upload a new image for changes to appear.
Additional Options
Propertybase tries to maintain aspect ratios on custom images to ensure the best-looking result. However, there are additional options available that give the system-specific instructions for resizing and cropping images.
Explicit Cropping
This tells the system to crop images even if it results in losing part of the image.
| Setting Key | Example Values |
| propertyMedia_imageSizes | 2048x1536^;900x700^;300x300^ |
By including "^", you are telling the system to crop the image at exactly the specific dimensions.
Explicit Resizing
This tells the system to resize images even if it results in a "squished" or "warped" looking image.
| Setting Key | Example Values |
| propertyMedia_imageSizes | 2048x1536!;900x700!;300x300! |
By including "!", you are telling the system to resize the image exactly to the specific dimensions.
Adding Watermarks
The media manager can also automatically add watermarks to uploaded images. To do this, enter a custom setting using the syntax below. The watermark syntax is added to the end of any custom sizing value.
Click here to learn how to add custom settings to Propertybase.
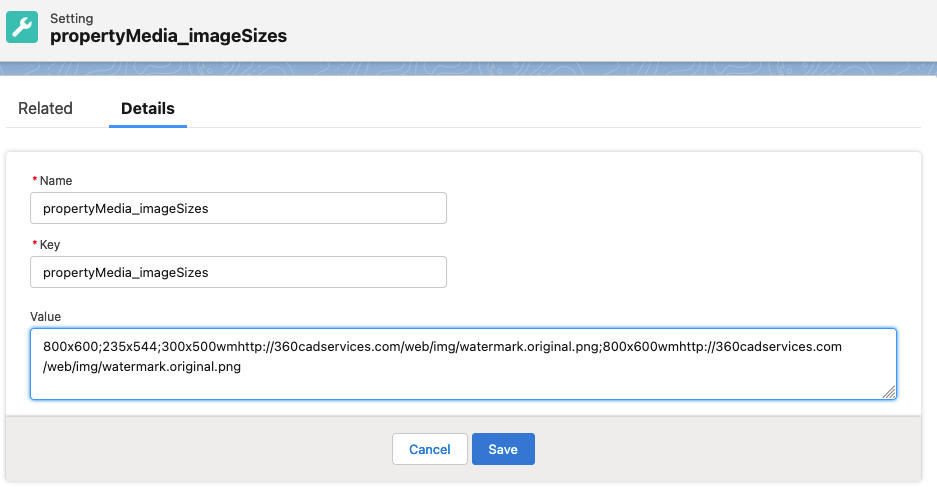
The following would create images without watermarks 800x600 and 235x544 and images with watermarks 300x500wm and 800x600wm. (Scroll to the right, please, to see all!)
| Setting Key | Example Values |
| propertyMedia_imageSizes | 800x600;235x544;300x500wmhttp://360cadservices.com/web/img/watermark.original.png;800x600wmhttp://360cadservices.com/web/img/watermark.original.png |
The URL behind the dimension (800x600) and the letters "wm" locates the watermark file you want to use. This file must be publicly hosted & accessible and should be in dimension the destination format will have, so if your outcome size is 800x600, the watermark image should have at least that size or larger (if smaller it will be blown up and may look blurry).
Note: You must clear your Propertybase cache for changes to appear.
Accessing Watermarked Images
To access watermarked images simply add the custom size to the URL as seen below:
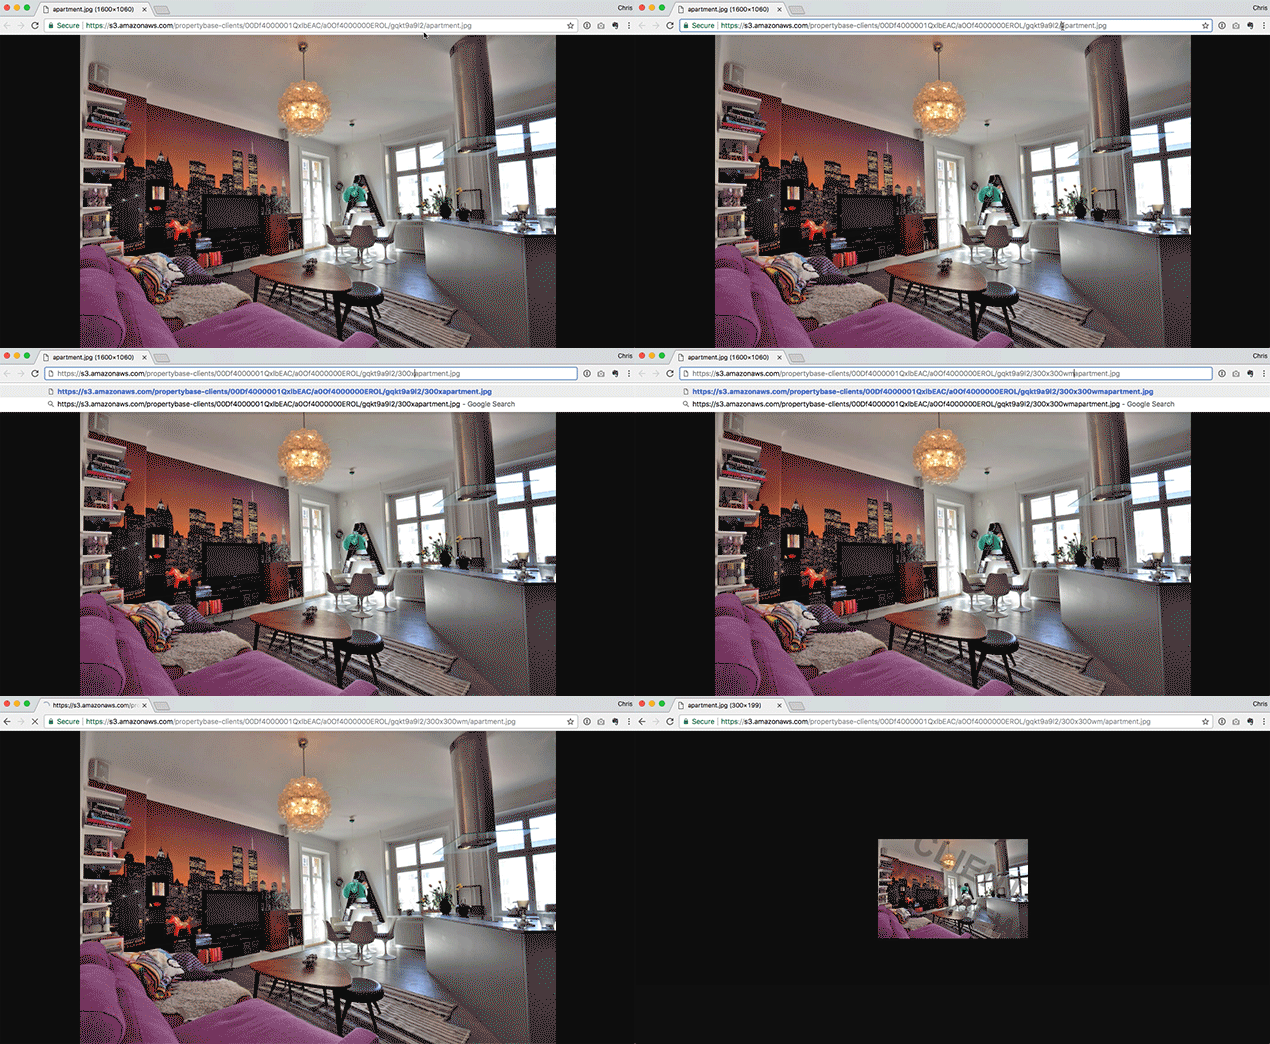

Accessing Resized Images
To access resized images simply add the custom size to the URL as seen below:


If you use Explicit Cropping your size needs the character as added in the size setting e.g. 300x300^
For Explicit Resizing your size needs the character as added in the size setting e.g. 300x300!
For Watermarked versions to be loaded only the "wm" needs to be added to the size you defined for it, e.g. 800x600wm
So simply use the size defined in the setting adding it to your URL to open the sized version.
You can use "thumbnail" and "midres" to open and use 100x100 thumbnails and 800x600 middle resolution images.
Please follow the steps in the FAQ of the article "Quicksend Coding Tips & Tricks" for further sizing options.
In your email (e.g. inline listing template) and pdf html code you can predefine the size you want to use.
A website will receive the URL of the original image, and typically a developer will use the base URL and filename to modify by code to include a size you want to download as shown manually in the above animation.
Note: Currently Portals only support receiving the original image version. We are looking into a feature to allow this to be more dynamic in the future.
Limiting File Types
These settings allows you to limit uploads to specific file types. If you don't want to limit to certain file types, skip this section. Most clients will want to allow uploading every kind of supported file. Without the setting, the default is used (allowing all supported types).
Click here to learn how to add custom settings to Propertybase.
The following settings are available for limiting file types for images, video and documents. The values shown are also the default and applied if there is no setting:
| Setting Key | Default Values |
| propertyMedia_imageExtensions | jpg,jpeg,gif,png |
| propertyMedia_videoExtensions | mov,avi,m4v,mkv,mpg,flv |
| propertyMedia_documentExtensions | pdf,zip,rar,swf,doc,docx,xls,xlsx,ppt,pptx,txt,rtf |
Note: You must clear your Propertybase cache or browser cache for changes to have effect.
Custom Solutions
Does your organization have specific image needs? Propertybase can develop custom solutions like branded URLs, image expiration and more. Please reach out to the customer success team to discuss further.
FAQ
Q: I get an "Internal Server Error" message for (some) images I upload.
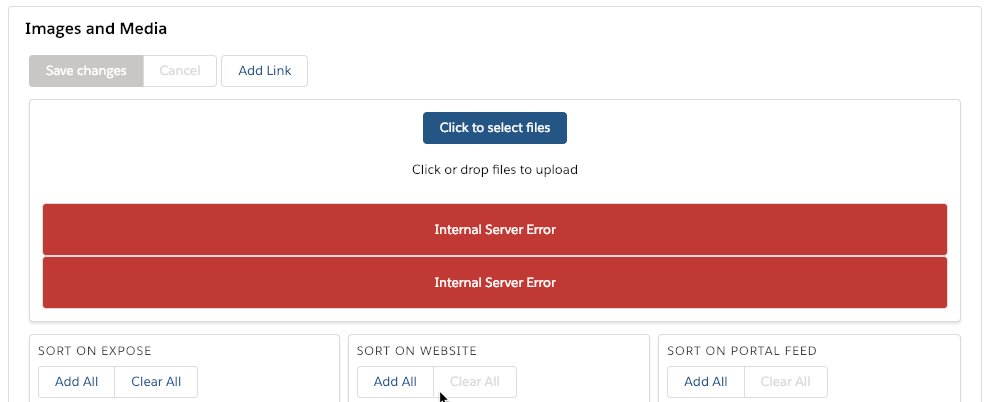
A: When you upload images, please avoid using special characters in the file names and especially not such as brackets and apostrophes. Apostrophes will certainly destroy the code and stop you from uploading a file. Also, check that the file name has a regular amount of characters. It's a file name, not a description.
Q: How are the standard image size versions that Propertybase always creates (800x600 and 100x100) referred to in the image URL?
A: Propertybase resizes images to 800x600 by default and 100x100. To "call" these version via the image's URL, add the custom size to the URL as "midres" or "thumbnail":
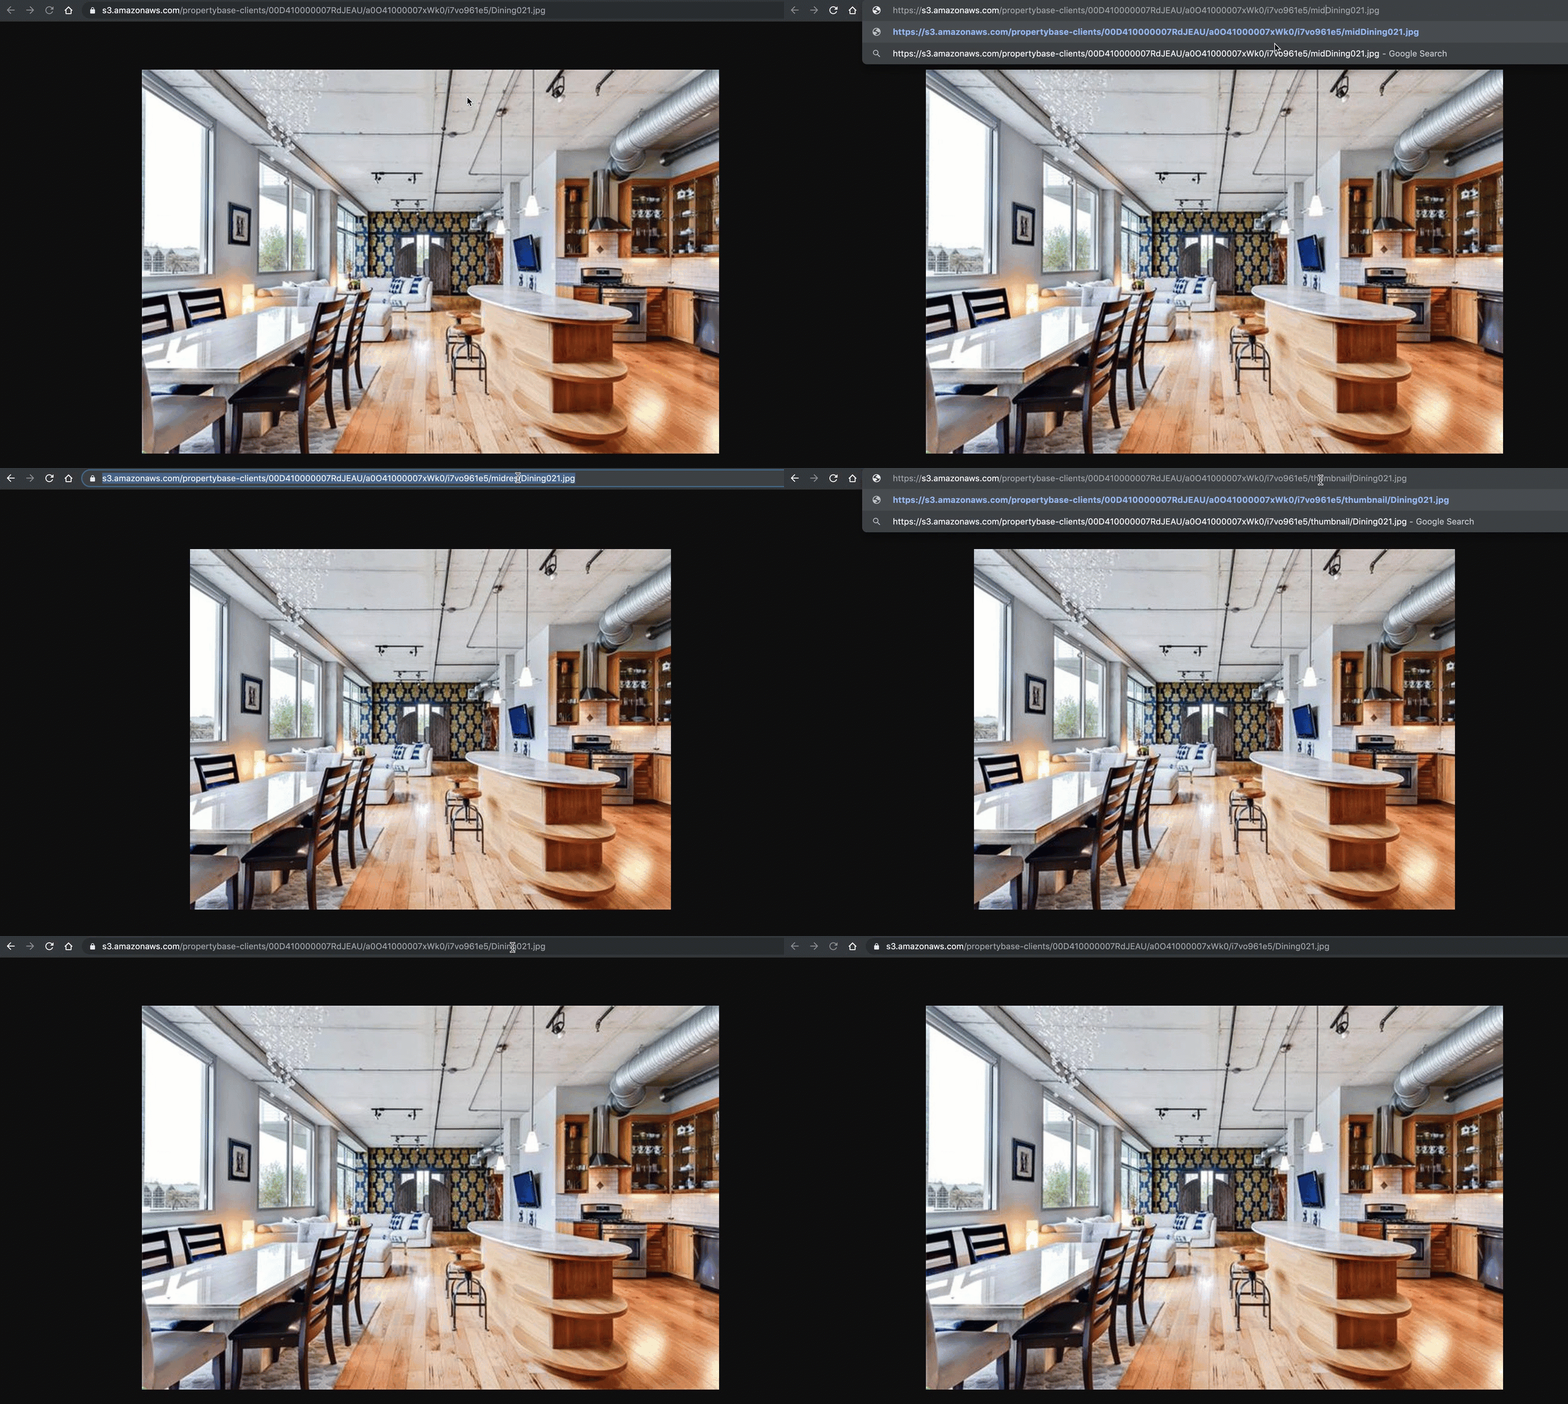
You will also find these sizes being used in our PDF template examples. See the next entry for more info on that.
Q: I want to use my custom image sizes in PDF and emails. How do I update the code?
A: Please follow the steps in the FAQ of the article "Quicksend Coding Tips & Tricks"
Q: How can I sort my images faster?
A: Images are sorted alphanumerically on upload. If you already know the sort order you will want to present them, please use a numbered or ABC-naming. Then you can use "Add All" to add them to the corresponding presentation feeds. Of course, you can drag and drop anytime later to change the order again in the feeds.
Q: My Watermark is not at the position I would like it to be at. How do I amend this?
A: The placement of the watermark image is centered on to the original image. Hence, to manipulate the position you will want to create a watermark image that has the watermark in the corner/position of your choice on a transparent canvas in relation to your picture sizes (if it is too small and placed on a much larger image, it will be blurry):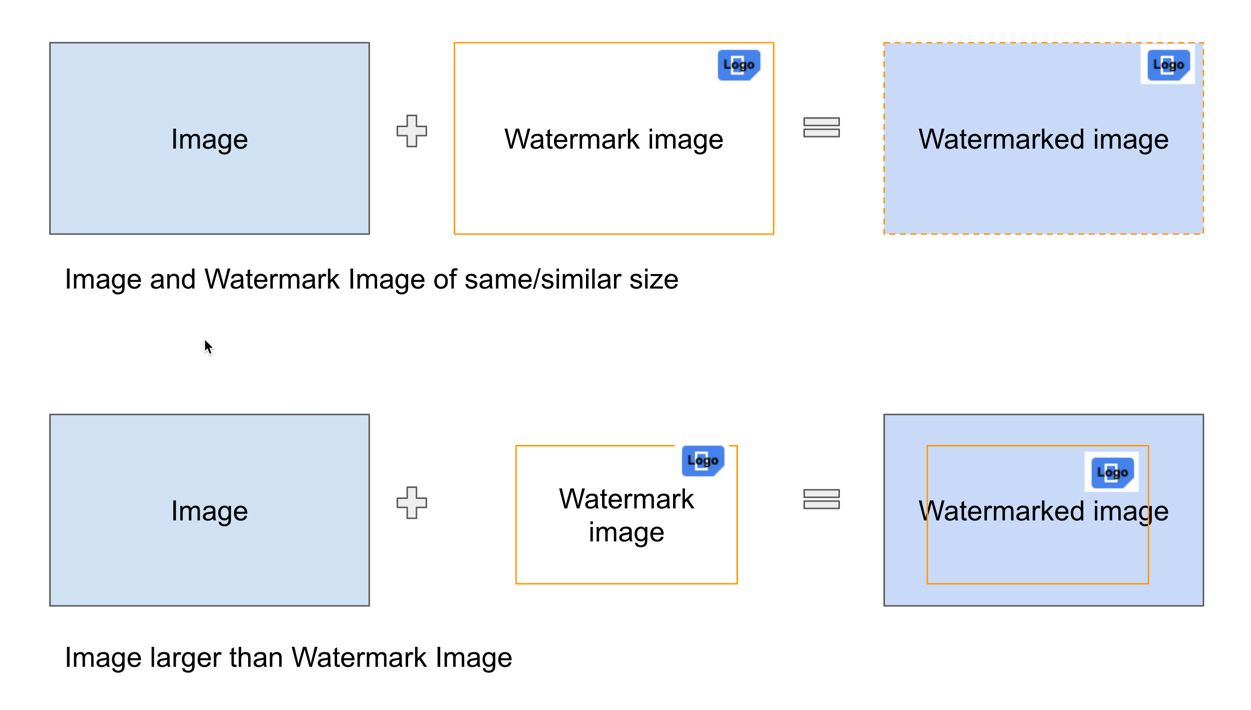
Q: I changed the size setting (added watermark or another size). How do I get all my images up to date, so already uploaded images also share these new versions?
A: Since the changes only apply to images uploaded as of the time of change, you will need to re-upload your images. You can either gradually start re-uploading them as you work with your properties/listings or you could consider running a report on PropertyMedia to extract the Property ID and the URL to the original file you uploaded (along with potentially other relevant data like sort order, filename, title, tags, PropertyMedia RecordID and so on) and then build a Bulkinator-ready import file and re-import all images with Bulkinator (see article).
Once Buklinator completed successfully, you could use the initial report to update all former images to not show on exposé/website/portal and/or if you are fully certain all worked fine, you can use the PropertyMedia record ID to remove them completely as you will have uploaded a new image source with Bulkinator. The latter will remove the now duplicated old image from the Property (Media Manager).
Note: Review whether you understood all steps or have a backup of the images somewhere before you start. We cannot bring back deleted records and can't be held responsible. Use adequate steps or backup measures with any data import/bulk manipulation you perform!
Q: I want to use the watermarked / resized image version on the portals, so I want to add them to "Portals" on the listing. How can I do this?
A: At this time, portal feeds do not support auto-selection of resized or watermarked images. It will always send the original image version to the portal and let them decide what they want to do with it. Many portals have their own rules around images, some require a watermark, some do not allow you to send images with watermarks (branding) and yet others don't care. We are reviewing a new feature that will permit you sending the version per portal that you want to send but at this time, you can only send what you uploaded. A workaround could be to (re) upload watermarked/resized images and only add those to the portal. This will go like that to all portals, however.


Comments
0 comments
Article is closed for comments.