Core Feature: Send Email with Quicksend Follow
Quicksend is a robust emailing tool unique to Propertybase, designed specifically for real estate professionals to send emails. Quicksend is available on the Contact, Listing, Inquiries, Offers and Closing objects. Quicksend allows you to send a personalized email to up to 20 recipients while taking advantage of several powerful features. This article will dive into those features and more. To access Quicksend, click the "Email" tab on any of the aforementioned objects.
Note: A one-time activation is required before using Quicksend. Click here to learn more.
Table of Contents
- Personalization
- Opt-Out Consideration
- Adding Links
- Additional Recipients
- Sending to Households and Companies
Personalization
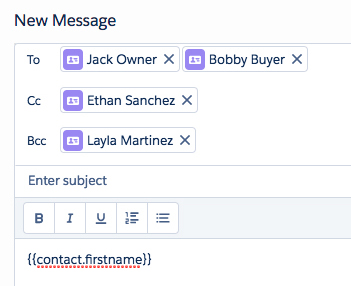
Quicksend allows you to send correspondence to several contacts at once while keeping your message personalized. This is possible through the use of merge fields. For example, the "First Name" merge field will pull the first name for each individual recipient. You can add a merge field by clicking the merge field icon in the lower left corner of Quicksend. (See image below.)

Note: Merge field personalization does not work for CC or BCC recipients. Those recipients will see personalization fields for the first recipient listed in the "to" field. In the example below, Ethan and Layla will both receive an email that was address to Jack.
Opt-Out Consideration
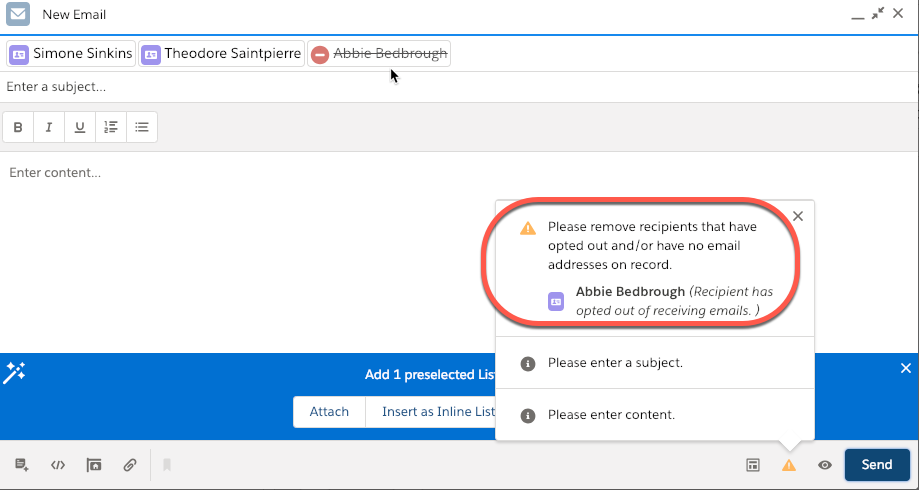
If a Quicksend recipient has previously opted out of receiving emails from Propertybase, users will see this indicated in the interface. (Opt-out settings can be controlled by a checkbox on the user record.)
Adding Links
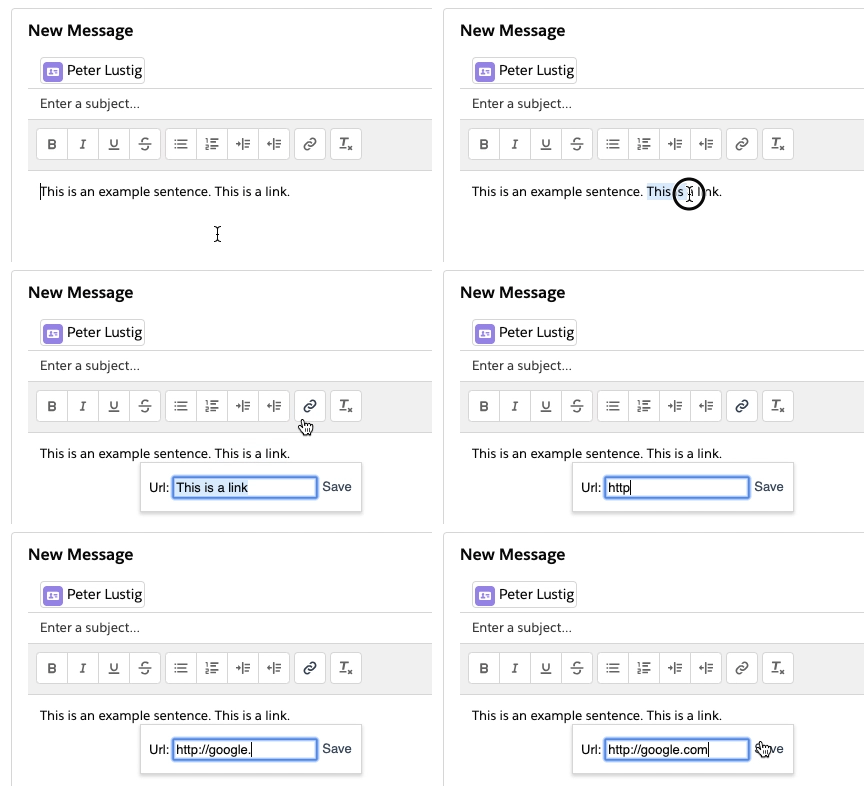
As of Propertybase 1.577 users can easily add links to Quicksend emails. To add a link, simply highlight the text that should be linked and click the "link" icon. Watch the animation below for a visual walkthrough of this process.
Additional Recipients
Starting in version 1.591 it is now possible to automatically CC additional email address fields located on the contact record. This is helpful when a spouse or partner should be included in email communications. Contacts that have additional recipients available will have a purple indicator next to their name within Quicksend.

To select additional recipients, click the purple indicator and then check the recipient you would like to CC as shown below.

This popup can also be opened by clicking on the person icon at the bottom of Quicksend.

Households and Companies
Starting in version 1.595 it is now possible search for and send to all or some contacts of Households and Companies.
On every new message I can now select between the objects Contact, Household and Company. This behavior is the same on all places where you can send an email from: Contact, Listing, Contact Manager, Listing Manager and Inquiry.
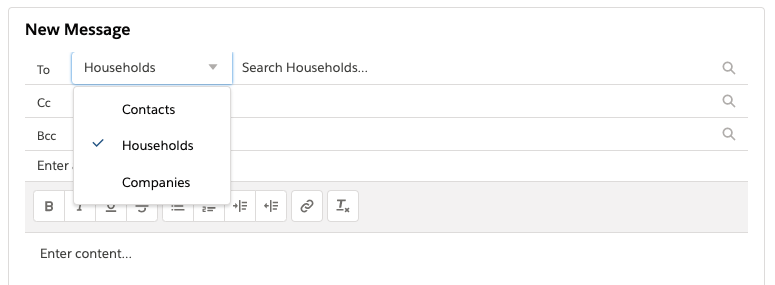
When I have selected the object I want to search in, I can search for the record I want to send to:
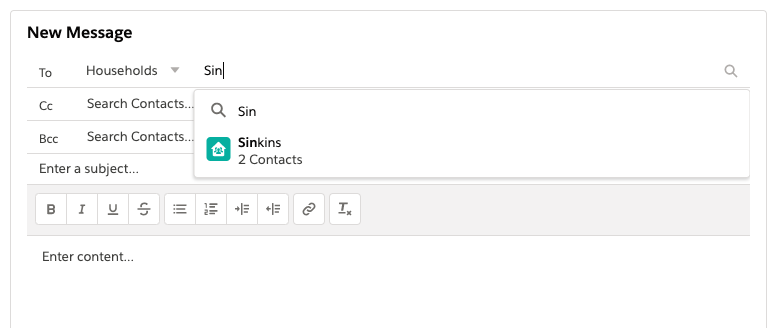
When I have selected a Household or Company, all related contacts are selected by default. I can go to the Person icon at the bottom to manage the recipients:

I can now select the appropriate object (1.), deselect or reselect single recipients (2.) or deselect the whole Household or Company (3.).
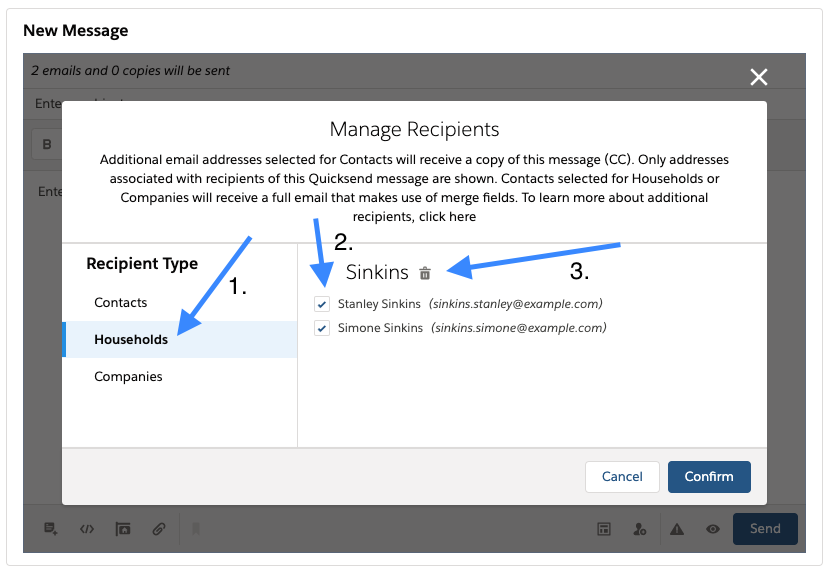
When I click confirm and send out the email, every contact selected in a Household or Company will get an email to their email address (Field Contact.Email).
Merge fields will be respected for each email when Households or Companies are selected.
Quicktext
Quicktext is simply a way to save messaging that you send often. When you create a new Quicktext your entire message, along with all formatting, will be saved.
Creating a new Quicktext
To create a new Quicktext, click the "Save Quicktext" icon. (See image below.)

You will then be asked to name your Quicktext and assign it to a collection. For more information regarding collections, click here.
Using Quicktext
To use Quicktext, click the "Quicktext" icon. (See image below.)

Next, click "Select a Quicktext..." (See image below.)
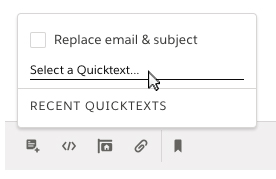
You can then browse available quicktext using the quicktext collections screen. To use quicktext, click the “+” next to it and then click Insert Quicktext. (See image below.)
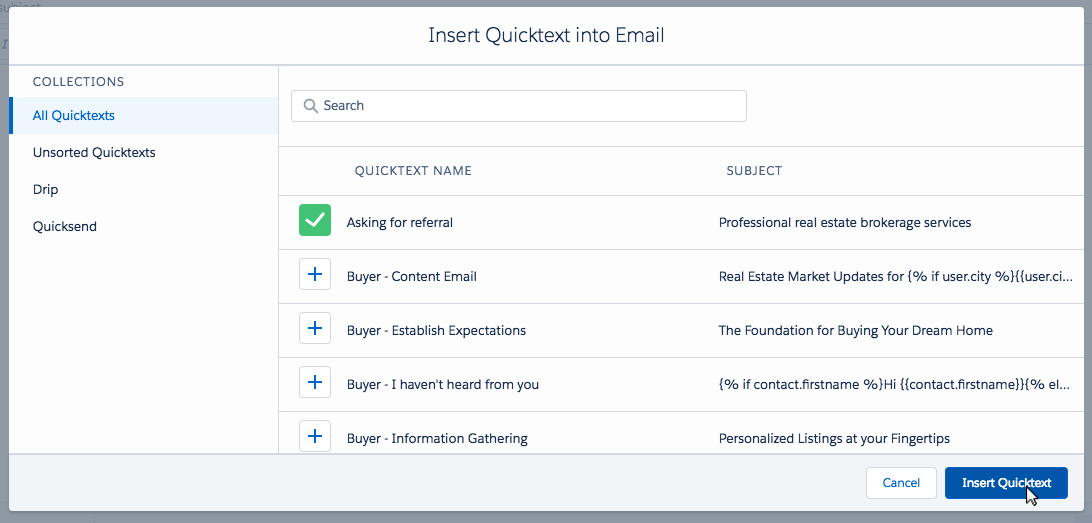
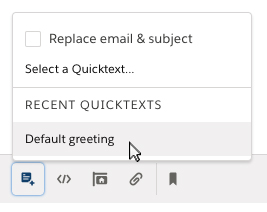
Once you begin utilizing this feature, your most recent Quicktexts (up to six) will show in the "insert" dialogue. When inserting Quicktext from this dialogue, you also have the option to replace the email content and subject, simply check the box. (See below.)
Templates
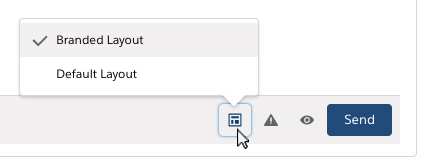
Templates determine the look, feel and structure of your emails. Propertybase utilizes several template types. You can change the layout for your message by clicking the templates icon near the bottom of Quicksend. (See image below.)
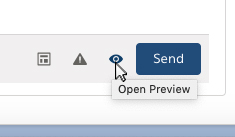
To preview any template, simply click the preview icon which is located immediately to the right of the templates icon. (See image below.)
Importing Default Templates
If you are just getting started with Propertybase you may want to import the "default" templates. However, if you plan on creating and using your own templates, you may want to skip this.
To download the default templates, visit the Propertybase Update Page and click the Resources tab. On that page you will find an option for Residential Email Templates. Clicking the import button will add those to your account.
Editing Template Branding
With Quicksend, you also have the ability to modify and create new templates.
Note: It is recommended that only those with proficiency in HTML & CSS coding language modify templates. Propertybase does not support or offer help with HTML or CSS.
In the example below, we modify a branded template to change the company logo.
Note: It is recommended that you copy the HTML & CSS into a separate code editing program when making changes. Once finished you can copy and paste your modified code back into Propertybase.
- Click the app launcher in the top left of the page.

- Click Templates.
- Click Branded Template.
- Click Edit in the top right corner of the screen.

- Next copy the HTML from this screen and paste it into your code editor of choice.
- Locate where says “Company logo settings”.

- Replace the code between the single quotes with the URL to your company logo.
Note: Recommended image size for logo is 210x36.
- Copy the updated HTML and paste it back into Propertybase.
- Click Save.
Editing Your Signature
If you use the Branded Template, your email signature is automatically populated using your profile data. You can modify what is included (or excluded) by updating your profile information.
- Click your portrait in the top right corner.

- Click Edit.

On this screen the Name, Title, Company, Address, Phone, Cell and Agent Image URL fields will be pulled into your signature as long as information is provided. If you don’t want to include a specific field, simply leave it blank.
You can preview your signature by clicking the preview icon in the lower right corner of the Quicksend window.

Setting Email Subject - NEW
In addition to using Email Templates to determine head and footer content and branding, it's also possible to set the subject of an email within the Template itself. To predetermine email subject open any Email Template, click Edit and then follow the step below.
- From the edit screen, enter content into the Subject field and then click Save.

Attachments
Quicksend allows you to attach multiple file types to your messages. Just like a traditional emailing tool, you can attach files, but the power of Quicksend shows in its ability to attach multiple listings to a message.
Sending Files
To attach a file to a Quicksend message, click the "Attach Files and Listings" icon in the lower left corner of the screen.

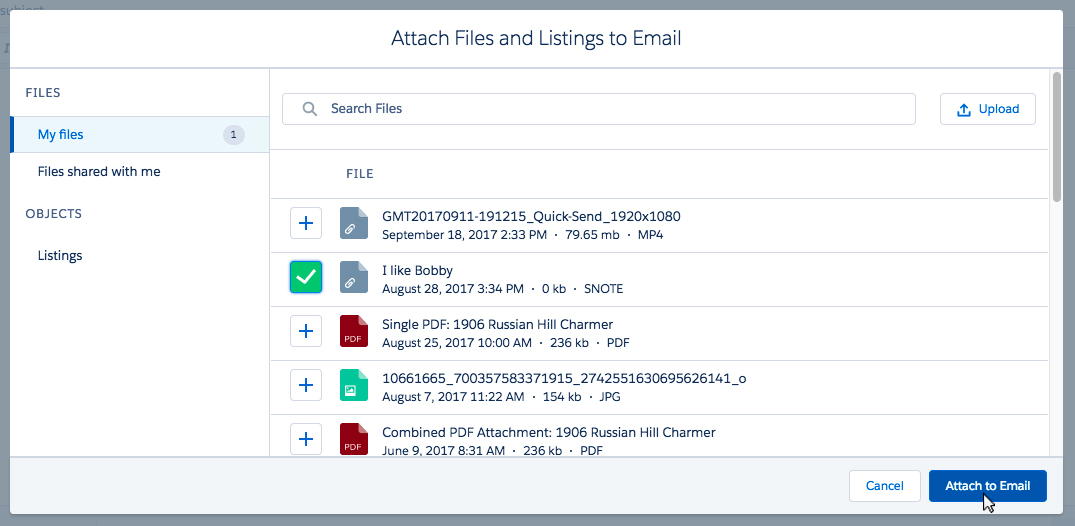
From here you can upload new files by clicking the Upload button in the top right corner of the window. Alternatively, you can search, select and attach files you have uploaded previously.

To add one or more file, click the “+” and then click Attach to Email.
Sending Listings
Quicksend allows you to attach listings both inline (meaning inside your email message) or as attachments. If you chose the latter, Propertybase will generate a PDF document with the listings you have selected.
Note: By default, the status of a Listing must be set to active to send through Quicksend. However, this setting can be changed in the Control Center. Click here to learn more.
Inline Listings
Inline listings are included inside your email message. This allows your recipient to view the listing quickly, without the need to open an external attachment. To insert an inline listing, click the “Insert Inline Listings icon” in the lower left corner of the Quicksend screen.

From the next dialogue, you can browse listings using the search textbox at the top. To add one or more listings, click the “+”and then click Insert Inline Listing.
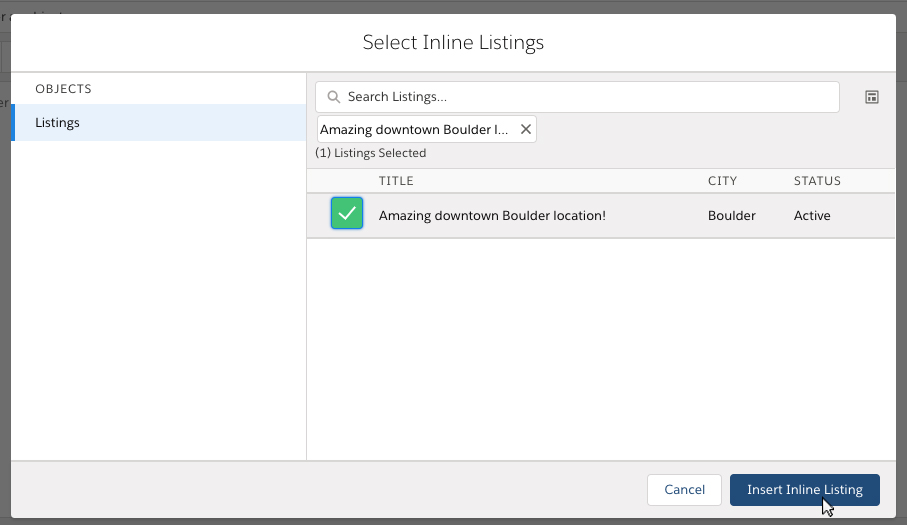
Once you have selected a listing, simply click "Insert Inline Listing" to add it.
Attached Listings
In addition to inline listings, you can also attached listings to Quicksend messages. When you select a listing (or multiple listings) and chose to send them as an attachment, Propertybase combines them all into a single, branded PDF document.
To add an attached listing, click the “Attach Files and Listings" icon in the lower left corner of the Quicksend screen.

In the following window, select “Listings” under the Objects header. From here you can browse and attach one or more listing to your email.
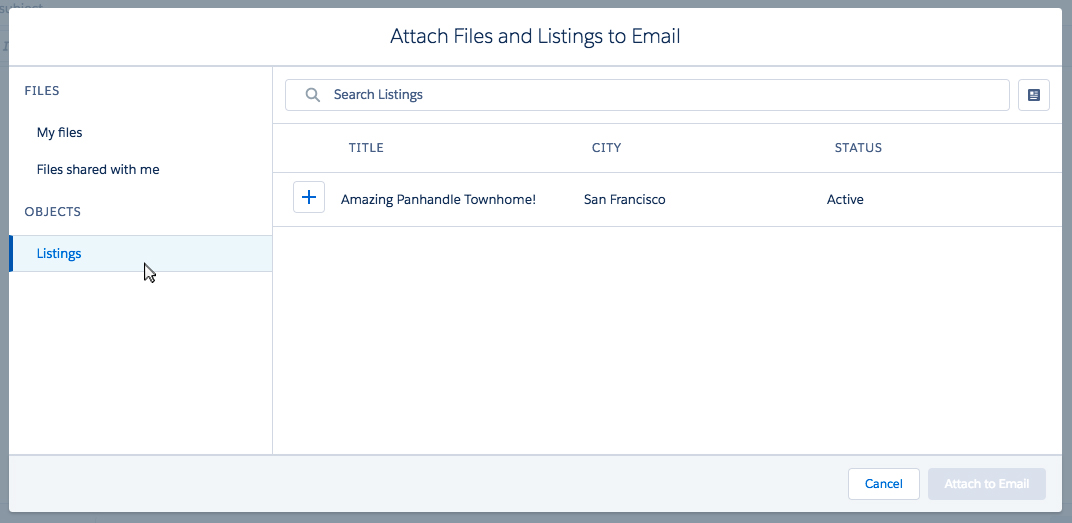
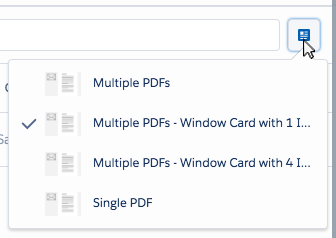
As mentioned above, when you select a listing(s) for attachment, Propertybase will combine one or more listings into a single PDF attachment. You can also change the layout of this PDF by clicking the "select layout" icon in the top right corner of the modal window. Changing the layout should be done before clicking "Attach to Email".
Email Tracking
To view all emails sent to a given Contact, simply open the Contact record and click the Tracking tab.
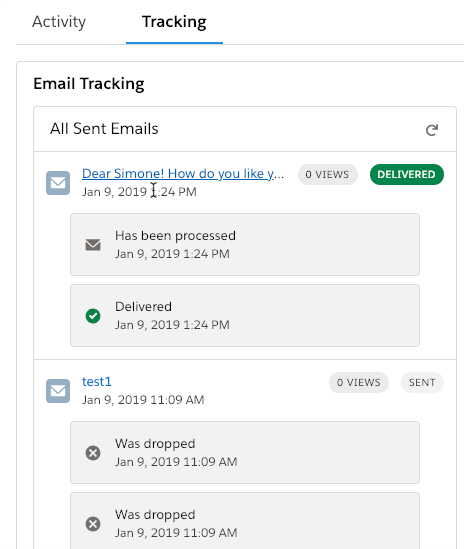
The Email Tracking feature will allow you to see the status of all Quicksend emails sent to a given Contact. This includes statuses like delivered, opened, bounced or unsubscribed. Additionally, clicking on an individual email will show extra details.
Can't see Email Tracking on the contact page layout?
Please add a Visualforce component to the contact page layout(s) called "Contact Email Timeline".
![]()
Note: By default Propertybase users can only see their own sent emails. However, by adding the setting below all emails can be seen by all users. Not sure how to add a Setting? Click here.
| Setting Name/Key | Setting Value |
| mailserviceVisibilityScope | team |
Settings
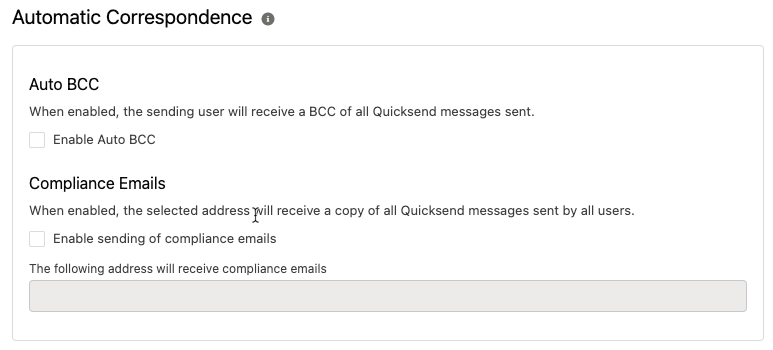
There a several settings that affect how Quicksend behaves. For the purposes of this article, our focus is Quicksend. However, following the steps below is how you modify settings for Email Campaigns as well.
How do I access Email Settings?
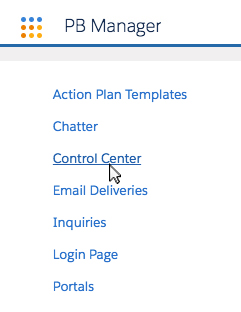
- To access Email Settings, open the Control Center through the App Launcher.
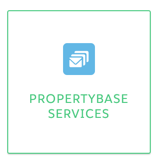
- On the Control Center page, click the Propertybase Services component (in older versions aka "Email Settings").
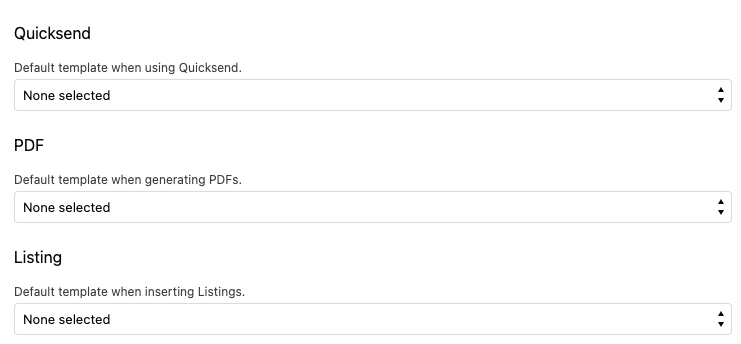
- On this page you will see several settings that modify the behavior of Quicksend. Review the table below for more details regarding each setting option.
Note: Don't forget to click "Save" when making changes to these settings.
Note: Click on images below - will open larger in new tab.
FAQs
Quicksend is telling me I need to complete activation. How?
Does the error look like this? When upgrading to the newest version of Quicksend (Propertybase version 1.555), a one-time activation is required before use. Click the box below to view the steps for this activation.
One-time Quicksend Activation
Starting with Propertybase 1.555, a one-time activation is required for Quicksend.
- Open the Control Center through the App Launcher.

- On the Control Center page, click the Propertybase Services (in older versions aka "Email Settings) component.

- Click Activate. This will open a new window which may be closed once completed.

Once activated, you will be able to use Quicksend and make changes to the Quicksend settings.
How do I check for errors in Quicksend?
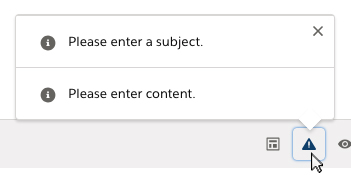
To check for errors, prior to sending your message, click the "View Errors" icon in the bottom right corner of the screen. (See image below.)
How do I change the image that shows when attaching listings in Quicksend?
The Media Manager (located on the Listing record) is used to add, remove and modify media for a listing. The first image in the Media Manager is always used when attaching listings in Quicksend. Click here to learn more.
Can I change the columns that appear when browsing listings in Quicksend?
Yes, through a setting. This setting can be modified through the Email Settings component in the Control Center. Click the "Settings" tab on this page to learn more.
Can I automatically create a Linked Listing when I send listings to Contacts?
Yes, through a setting. This setting can be activated through the Email Settings component in the Control Center. Click the "Settings" tab on this page to learn more.
Can we ensure that Contacts that choose to opt-out from receiving email messages will not get any messages?
Yes, from version 1.552 and above the field "Email Opt Out" is checked. This field should be added to the contact page layouts if not already there. When this checkbox is ticked, you will not be able to send a message to this contact. Quicksend will notify you about opted-out recipients and you will need to remove those recipients before you can send the message to the remaining recipients (e.g. when sending from a matching result). Note: this is a separate opt-out option for emails. There is another one for Mass Email Campaigns.
Related Articles
This is Part 3 of 10 in our Propertybase Core Features series. We recommend you continue to follow along, in order, as we walk through the entire Propertybase process, in detail, from lead to close.
Propertybase Core Features: Table of Contents
- Contact Management
- Create & Manage Companies
- Sending Email with Quicksend
- Inquiry Management
- Listing Management
- Property Management (Coming Soon)
- Offer Management (Coming Soon)
- Closing Management (Coming Soon)
- Using Reports
- Using Dashboards
Next Up: Inquiry Management
At this point, we've covered how to manage both Contacts and Companies, as well as how to communicate with them using Quicksend. In the next section, we'll cover how to find the perfect Listing for your customers, through the use of detailed Inquiry data and a powerful little tool called Matching.
Click here to learn about managing Inquiries in Propertybase.






Comments
0 comments
Please sign in to leave a comment.