

Core Feature: Create & Manage Companies Follow

In this article we'll talk about how Companies in Propertybase differ from Contacts. This article will expand upon the information covered in Core Feature: Contact Management. If you haven't read that article, we recommend doing so now. It will be helpful to understand how Contacts work in Propertybase prior to reading the information below.
Overview
Companies in Propertybase are simply records of business that you have relationships with. Without Companies, it would be difficult to track relationships between individual Contacts, especially when they are part of the same Company. With Companies, you can associate individual Contacts with a Company and track the role of that Contact within the organization.
Relating Contacts to a Company
Want to relate Individual Contacts to a Company in Propertybase? To do this, first open the Contact that you would like to modify. On the Contact record page, click the arrow next to Actions and select Change Record Type.

- On the following page, select the Company to relate to.

- Alternatively, you can create a new Company.

- When finished, click Change Record Type.
That's it! This will change the record type for the selected Contact from "Individual" Contact to "Company" Contact and relate them to your company of choice.
Viewing Company Contacts
Want to see all Contacts related to a specific Company? Open any Company record and click the Related tab. On this screen, under "Contacts" will be a list of all Contacts related to the current Company record.
Creating a New Company
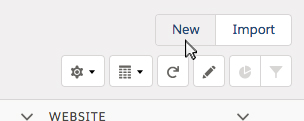
The easiest way to create a new Company is through the app launcher.
- Click the App Launcher in the top left corner of the screen, then click Companies.

This will take you to the Company List View page. Upon loading the page, you will be presented with a list of "Recently Viewed" Companies. We'll cover this page in more detail later.
- To create a new Company, click the New button in the top right corner.
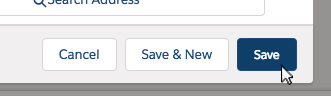
This will take you to a new screen with empty fields for Company information. To create a new Company, fill out this information and click Save in the bottom right corner of the screen.
Viewing Companies
You can view your existing Company records at anytime by following the link through the App Launcher.
- Click the App Launcher in the top left corner of the screen, then click Companies.
List Views
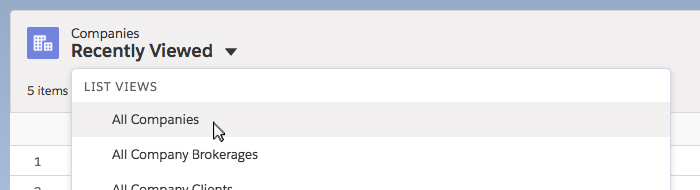
Upon loading the page, you will be presented with a list of "Recently Viewed" Companies. Looking empty? This can happen if you haven't viewed a Company recently. To select a different view, such as "All Companies", click the arrow next to the current view and select from the list (as shown below.)
In Propertybase terms, these views are called "List Views". Which is simply a list of records filtered by certain criteria. List Views are a powerful way to focus on certain customers and quickly make business decisions. Decisions like "Who should I call today?" or "Who should I invite to my next showing?" for example.
For more information on creating custom List Views, click here.
Company Details
Selecting a Company from a List View will open that Companies detail page. Let's review the Company detail features available in Propertybase.
Actions
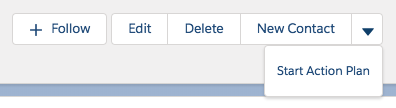
One of the first things you will see are Company "actions" at the top of the page. Here you can perform a variety of actions based on the record selected.
|
Follow You can follow any record in Propertybase by clicking the Follow button. Once followed, any changes to this record will show up in your feed. Edit Just what it sounds like! Clicking this button will allow you to edit the current Contact record. Delete Quickly delete the current Contact. New Contact Clicking this button will allow you to create a new Contact, which will be automatically associated with the current Company. Start Action Plan Click this button to quickly create an Action Plan for this Contact. |
|
Header Details
To the left of the Actions described above is the Company Header. In this area you will find some of the most useful and actionable Company details. These details are conveniently positioned at the top of the page for quick reference.

Did you know you can modify the fields that appear in the header?
Follow the steps below to modify the Company header details.
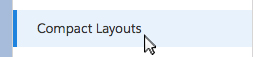
- Click the gear icon at the top of the page, next click Edit Object.

- On the left side of the screen, click Compact Layouts.
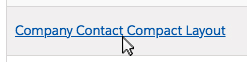
- Select Company Contact Compact Layout from the list of page layouts.
- On the next page, click Edit.
To modify Company header details, use the "Add" and "Remove" arrow keys to move fields between "Available" and "Selected". You can change the order that fields appear using the "Top", "Up", "Down" and "Bottom" arrows on the right side.
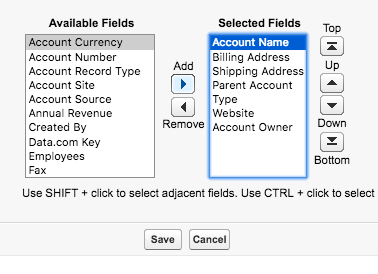
- Once finished, click Save.
Details Tab
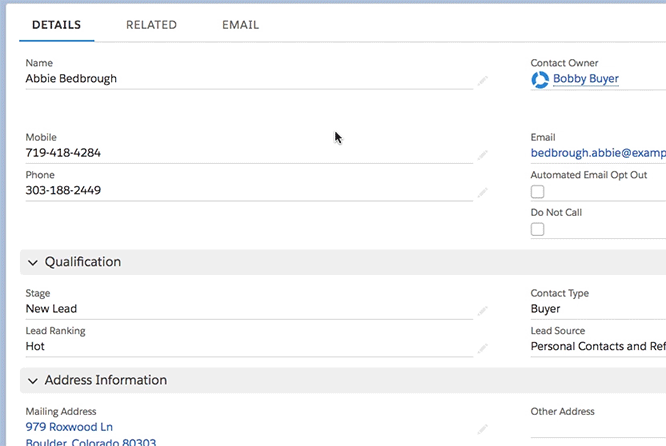
Underneath the Header Details, is a series of tabs. The first tab, Details, displays additional Company information for the current record. This includes everything from company name and phone number, to details like company type, industry and annual revenue. In Propertybase terms, this information is contained in "fields".
Editing a Field
You can edit any field by clicking the "pencil" icon to the right. Once you are done editing, click the Save button at the bottom of the screen. This is shown in the animation below. (You can also edit multiple fields by clicking the Edit button in the top right corner of the screen. See the "Actions" section above for more details.)
Note: Below is a Contact record, however editing a field is the same for all records in Propertybase.
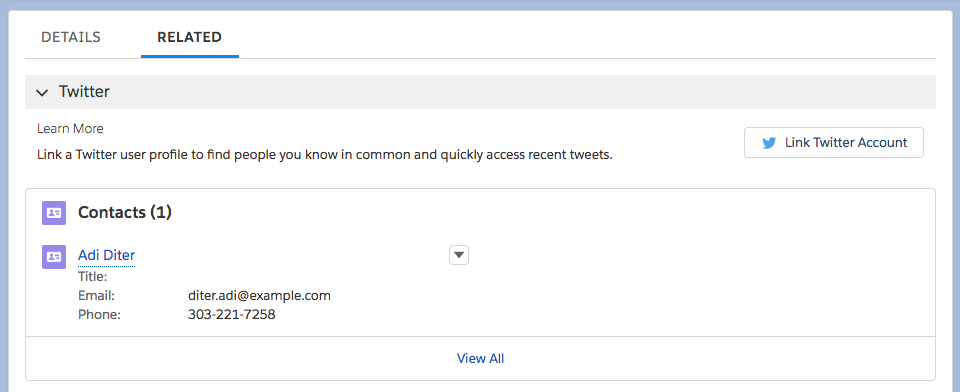
Related Tab
To the right of the Details tab is the Relate tab. Under this tab, is a list of other records, that relate to the current Company record. The Related tab is a good demonstration of the power of Propertybase as a CMS. Here you can cross-reference data and view relationships between separate objects. This allows you to quickly visualize the entire relationship a customer, or in this case company, has with your business.
For example, if the current Company has Contacts associated with it, you will see those here. You will also see Actions Plans, Referrals, Notes and any uploaded Files that relate to the current Company.
Activity
Want to quickly view all interactions you've had with a Company? Look no further than the Activity tab! This component shows you a list of all Calls, Tasks, Events and Showings that relate to the current Company. To create a new Activity, simply click the corresponding tab, fill out the required fields and click save.

|
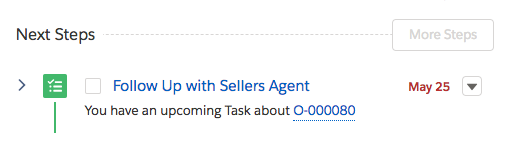
Viewing upcoming activity Once created, the new Activity will show up on the timeline below. Upcoming Activities will show up on top of the timeline, under Next Steps. |
|
|
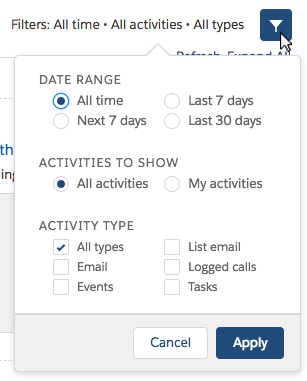
Filtering activity If the Activity list for a given Company is long, you can filter to show exactly the type(s) of Activity you want to see. To filter Activity, click the funnel icon next to the filter links. |
|
|
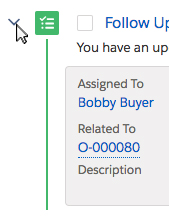
Showing activity details Clicking the arrow on the left side of any Activity will show additional details. |
|
|
Modifying activities Any Tasks that are past due will show the date text in red. To modify an Activity on the timeline, click the arrow next to the date. This will present a list of actions to perform on the current Activity. |

|
|
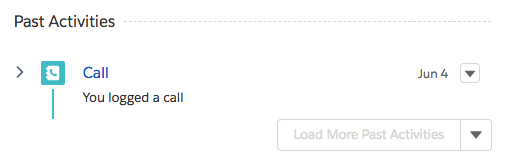
Viewing past activity Below Next Steps you will see Past Activities. These are all Activities that have already happened. Just like Activities under Next Steps you can use the left and right arrows to show more information and edit the activity respectively. |
|
This is Part 2 of 10 in our Propertybase Core Features series. We recommend you continue to follow along, in order, as we walk through the entire Propertybase process, in detail, from lead to close.
Propertybase Core Features: Table of Contents
- Contact Management
- Create & Manage Companies
- Sending Email with Quicksend
- Inquiry Management
- Listing Management
- Property Management (Coming Soon)
- Offer Management (Coming Soon)
- Closing Management (Coming Soon)
- Using Reports
- Using Dashboards
Next Up: Sending Email with Quicksend
Now that you've mastered Contact and Company management in Propertybase, it's time to learn more about commuincating with those customers. Propertybase includes a powerful emailing tool called Quicksend. Learning the features available to Quicksend will quickly take you from email joe to email pro.
Comments
0 comments
Article is closed for comments.