Core Feature: Listing Management Follow
Propertybase offers several powerful features for managing your Listings. These tools give you the power to automatically export Listings to your website and favorite real estate portals, find the perfect Listing using customer Inquiry data and more. When you use Propertybase to manage your Listings you will spend less time managing your inventory and more time closing deals. This article will cover all of the features available to Listings, the differences between Listings and Properties and some best practices for managing your inventory.
Table of Contents
Overview
In Propertybase, Listings are always based on Property data. If a Listing is created for a Property that doesn't exist in your account, a new Property record will be created. A Property record can be represented by different Listing records over time. When an attribute changes on a Property (renovations are made, etc.) then most likely, a new Listing record would be created to represent that.
Record Types
As you're most likely aware, selling a property and renting a property involve separate marketing strategies, closing processes and so on. Listings in Propertybase have two different record types: Rent and Sale. These two record types provide separate page layouts and unique fields respectively.
Unlike Contacts, due to their unique nature, you cannot change the record type of a Listing once it has been created. However, you can simply delete the current Listing and create a new one with the correct record type.
Syncing Data with Properties
As stated above, all Listing records have a corresponding Property record.
Data syncing between these two objects is helpful because it allows you to create new Listings quickly, without the need to type all the Property data each time. However, there may be situations where you don't want certain fields to populate from Property records to new Listing records; thankfully Propertybase has a setting for that.
Not sure how to add Settings to Propertybase? Click here.
Controlling data sync from Listings to Properties
The following setting will control data syncing for all fields that have the same name.
|
Setting Name & Key |
Setting Value |
|
listingToPropertySync_syncSameNames |
true or false |
Or you can add additional mapping between fields with different API field names
|
Setting Name & Key |
Setting Value (replace with your field names, so "listing_field_name__c": "property_field_name__c") |
|
listingToPropertySync_additionalMapping |
{ |
The following setting will blacklist specific fields from syncing data
|
Setting Name & Key |
Setting Value (Replace "Example__c" with Field Name) |
|
listingToPropertySync_blacklist |
[ |
Controlling data sync from Properties to Listings
The following setting will control data syncing for all fields that have the same name.
|
Setting Name & Key |
Setting Value |
|
propertyToListingSync_syncSameNames |
true or false |
Or you can add additional mapping between fields with different API field names
|
Setting Name & Key |
Setting Value (replace with your field names, so "property_field_name__c": "listing_field_name__c") |
|
propertyToListingSync_additionalMapping |
{ |
The following setting will blacklist specific fields from syncing data
|
Setting Name & Key |
Setting Value (Replace "Example__c" with Field Name) |
|
propertyToListingSync_blacklist |
[ |
Not sure how to look up the name of a field in Propertybase?
- From any Listing record, click the gear icon at the top of the page, then click Edit Object.
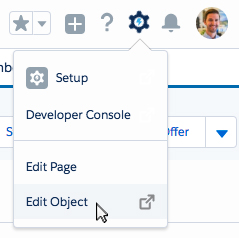
- From the menu on the left, click Fields & Relationships.

On the subsequent page, locate your field of choice and the field name will be located in the second column. In the example below, the field name for "Address" is highlighted.

Viewing Listings
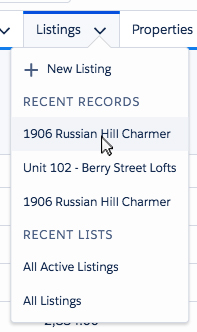
Listings can be viewed by clicking the Listings tab at the top of the page.

You can also access individual Listing records by clicking the drop down arrow.
List Views
When you click the Listings tab, you will be presented with a list of "Recently Viewed" Listings. Sometimes this view is empty. This happens if you haven't viewed a Listing recently. To select a different view, such as "All Listings", click the arrow next to the current view and select from the list (as shown below.)
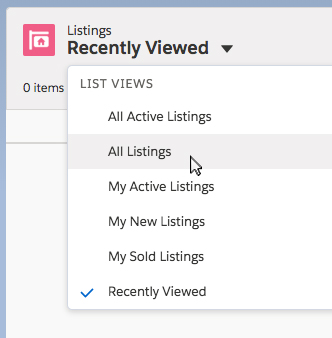
In Propertybase terms, these different views are called "List Views". Which is simply a list of records filtered by certain criteria. List Views are a powerful way to focus on certain customers and quickly make business decisions. Decisions like "How many active Listings do I have?", for example.
For more information on creating custom List Views, click here.
Saving Listing Favorites
New on v1.625 and higher we have added the option to save favorite listings! This allows users to Favorite Listings to be saved for later use. In order to start saving Favorites, you first must enable Favorites. To do that, follow the steps below:
First, you'll need to go to the Record Manager in the Control Center:
Here, you'll want to be in the Listing Manager tab at the top inside Record Manager:

Scroll down to the bottom and you'll see the Settings section and check the Enable Listing Favorites checkbox:

Followed by scrolling back to the top and clicking on Save changes:

Once that is done you can go to the Listing Manager:

Once there you'll see a new icon in the top right with a star indicating how many favorites you have saved:

Once you go through the Listings and check the box next to those you'd like to save as a Favorite:

You can go back up to the Star icon and Add to Favorites (you can also view your favorites list from here):
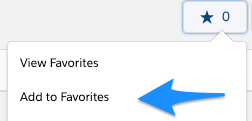
You'll see the number by the star icon change to the number of selected Favorites:

Here you can also clear out your Favorites list:

Or, if you'd like to remove some but not all of your Favorites you can deselect those that are unwanted and go back and select Add to Favorites again.
Now you're all set with your Favorites!
Creating a Listing
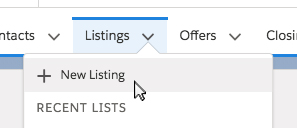
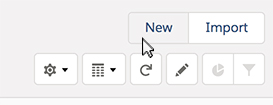
New Listings are created similarly to other objects in Propertybase; through the Listings tab or through the Listings List View page.
Table of Contents
Listing Details
Selecting a Listing will open the detail page. Below are the features available to Listings in Propertybase.
Actions
One of the first things you will see are Listings "actions" at the top of the page. Here you can perform a variety of actions based on the record selected.
|
Follow You can follow any record in Propertybase by clicking the Follow button. Once followed, any changes to this record will show up in your feed. Send Email Clicking this button will open a blank Quicksend message in a new window, with the opportunity to attach the current Listing. Edit Just what it sounds like! Clicking this button will allow you to edit the current Listing record. New Offer Clicking this button will start the creation of a New Offer for the current Listing record. New Closing Clicking this button will start the creation of a New Closing for the current Listing record. Start Action Plan Click this button to quickly create a blank Action Plan and the current Listing will automatically be listed as a related record. Create PDF This button will allow you to generate a PDF, for the current Listing, with the option to select a specific template. Email All Linked Contacts Clicking this button will open a new Quicksend message in a new window, addressed to all Linked Contacts for the current Listing record. (See "Related Tab" below for more information regarding Linked Contacts.) Matching Click this button to open Matching in a new window, with the current Listing's data loaded automatically. This will show you Contacts with Inquiry data that matches the current Listing. Click here to learn more about Matching. Delete Quickly delete the current Listing. Please read FAQ if you can''t delete a listing. |
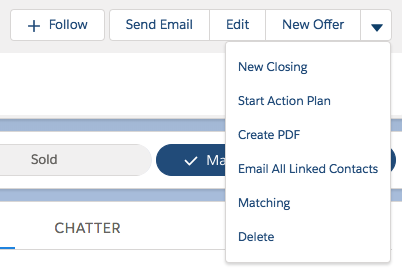
|
Header Details
To the left of the Actions described above is the Listing Header. In this area you will find some of the most useful and actionable Listing details. These details are conveniently positioned at the top of the page for quick reference.

Did you know you can modify the fields that appear here?
Follow the steps below to modify the Inquiry header details.
- Click the gear icon at the top of the page, next click Edit Object.

- On the left side of the screen, click Compact Layouts.

- Select Sales Compact Layout from the list of page layouts.
Note: To modify the compact layout for Rental Listings, select Rent Compact Layout.
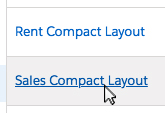
- On the next page, click Edit.
To modify Listing header details, use the "Add" and "Remove" arrow keys to move fields between "Available" and "Selected". You can change the order that fields appear using the "Top", "Up", "Down" and "Bottom" arrows on the right side.
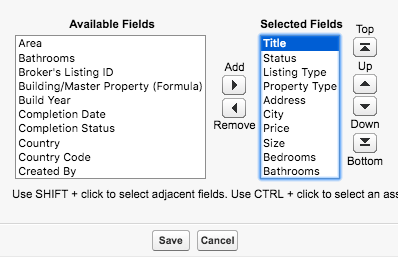
- Once finished, click Save.
Details Tab
Underneath the Header Details, is a series of tabs. The first tab, Details, displays additional Listing information for the current record. This includes everything from who owns the Listing, to details like listing and property type, city and more. In Propertybase terms, this information is contained in "fields".
Editing a Field
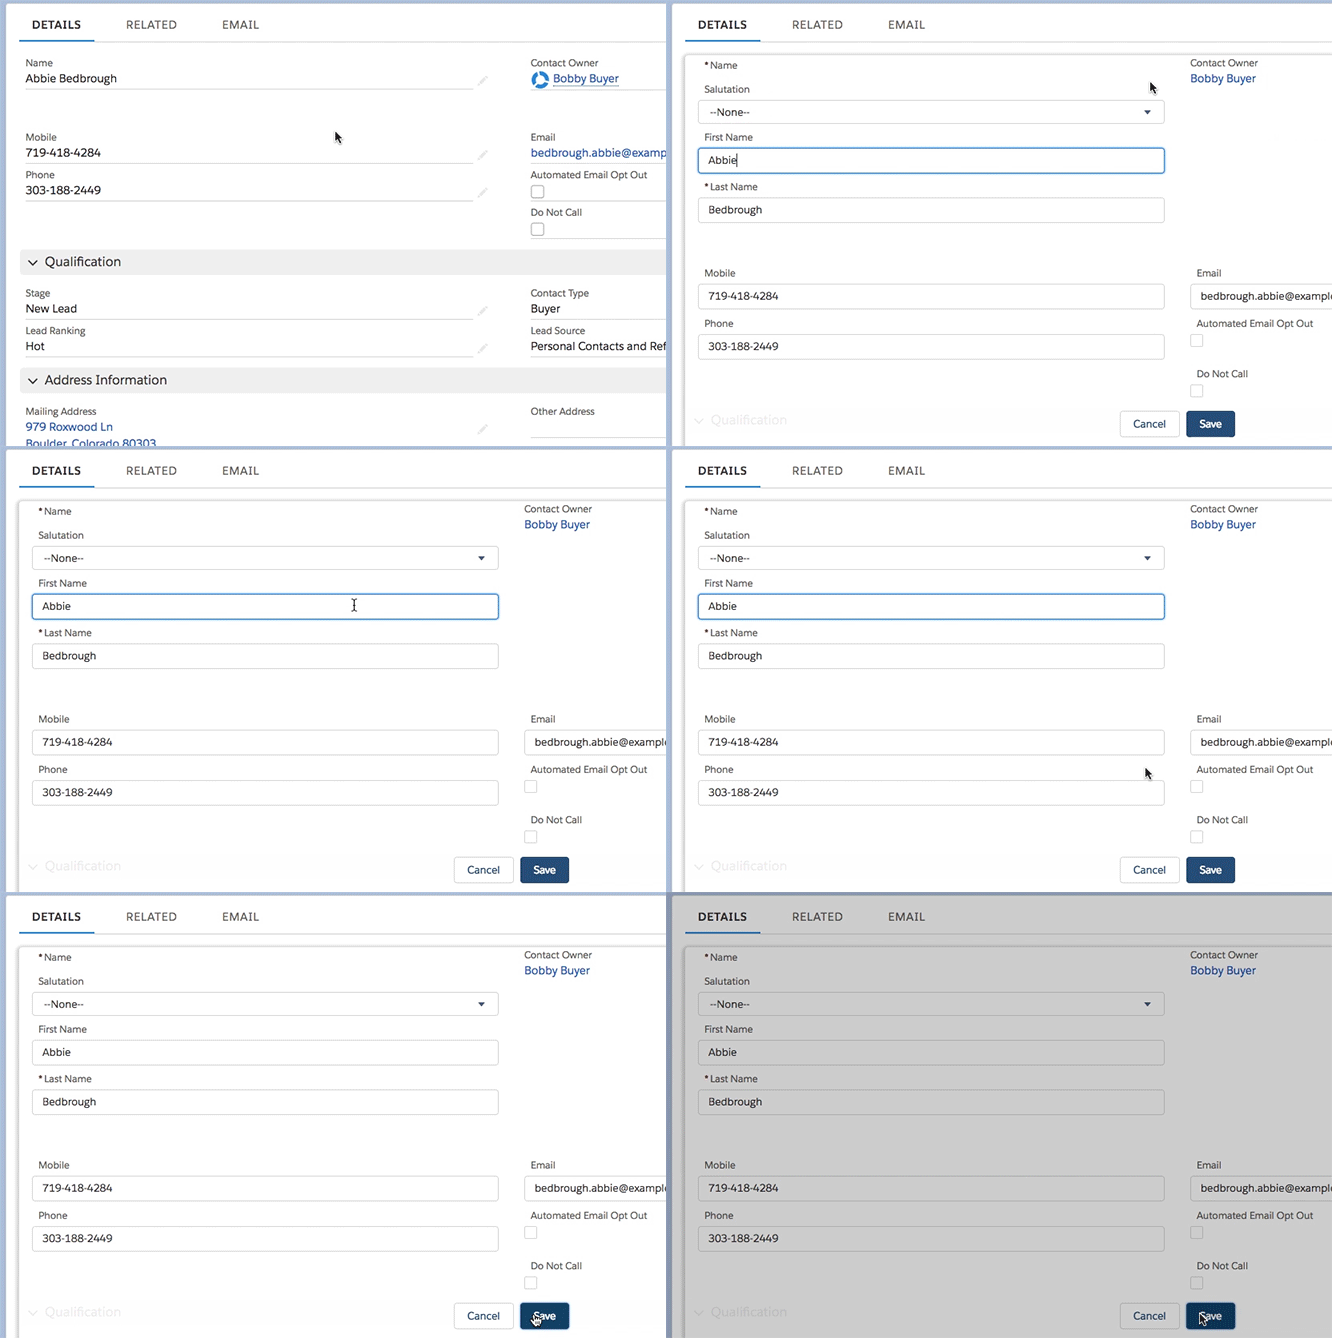
You can edit any field by clicking the "pencil" icon to the right. Once you are done editing, click the Save button at the bottom of the screen. This is shown in the animation below. (You can also edit multiple fields by clicking the Edit button in the top right corner of the screen. See the "Actions" section above for more details.)
Note: Below is a Contact record, however editing a field is the same for all records in Propertybase.
Related Tab
To the right of the Details tab is the Related tab. Under this tab, is a list of other records that relate to the current Listing record. The Related tab is a great example of the power of Propertybase. Here you can cross-reference data and view relationships between separate objects. This allows you to quickly visualize the entire relationship a customer has with your business.
For example, if the current Listing has received any offers you will see those offers listed here (under "Offers"), as well as buyer feedback (under "Linked To") just to name a few of the records available here.

Did you know you can modify the columns that appear here?
Follow the steps below to modify the columns shown for related records.
- Click the gear icon at the top of the page, next click Edit Object.

- On the left side of the screen, click Page Layouts.

- Select Rent or Sale from the list of page layouts. (This depends on the record type you want to edit.)

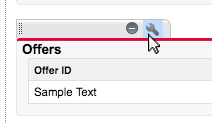
- Click the wrench icon next to the related object you want to edit.
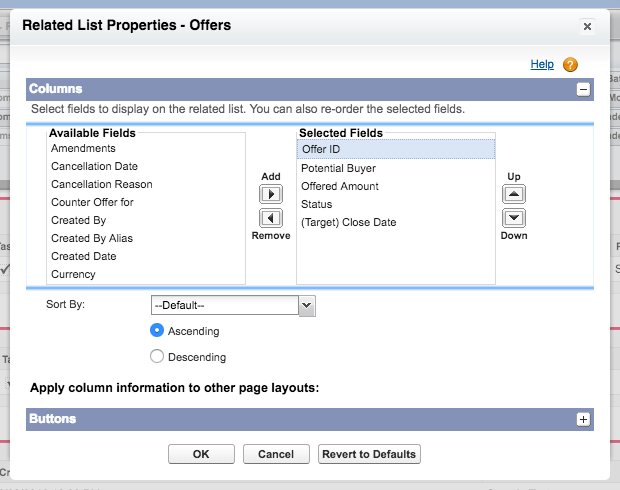
On the following screen you can use the arrow buttons to add or remove fields (left and right arrows) and reorder fields (up and down arrows.) You can also modify the sort order using the Sort By picklist. When you are done making changes, click the OK button.
Images and Media Tab
To the right of the Related tab is the Images and Media tab.
As the name implies, this is where all images and media for a given Listing can be accessed. The images here are used by Propertybase when displaying Listings internally, as well as on external real estate portals (if applicable.)
Click here to learn more about Images and Media.
Matching Tab
To the right of the Images and Media tab is the Matching tab.
Matching is a powerful Propertybase feature that allows you to match Contacts to Listings. Using Inquiry data, Propertybase is able to search your Listing inventory and find Contacts with preferences that "match". Matching also lets you create related records so that you can save those relationships. You can also print out a PDF list of matching Contacts, as well as email them the current Listing through Quicksend.
Click here to learn more about Matching.
Email Tab
To the right of the Matching tab is the Email tab. This tab contains Propertybase's emailing feature, Quicksend. Quicksend is a robust emailing tool unique to Propertybase. Quicksend allows you to quickly email multiple Contacts, draft messages using templates and merge fields, as well as attach Listings and files.
Click here to learn more about Quicksend.
Activity
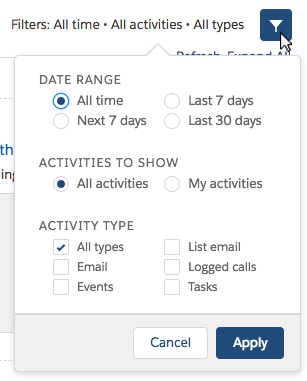
Want to quickly view all previous interactions with an Listing? Look no further than the Activity tab! This component shows you a list of all Calls, Tasks, Events and Showings that relate to the current Listing. To create a new Activity, simply click the corresponding tab, fill out the required fields and click save.

FAQs
Deleting Listings
When you tried deleting a listing you noticed that you can also delete the property:

The option to delete the Property at the same time while deleting a listing is only available when there is only one listing related to the property. If there are others, the option will be greyed out.
In some cases you will receive a Custom Validation error message like this one when trying to delete a listing:
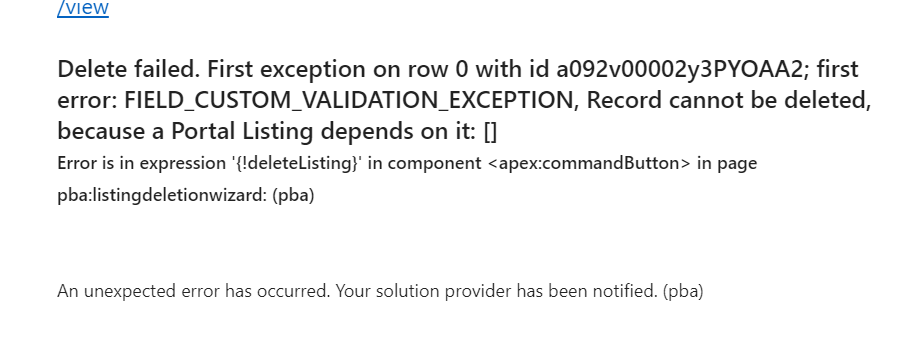
This means this listing has already been published at least once to a portal feed and may no longer be deleted. This is common practice as it also allows to track the history of a publication and lots of clients don't wish that something can be deleted that ever was on a portal for documentation purposes, costs of portals, etc.. Furthermore it creates big issues with portals if the connection between the listing and their publication is broken.
DO NOT DELETE LISTINGS OR THEIR PORTAL-LISTINGS IF THE LISTING WAS PUBLISHED!
Only perform this for test/demo listings on test portal feeds or feeds you are not using. Once it is gone there is almost nothing we can do to remove an orphaned portal-listing from a feed.
Should you, nevertheless, need to delete a listing, this is how:
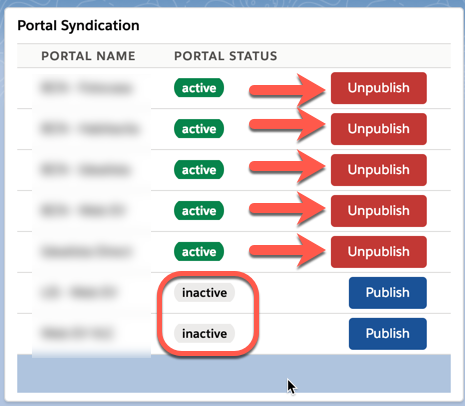
To stop users from disconnecting the connection of a listing to a portal, you can only delete a listing once it is not active anymore. This means, you need to unpublish the listing from all portals, then delete all entries on "Listed on these Portals". Once all so-called portal listings on the listing have been deleted, you can delete the listing.
1. unpublish the listing from all portals (deactivate) in Portal Syndication:
2. delete all portal listings that you find on the "Related" tab under "Listed on these portals":

3. Now you can go ahead deleting the listing
This is Part 5 of 10 in our Propertybase Core Features series. We recommend you continue to follow along, in order, as we walk through the entire Propertybase process, in detail, from lead to close.
Propertybase Core Features: Table of Contents
- Contact Management
- Create & Manage Companies
- Sending Email with Quicksend
- Inquiry Management
- Listing Management
- Property Management (Coming Soon)
- Offer Management (Coming Soon)
- Closing Management (Coming Soon)
- Using Reports
- Using Dashboards





Comments
0 comments
Article is closed for comments.