Import Part 3: Importing Listings and Custom Objects Follow
Importing your listings and custom objects into Propertybase is made simple with the Import Wizard. The first part of this process is to prepare your CSV file with all the necessary data. For steps on creating a custom CSV file, check out Prepare CSV for Import: Import Wizard. To import custom objects you need to be a PB Administrator.
One detail that must be discussed, is that you can only import one record type at a time with the custom object import wizard. Make sure to have more than one file if you have both Rent and Sale listings.
To start the process of import go to: Setup/ Data Management/ Import Custom Objects
Step 1 & 2 of 8: Click 'Start the Import Wizard!' to begin the process for import. The first window that appears will ask you to select the custom object you wish to import into, in this case we will select 'Listings'. The next step will ask, if you would like to prevent duplicates. If all data has been properly cleaned up in your CSV and all records are new select 'NO'. Otherwise make sure that your data is completely accurate as selecting 'yes' can cause some records not to be imported, and treated like duplicates. In the next step the mapping process begins. Mapping your fields consists of matching the headers of the columns in your CSV file, with the fields found in Propertybase. This will add all of the data found in that column to the correct field in Propertybase.

Step 3 & 4 of 8: You will need to specify relationships in this step. Make sure that you choose the default 'Name' for designators and select additional lookup fields that will be imported. As an extra note: Make sure your lookup field values are identical to the record names already in Propertybase. Step four will prompt you to select how you will match your additional lookup fields. Select Title.
Step 5 of 8: Record type selection will be done in this step.

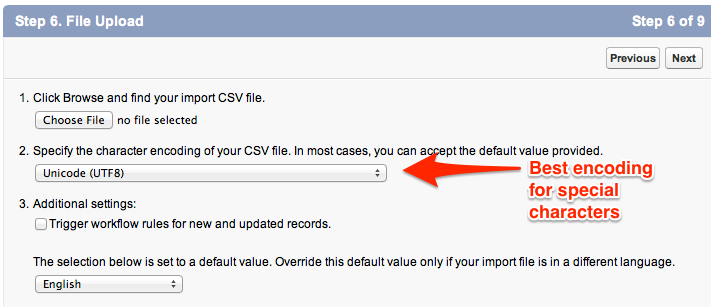
Step 6 of 8: Will prompt you to upload your CSV file and select the encoding for character recognition. It is strongly recommended that you use Unicode (UTF8), because this encoding supports the majority of the special characters out there (é,ñ,ü, etc.). Make sure you leave the default value of 'Name' in 3. and 4. so that the headers of your CSV file are recognized by the system.

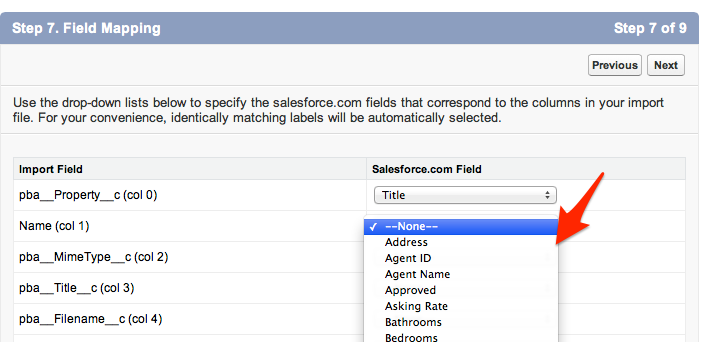
Step 7 of 8: In this step you will begin to map all of your custom object fields. Make sure that all fields are correctly mapped. If the owner is not specified it will be set to the user currently performing the import. If currency is not specified it will be set to the default value in your settings.

Step 8 of 8: This step informs you if any of your fields were not mapped. From here, you can make sure that all of your mappings are correct, and click the 'Import Now' button to begin the import process.
Depending on the size of the import, the import time may vary. You can keep track of the progress of your import by going to the 'Monitoring' section of the Setup. Once the process is complete you can go into your Contacts tab and find all successfully imported records.


Comments
0 comments
Please sign in to leave a comment.