

Using Drip Campaigns Follow

In Propertybase version 1.474, we've added Drip Campaign functionality to all Contact record pages. Drip Campaigns sometimes referred to by other names—automated email campaigns, email automation, autoresponders—are a set of emails that are automatically sent out on a schedule. This powerful new feature allows you to engage your leads, without having to manually write follow up emails each time. With Drip Campaigns you decide how many emails you want to send, what those emails should say and at what interval they should be sent - Propertybase does the rest. When your contact responds, simply pause or stop the campaign.
How do I know if I've configured Drip Campaigns?
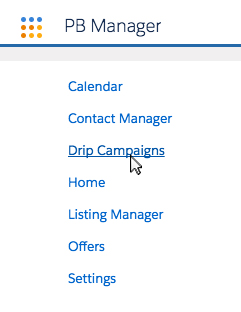
- Click the app launcher and select Drip Campaigns in the list of applications.
- If you see the "Email Automation Is Inactive" message, you do not have drip campaigns configured.

Click here to configure Drip Campaigns in your Propertybase account.
Note: Drip Campaigns make use of a branded email signature. Learn more about signatures here.
Defining Drip Campaign Content
The first step in setting up a Drip Campaign is defining all messaging that will be part of the campaign. Before we get started, decide how many emails you want to send. For example, you might want to send one introductory email immediately and then five follow up emails over a period of time.
After you have defined the messaging content for your Drip Campaign, we can enter that into Propertybase through the Template Editor.
Note: If you do not want to write your own, click here to import default Drip Emails for residential clients written by Propertybase. If so, skip the instructions below and move to the next tab on this page (creating templates.)
- Click the app launcher in the top left of the page.
- Click Control Center.
- Click Marketing Center.
- Click Quicktext Editor.
- Next click New Quicktext in the top right.
In this example, we are going to set up an introductory email that will be sent out immediately, followed by four follow up emails over a period of time. Please modify these emails to suit your specific needs.
(Note: You can use the Merge Fields button to search for and select specific merge fields.)
- Copy the data from the table below.
Click here to expand table data
| Template Name | Subject | Collection | Content |
| Introductory Email | Hello from the number one real estate agency in the {{user.city}} area! | Drip | {% if contact.firstname %}Dear {{contact.firstname}}{% else %}Dear New Client{% endif %}, Thank you for your interest and welcome to my agency! I am glad you chose to work with me and I look forward to working with you on finding the home of your dreams. I run a full-services agency that values, markets, sells and rents real estate. I am positive that with my expertise and resources I will exceed your expectations. Do not hesitate to give me a call at {{user.phone}} about any question(s) you might have! Best, {{user.name}} |
- Click Validate & Save at the bottom of the page.
- Create additional quicktext templates based on the remaining table data below.
Click here to expand table data
| Template Name | Subject | Collection | Content |
| Establish Expectations | Getting you the information you need to make an informed real estate buying decisions. | Drip | {% if contact.firstname %}Dear {{contact.firstname}}{% else %}Dear New Client{% endif %}, Over the next few days you can expect to receive several emails from me, including this one. These emails will provide information regarding the current state of the real estate market and which properties might suit your needs. If you find any of these listings suitable please give me a call at {{user.phone}} to schedule a tour. Please review the listings on my website http://www.propertybase.com as well. Kind regards, {{user.name}} |
| Content Email | Updates on the real estate market in the {{user.city}} area. | Drip | {% if contact.firstname %}Dear {{contact.firstname}}{% else %}Dear New Client{% endif %}, According to the National Association of Realtors, the median sale price for previously-owned homes nationally was $244,800 - this is up 6 percent from the previous year. It has also been noted that home-owners are holding onto their homes longer than they once did. Many investors who bought homes during the recession are currently earning rental income - and are in no rush to sell. Meanwhile, other owners can't sell their houses because they remain underwater on their mortgages. That being said, we are currently experiencing a seller's market. Because of this having a good real estate agent on your side that can advise and guide you through these developments is key. If you have any questions about current market development in your area, please give me a call at {{user.phone}} or simply reply to this email. Sincerely, {{user.name}} |
| Information Gathering | Please provide me with inquiry information so I can provide possible listings to you. | Drip | {% if contact.firstname %}Hi {{contact.firstname}}{% else %}Dear New Client{% endif %}, In order to best serve you, would you mind providing me with answers to the following questions? What neighborhood(s) do you prefer? How many bed and bathrooms are you looking for? What is your maximum price range? Providing answers to these questions will help me narrow down possible listings for you. Please call me directly at {{user.phone}} or simply reply to this email. Best regards, {{user.name}} |
| Testimonial Email | Recent testimonials regarding my agency and the services I provide. | Drip | {% if contact.firstname %}Dear {{contact.firstname}}{% else %}Dear New Client{% endif %}, I wanted to provide you with tesimonials from a two of my previous clients. "I have bought with {{user.name}} three times now! The fact that I'm a return client is a great indicator of the level of service and commitment of {{user.name}}. As always, my newest purchase was smooth and absolutely excellent. Thanks for everything!" Jason “{{user.name}} was great to work with while buying a condo in {{user.city}}. {{user.name}} is knowledgeable and very professional. I appreciate that {{user.name}} took the time to listen to my concerns and answer all my questions. Thank you!" Jennifer I hope that someday I have the opportunity to include your testimonial alongside these. You can find more on my website. Please call me directly at {{user.phone}} or reply to this email if you have any questions. Look forward to serving you soon, {{user.name}} |
| I haven't heard from you | {% if contact.firstname %}Hi {{contact.firstname}}{% else %}Dear New Client{% endif %}, I have yet to hear back from you. Please contact me. | Drip | {% if contact.firstname %}Hi {{contact.firstname}}{% else %}Dear New Client{% endif %}, Unfortunately, I have not yet heard from you. I look forward to the opportunity to serve you and help you find the perfect home. Please call me directly at {{user.phone}} or reply to this email if you have any questions. Best regards, {{user.name}} |
Now that we've created content for our drip campaign we are ready to create our drip campaign template.
Creating a Drip Campaign Template
At the heart of the Drip Campaign functionality is the Drip Campaign Template object. This object tells Propertybase everything it needs to know to successfully deliver your drip campaign. You can access this object through the app launcher.
- Click the app launcher in the top left of the page.
- Click Drip Campaign Templates.
- Click New in the top right corner.
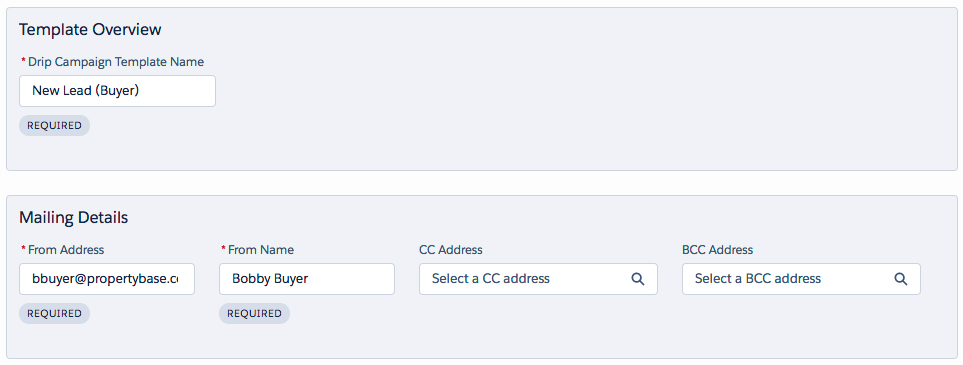
On the New Drip Campaign Template page, we need to define several fields to set up and complete our Drip Campaign.
The following fields are required:
- Drip Campaign Template Name
- From Address
- From Name
- Drip Email Template Name(s)
The following fields are optional: CC Address, BCC Address
- Fill out the Drip Campaign Template page using the image below as a guide, but please modify to your personal needs.

- Remember to select a Layout for your Drip Campaign.
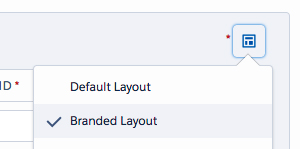
- Click Save.
Table of Contents
Starting a Drip Campaign
Once you have a Drip Campaign Template defined, you can start a new Drip Campaign from any Contact record.
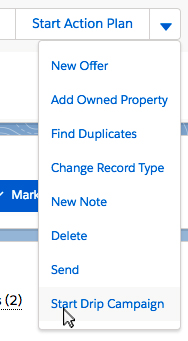
- Open any Contact record and using the actions menu, select Start Drip Campaign.
- Select the Drip Campaign Template we created in the previous section.
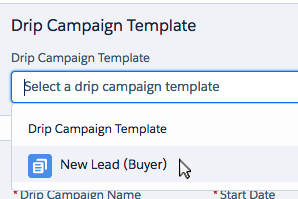
All related information will be automatically filled, based on the information contained in the Drip Campaign Template.
- Click Start when you are ready to send your campaign.
Deleting a Drip Campaign
Once your contact has responded or if you simply want to cancel a campaign, doing so is easy.
- Click the app launcher in the top left of the page.
- Click Drip Campaigns.
- Select the Drip Campaign that you would like to cancel.
- Scroll to the bottom of the page and click Delete.

Automating Drip Campaigns
With the release of Propertybase 1.551 it's now possible to automate drip campaigns. In the steps below, we walk through this new feature. Not familiar with Drip Campaigns in Propertybase? Click here to learn the basics.
Note: Make sure you have configured Drip Campaigns before setting up automations. Learn more.
In the steps below, we configure an automation that will start a drip campaign for all new leads. When setting up an automated drip campaign, the first step is to create a drip campaign template. Once you have created a drip campaign template, follow the steps below.
- First, copy the drip campaign template ID.
The template ID can be found at the top of the page, in the address bar, as shown in the image below.

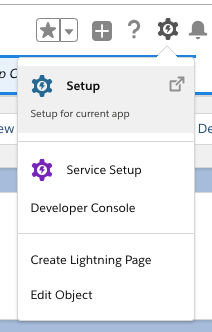
Once you have copied the template ID, it's time to build the automation. To begin, open process builder.
- Click the gear icon at the top of the screen, then click Setup.
- In the menu on the left side of the page, click Process Builder.

- Click New in the top right corner of the screen.

- Enter a name and description and for "process starts when", select "A record changes".
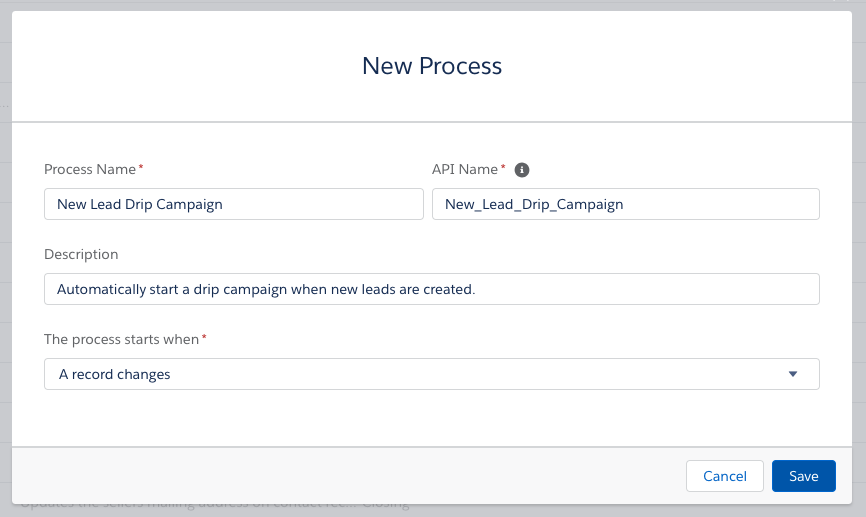
- Click Save.

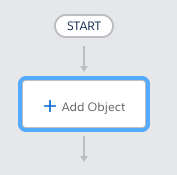
- Click Add Object.
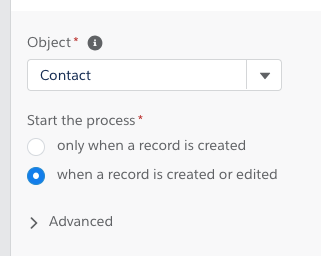
- Select the Contact object and for process start, select when a record is created or edited.
- Click Save.
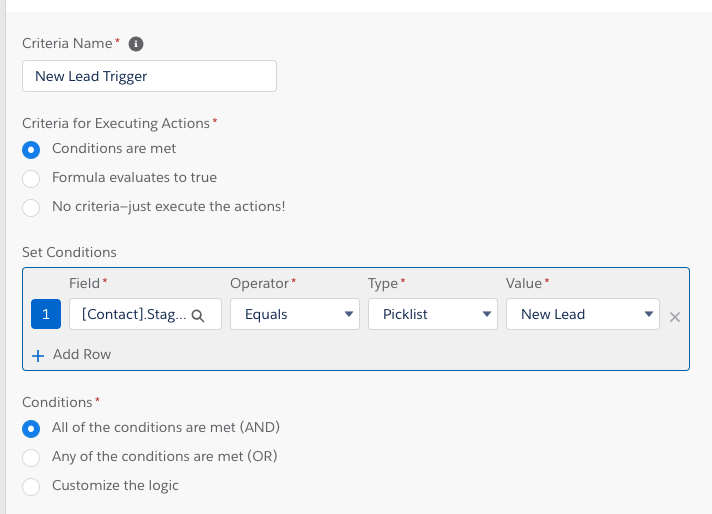
- Next, click Add Criteria.
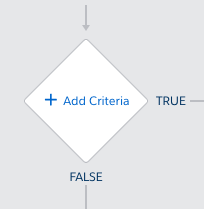
- For criteria, copy the information shown in the image below.
- Click Save.
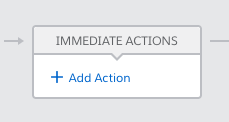
Now that we've defined the object and criteria for our automation, it's time to add our action. This is where we add our drip campaign template ID. (The template ID should still be copied from the first step above.)
- Next to the criteria we just created, click Add Action.
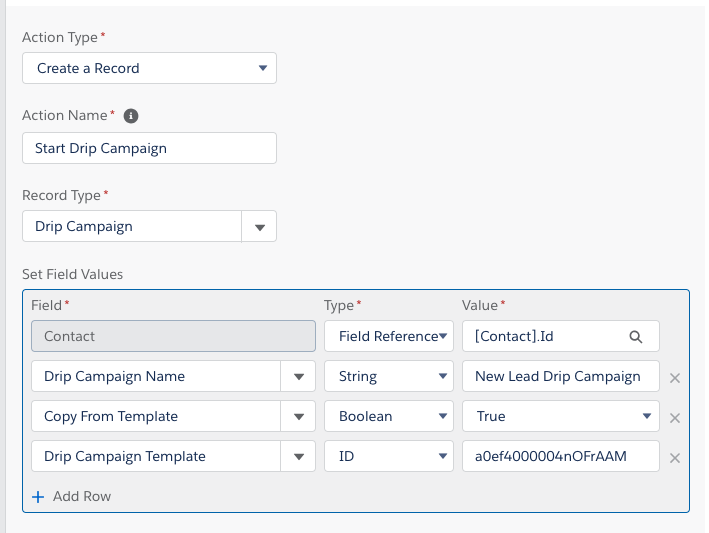
- For the action, copy the information shown in the image below.
- Click Save.
Note: For template ID, paste the ID copied at the beginning of this article.
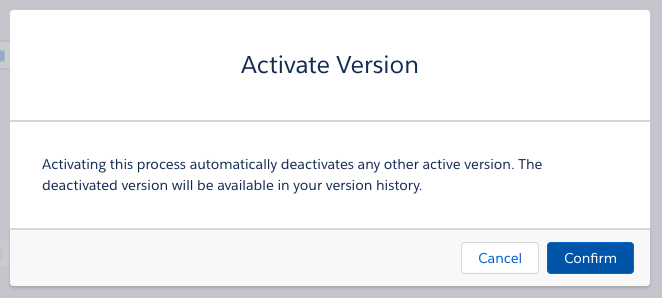
- Click Activate in the top right corner of the screen.
- When prompted, click Confirm.
Nice work! You have successfully built an automated drip campaign that will send to all new contacts with a stage value of new lead. You can stop this automation by clicking the "Deactivate" button on the process screen. Alternatively, you can stop drip campaigns one at a time. To learn more, click the "Start or Stop Drip Campaigns" tab at the top of this page.
Table of Contents
- Start by Contact Date
- Sending to Multiple Contacts
- Sending multiple emails on specific dates
- Email Tracking (Coming Soon)
Start by Contact Date
Accounts on the latest version of Propertybase have access to multiple send options. In addition to the default "send using a specific date" it's also possible to send using Contact date field values. This allows users to send Drip Campaigns based on date fields relative to the recipient. For example: using the "Birthdate" field a user could configure a Drip Campaign to send a Happy Birthday message to multiple Contacts, all on their respective birthdays. We have also added a new option for "Sending emails on specific dates" that will allow you to send multiple emails on different dates.
- To send based on a Contact date field, select "Using a contact related date field" under Start Date.
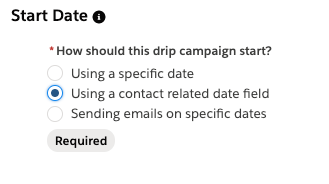
- Next, select a date field using the picklist on the right side of the screen.

Sending to Multiple Contacts and On Behalf Of
In addition to using Contact related date fields, Propertybase accounts on the latest version can also send Drip Campaigns to multiple Contacts. Combining these two features turns Drip Campaigns into very powerful marketing features.
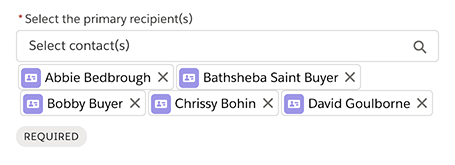
Note: When sending to multiple contacts, the recipient limit is 30.
- To send to multiple Contacts, select more than one Contact under Recipient Details.
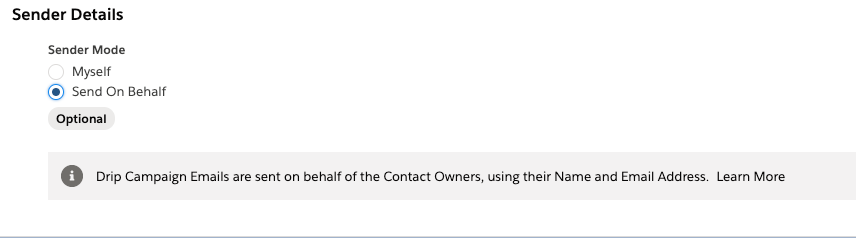
- To send On Behalf Of a Contact Owner, select Send On Behalf Of in the Sender Details section.
Sending emails on specific dates
In addition to using Contact related date fields and starting a drip campaign on a specific date, Propertybase accounts on the latest version can also send emails on specific dates. Combining all three of these features turns Drip Campaigns into very powerful marketing features.
- To send emails on specific dates select the radio button:
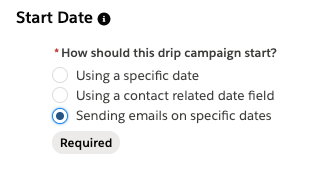
Once this is done you can go to the Configure Drip Emails section below and enter the required information.

You can add multiple emails at one time by selecting the Add New Email button at the bottom and entering each required field for the subsequent emails you wish to be sent.
Email Tracking
Unfortunately, this is not available yet. This is in the product roadmap to add this feature.
Comments
0 comments
Article is closed for comments.