How to populate the broker's listing ID for listings Follow
If you want to have an automatically filled field, it´s just a few clicks to have this generated:
1. Create an Autonumber field on the listing object:
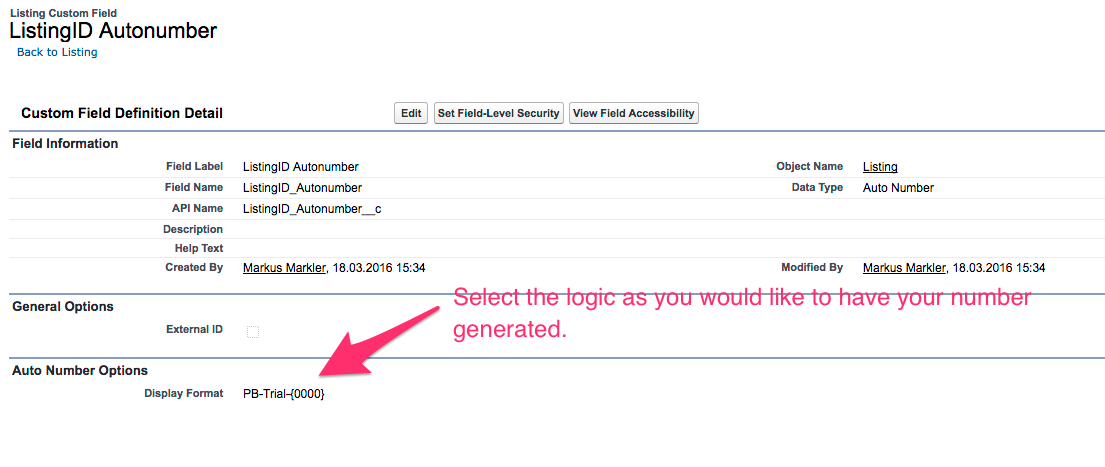
To make sure that this is working for all listing, we recommend to check "Generate Auto Number for existing records" during the field creation.
2. Create a new workflow rule which triggers if the field is not filled yet:
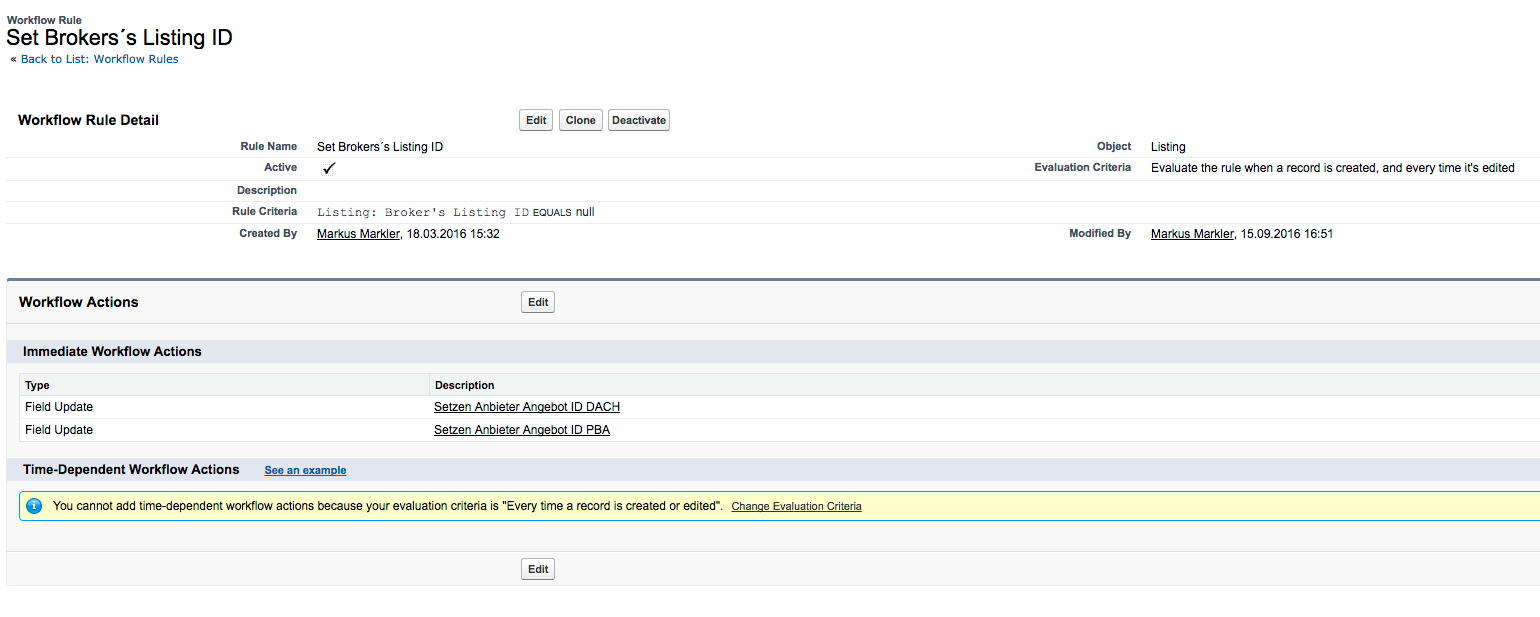
Depending which Propertybase field packages are installed in your ORG you need to create a field update for all broker´s listing ID fields (in this example there are two).
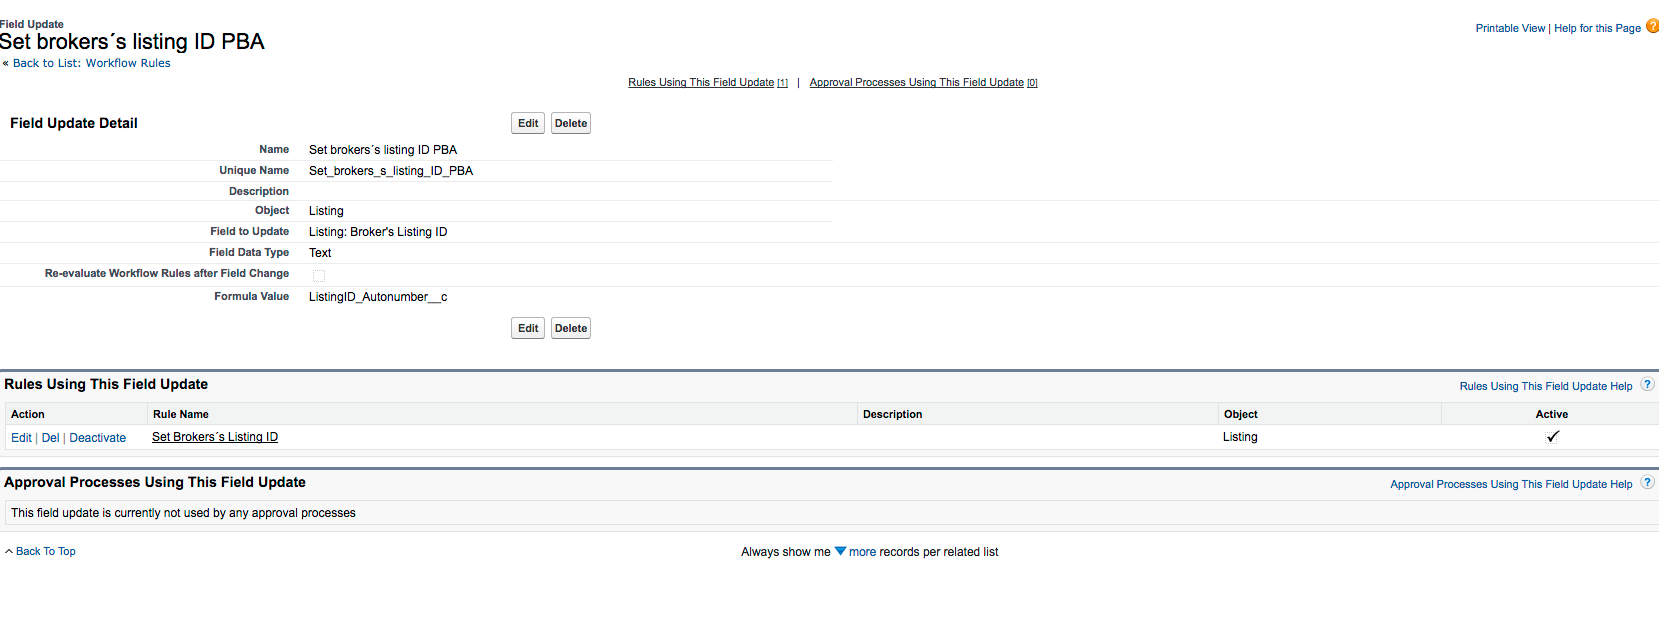
Do not forget to activate the rule and whenever you save now a listing where the broker´s listing ID field is not filled, it will be filled with your autonumber.
In this section we will show you how to populate Broker's Listing ID with a Process Builder Rule. This will also allow you to also add different initials to the ID and showing it on the Broker's Listing ID field. This can be helpful, if you want to differentiate e.g. between different offices or teams (sale & rent).
1. Create an Autonumber field on the listing object:
Note: In below image we used "PB-Trial-{0000}" which will generate the autonumber already with this prefix "PB-Trial". If you plan on using dynamic prefixes, perhaps only add a number combo (examples are given in the autonumber field creation wizard). If unsure, try it out, you can always delete the field and create a new one and update your process rule (further below) later at as needed.

To make sure that this is working for all listing, we recommend to check "Generate Auto Number for existing records" during the field creation. Note: the next steps populate the autonumber to "Broker's Listing ID" on listing creation only. Existing records will not receive that unless you amend the rule accordingly. For beginners, we recommend leaving it at that until the full process is understood.
2. Switch to "Process Builder" by going to Setup > Process Builder
3. Create a new Process and name it "Set Broker's Listing ID" and run it when a record changes.
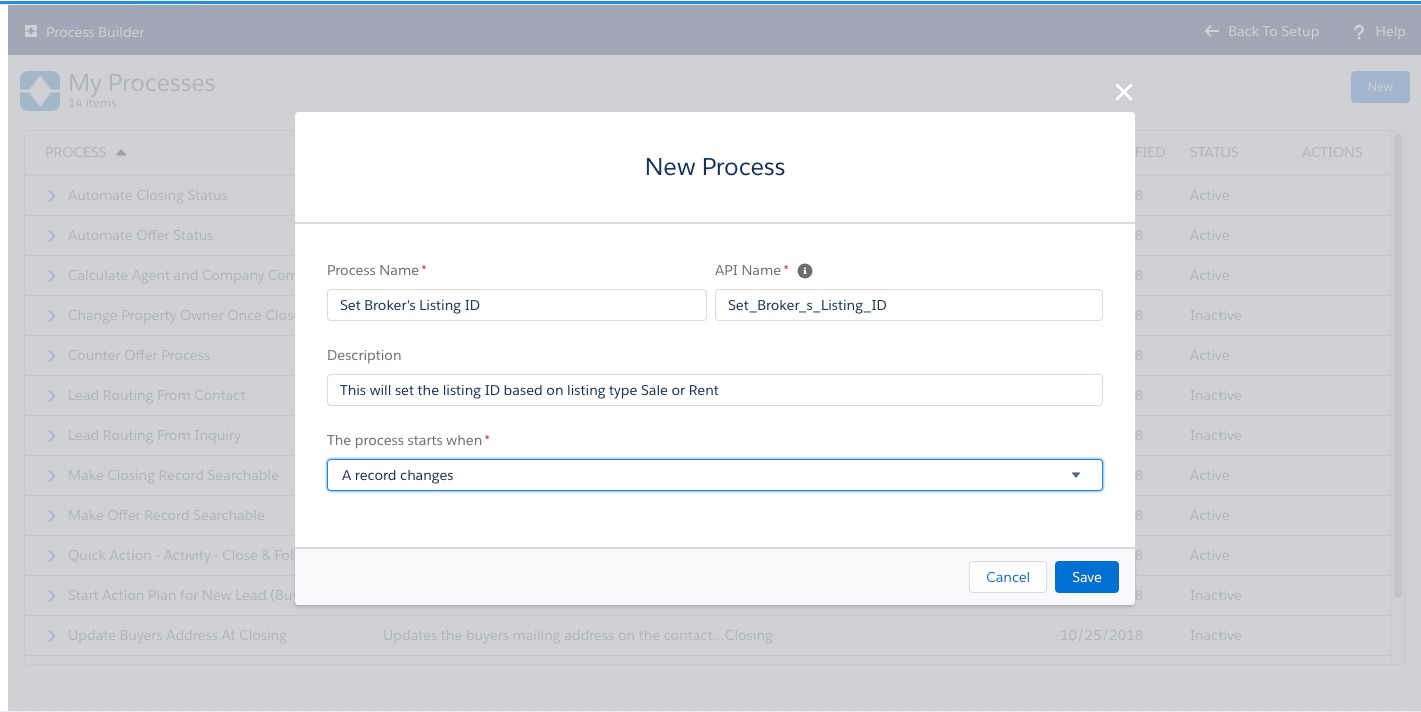
4. Set the object "Listing" and run it "only when a record is created". Save and go to +Add Criteria
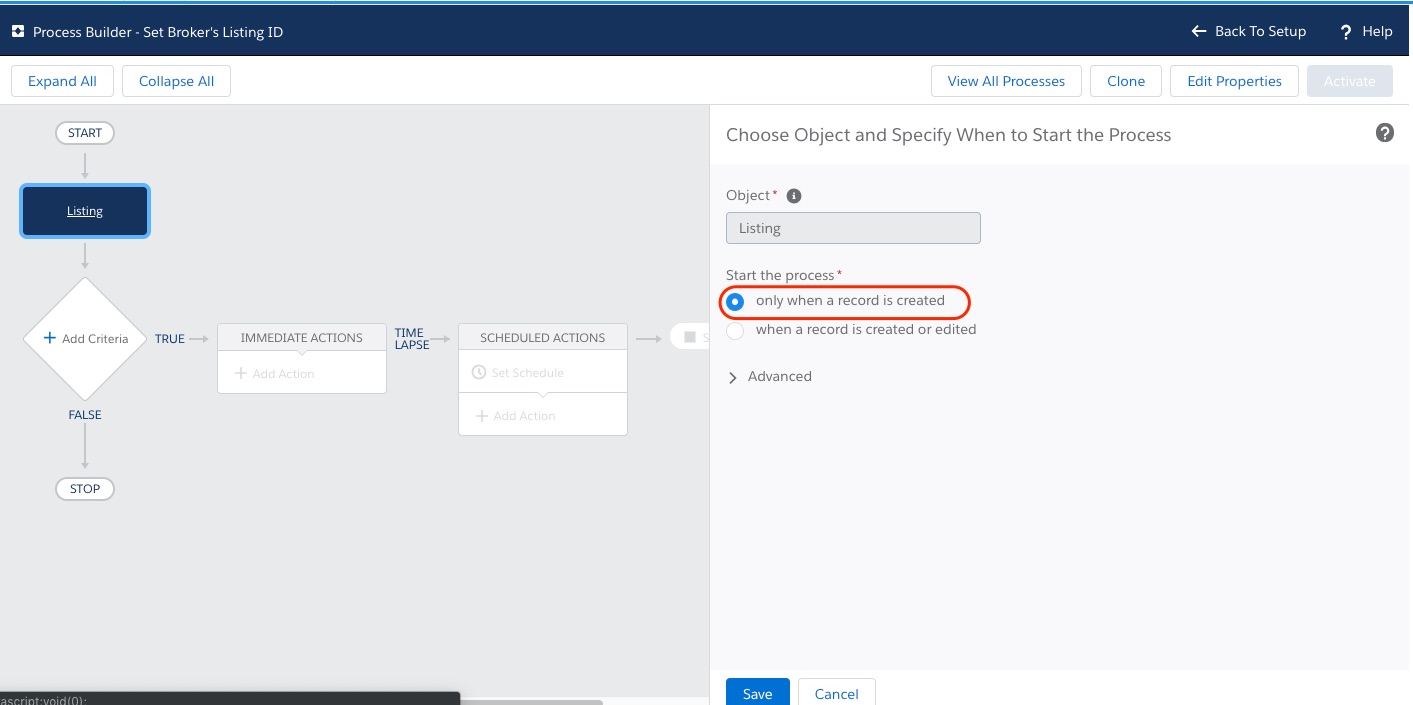
5. In a basic setup, so if you do not switch initials, you will simply either use what you defined in the autonumber field or you can simply set it in the action. Then no criteria is required. In that case choose, "No criteria—just execute the actions!", save and continue at number 7.
6. If you want to differentiate between teams or offices and have different initials, you will need the criteria that defines those. That can either be the user belonging to a certain role or public group or simply the user or the location of the listing or the listing type or a combination of the foregoing. In this example, we will explain how to separate between a Sale and a Rent team and give the listings IDs based on that. If you want to do a combination, please simply add your criteria to check for as needed.
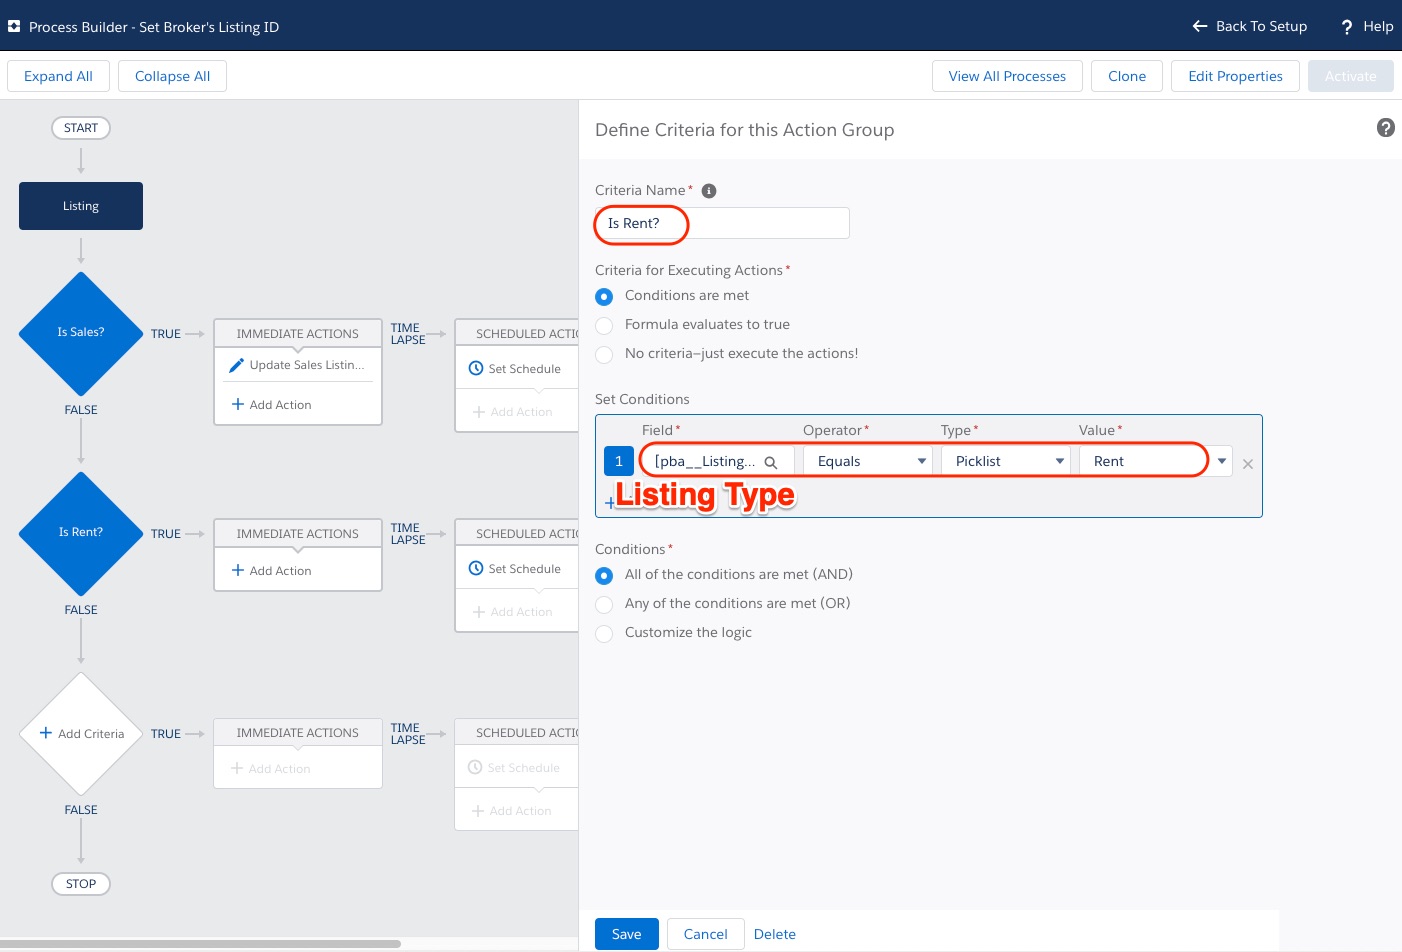
In the first criteria node add "Is Sales" as criteria name and set conditions to check on the field "Listing Type" for the value to equal "Sale".
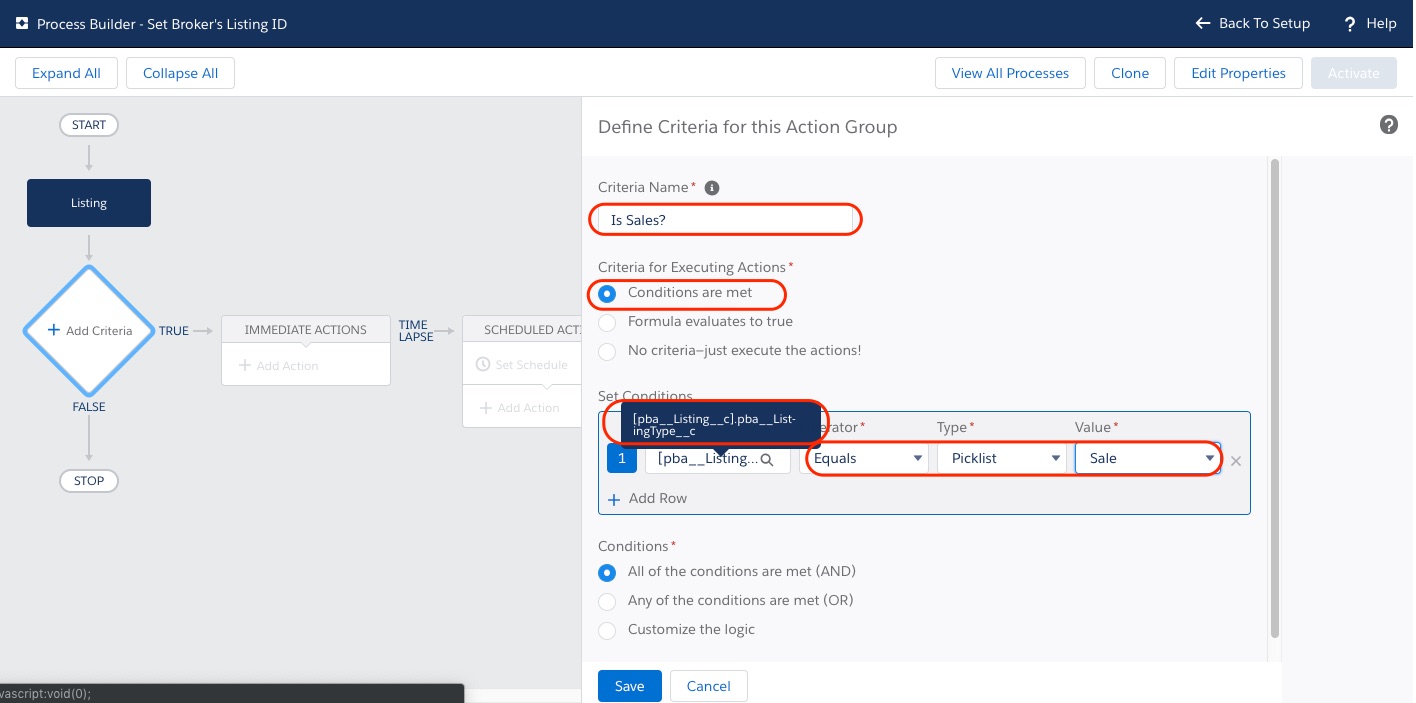
Save that (or add more rows of criteria to check).
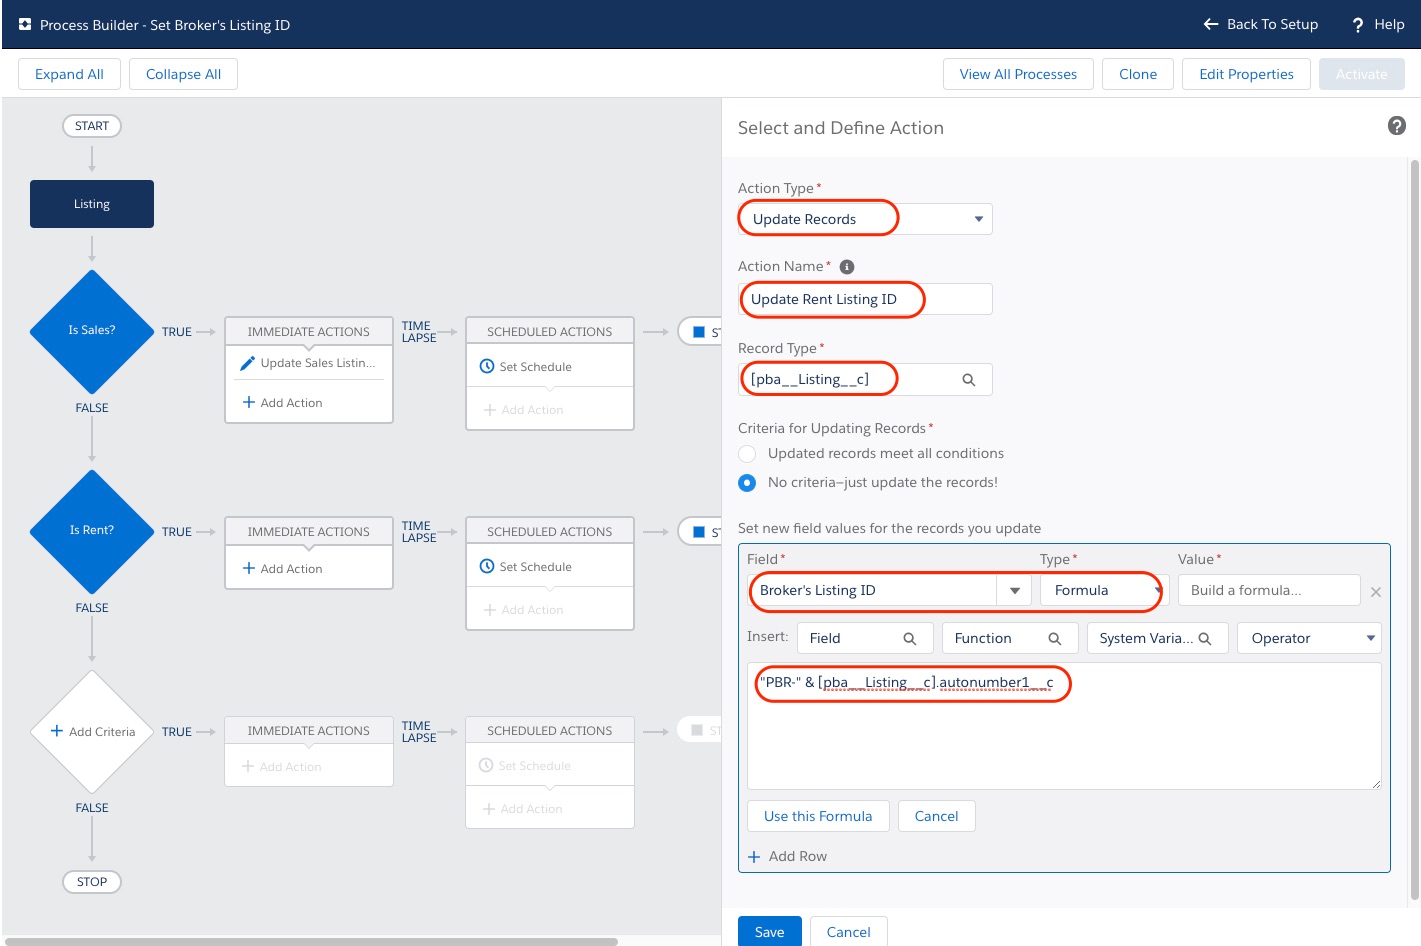
7. Go to +Add Action. Add an action to "Update Records", give it a name like "Update Sales Listing ID" and "Select the pba__Listing__c record that started your process" for "Record Type".
Then add the actual update on your "Broker's Listing ID" field:
- if you have the initials in your autonumber field (or don't need them), simply do a field reference against the Broker's Listing ID. Once you did this, save and go to point 9.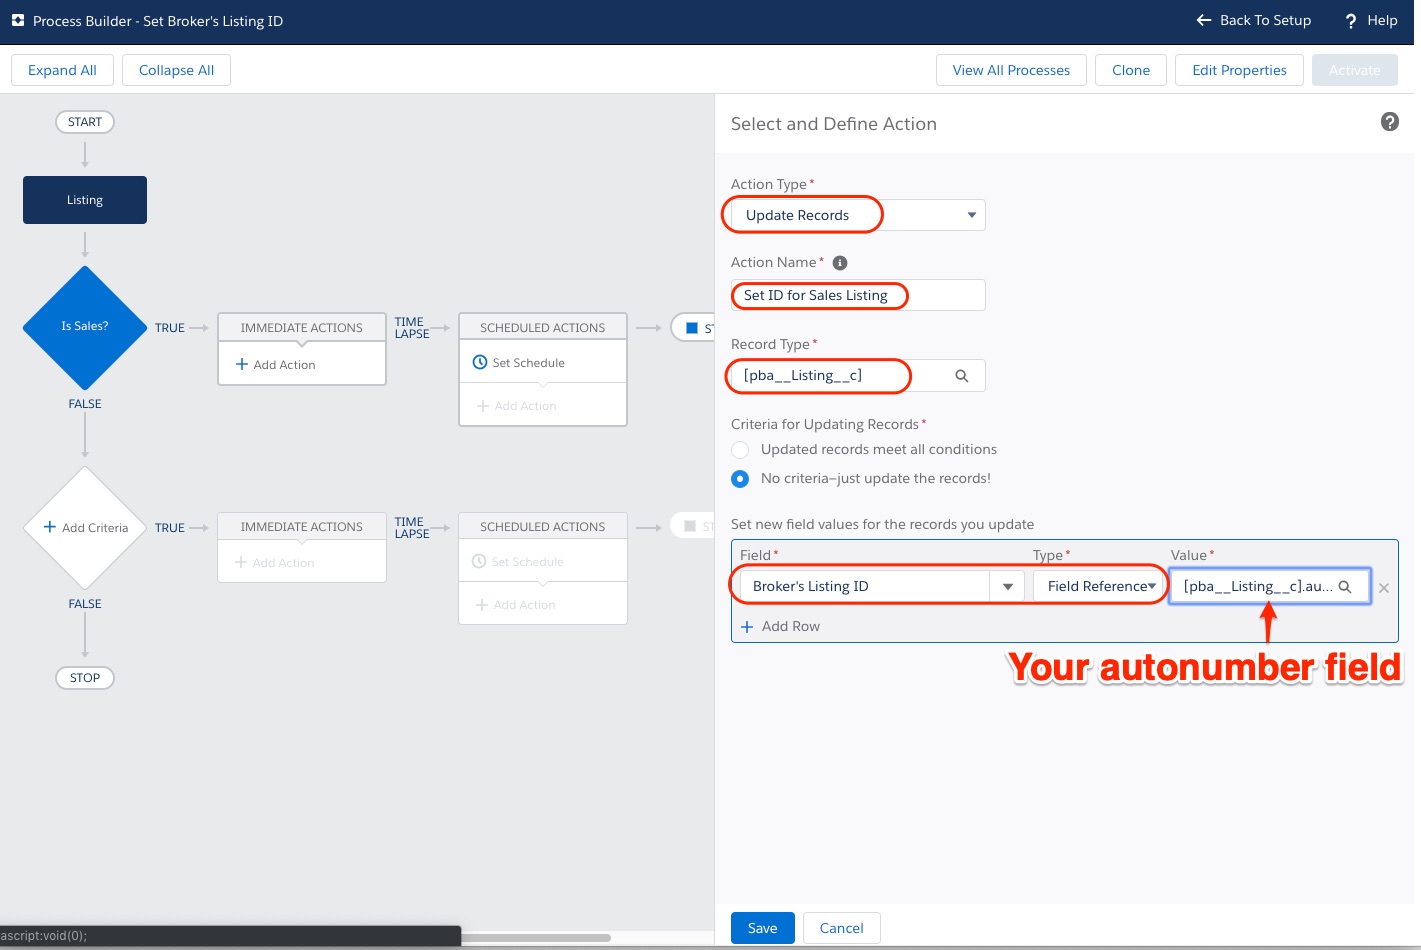
- if you want to add individualized intials, you will be updating it with a formula: The formula will contain the desired initials in quotation marks so e.g. "PBS-" (for Propertybase Sales) followed by an & to concatenate it with the field that generated the autonumber:
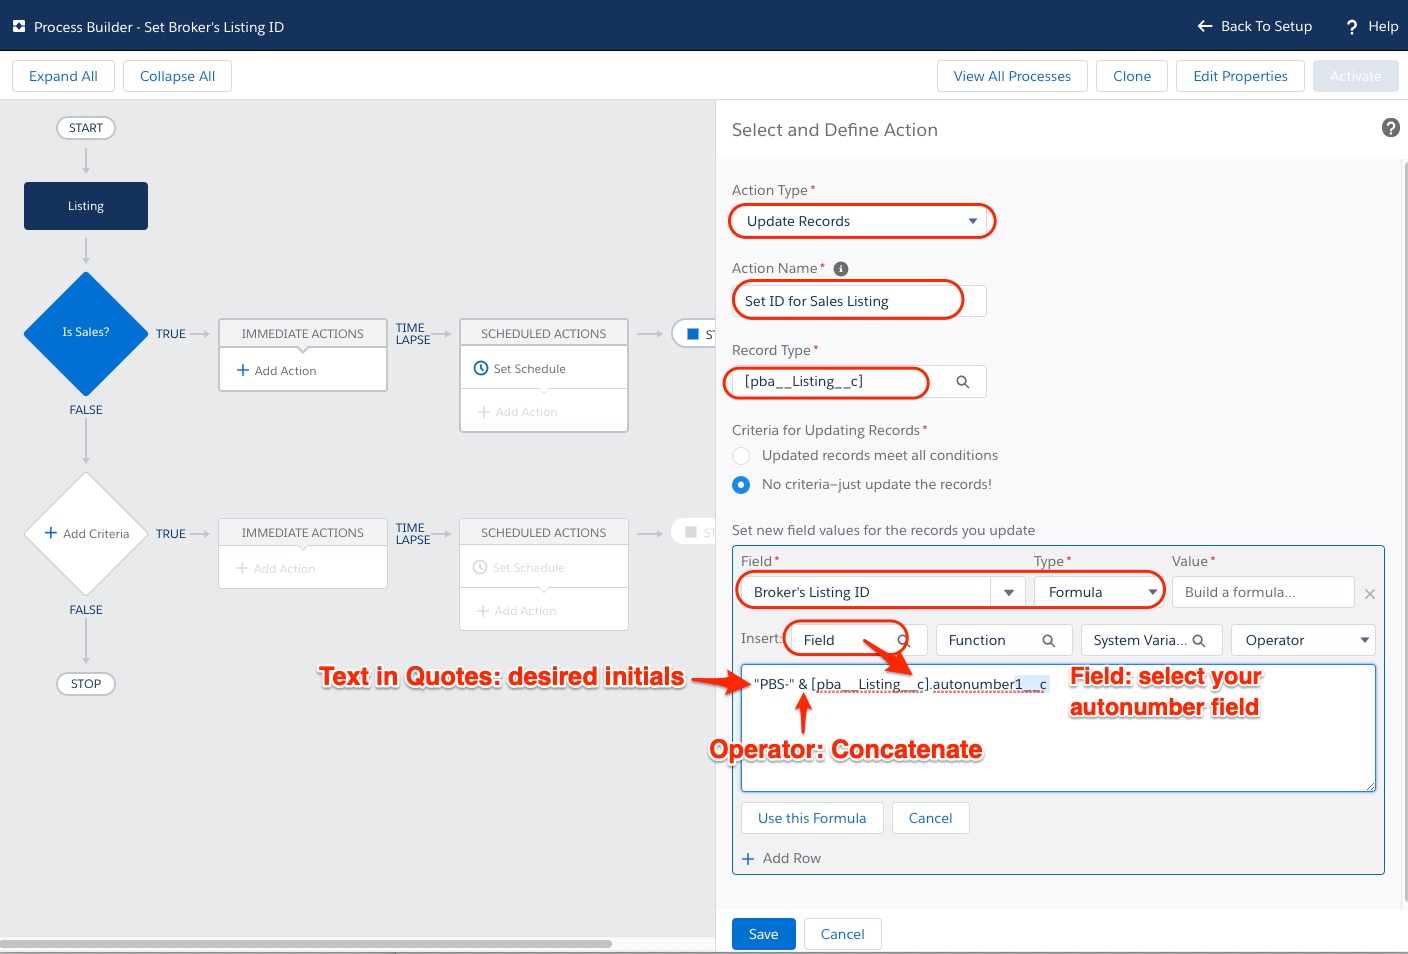
Click "Use this formula" and then save this action and continue with 8. to add the "Rent listing ID"
8. Repeat steps 6 & 7 except that you now look for the other listing type and update it with a different initial. It should look somewhat like this:
Criteria
Action
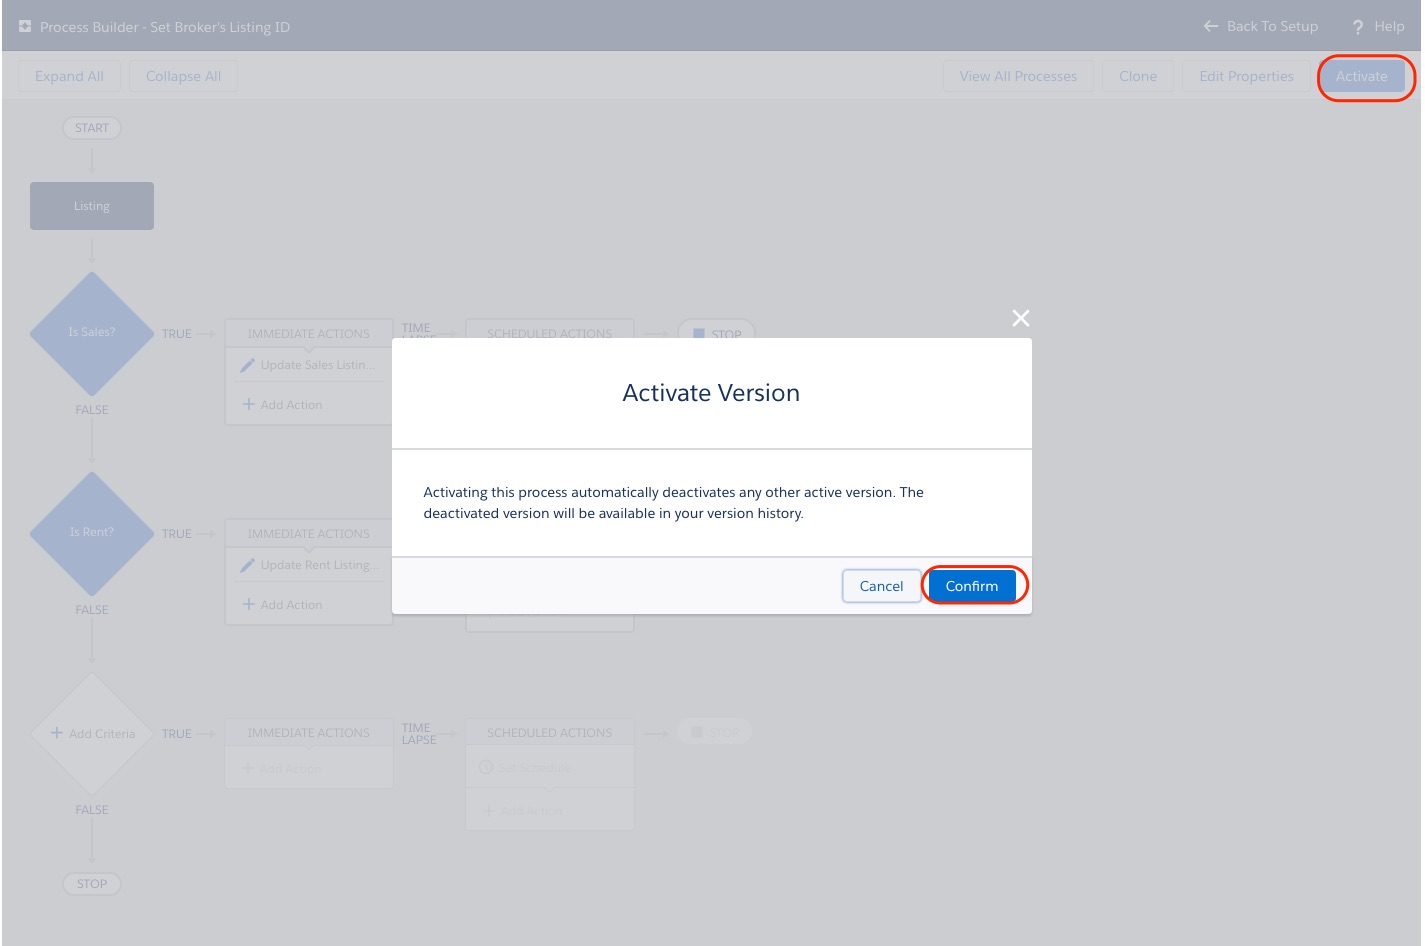
9. After everything is saved, activate the process in the top right corner and confirm the activation.
To test, create a new listing.
Note: you can also use multiple autonumber fields, should you want to have different number counts.


Comments
0 comments
Please sign in to leave a comment.