Creating Mail Merge Documents for Mac Follow
Mail Merge documents are also available for Mac users. Here are the simple steps to creating your own mail merge document for Microsoft Word for Mac.
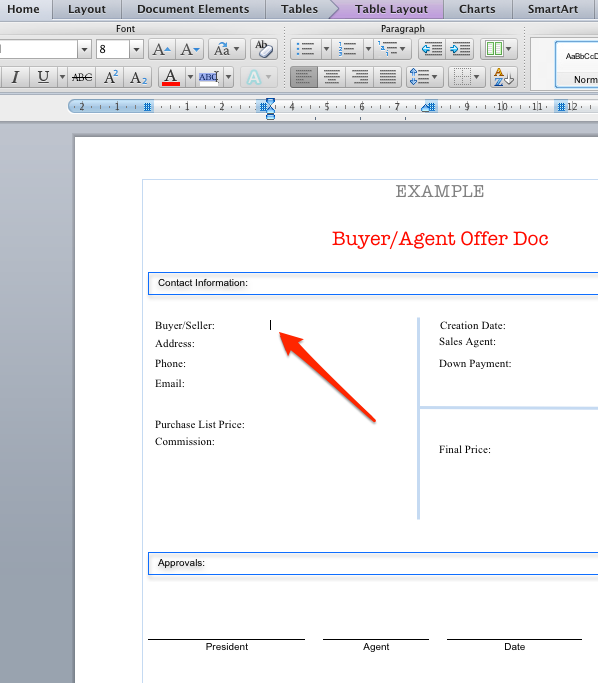
1. Open the document that will be used for the Mail Merge document on Propertybase.
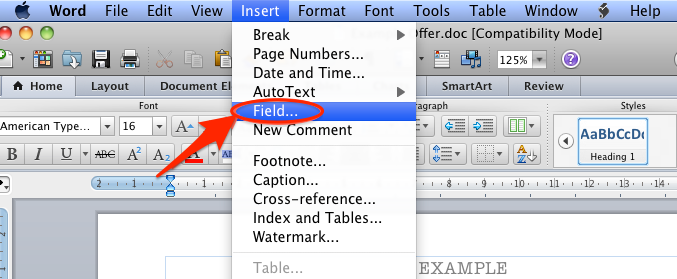
3. On Words main menu at the top select Insert and scroll down and click Fields.
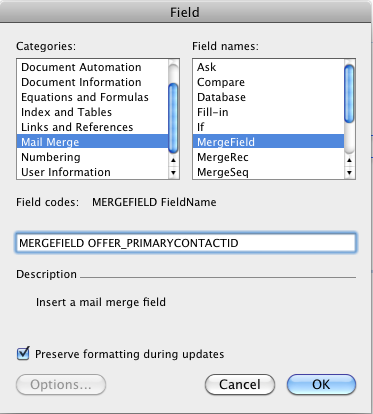
- In the categories section select Mail Merge
- In Field Names also select Mail Merge
- In the text field next the MERGEFIELD write the Object name followed by an underscore (_) and then write the exact API name of the field you would like to call (without the any of the prefix's "PB__ "or suffixes " __c").
- Click OK
5. The extension will insert the field into the document. Depending on how detailed your mail merge document is, it may happen that the formatting might become corrupted while preparing the document. Keep in mind that when the merge fields are replaced by their actual content it may behave as you expect. However layout might change even after merging the fields, if your layout does not have enough space to include the content. Always make sure that you allow enough space for the mail merge fields to be entered, so that the format of your document does not change unexpectedly.
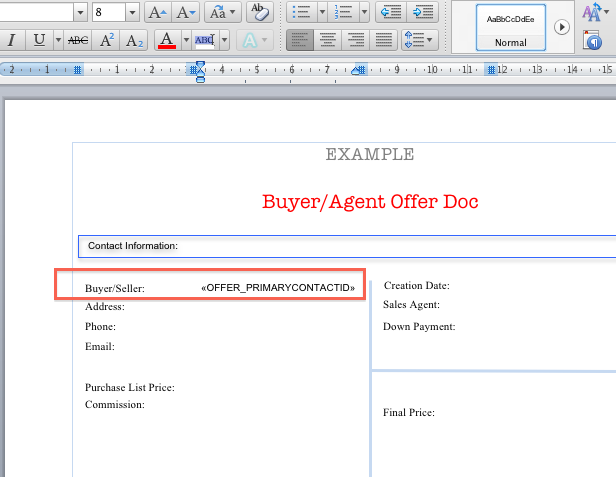
6. Repeat steps 3 to 5 for all fields.
Using Mail Merge
1. Use the mail merge from the activity history section of the desired object (account, offer, agreement, etc.).

2. Select the mail merge template
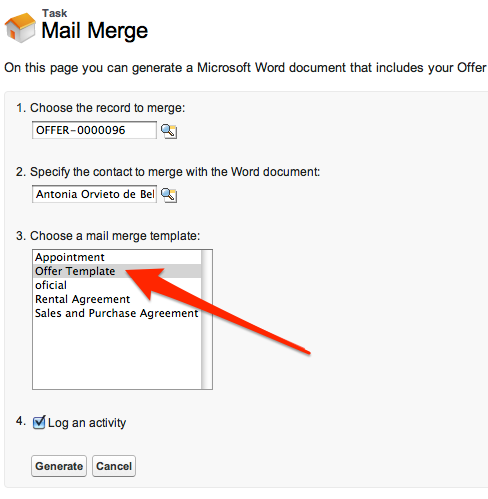
The system then creates a merged document, which will be sent to your email.
Hints
For word merge, you can only include fields, which are available in the main object (where document is being generated) and one optional contact. It is not possible to insert fields from more than one object, so e.g. you can’t add both agreement fields and account fields which are not available as fields or cross object formulas in the agreement object itself.
If you are missing any fields, please create them as custom formula fields into the desired object.


Comments
0 comments
Please sign in to leave a comment.