Configuring Email Automation in Propertybase Follow
In Propertybase version 1.471 we added the ability to automate emails with process builder, using our Template object. To demonstrate this feature we will create a process that automatically sends a welcome email to new leads.
Note: If your account was created after 11/16/17, refer to this article instead.
Estimated completion time: 30 minutes.
Updating Layouts
Before we build our new email trigger, we need to make slight modifications to our Default and Branded Layouts.
- Click the app launcher in the top left of the page and click Templates.

- Select Default Layout.
- Scroll down and click the pencil icon next to Plain Text.

- Enter the data below into the field that appears.
"{{SNIPPET.content}}"

- Scroll to the bottom of the page and click Save.
- Repeat this process for Branded Layout as well. (Return to Layouts, click Branded Layout.)
Note: The plain text field needs to be updated (as shown above) for all Layouts that will be used in automated emails. This includes Drip Campaigns.
Building the Process
Now that we have updated our layouts, we can begin creating our new custom process.
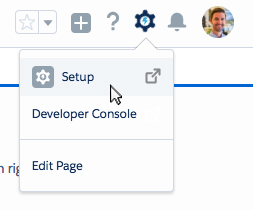
- Click the gear icon in the top right of the screen, then click Setup.
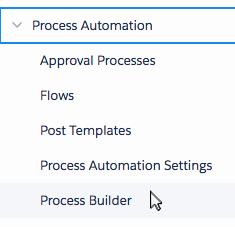
- In the setup menu, select Process Builder.
- Click New in the top right corner.

- Enter details for the New Process based on the image below.

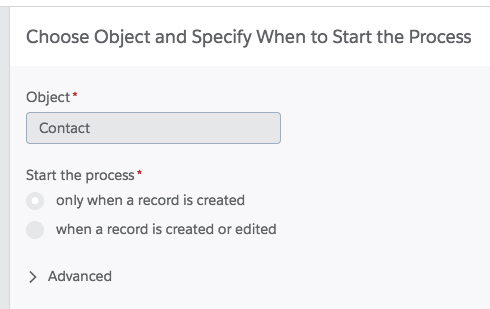
Next, we need to choose which object begins the process and when it starts.
- Click Add Object.

- Select Contact for Object and select only when a record is created for process start.
- Click Save.
- Click Add Criteria.
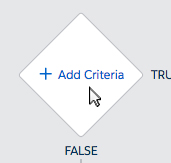
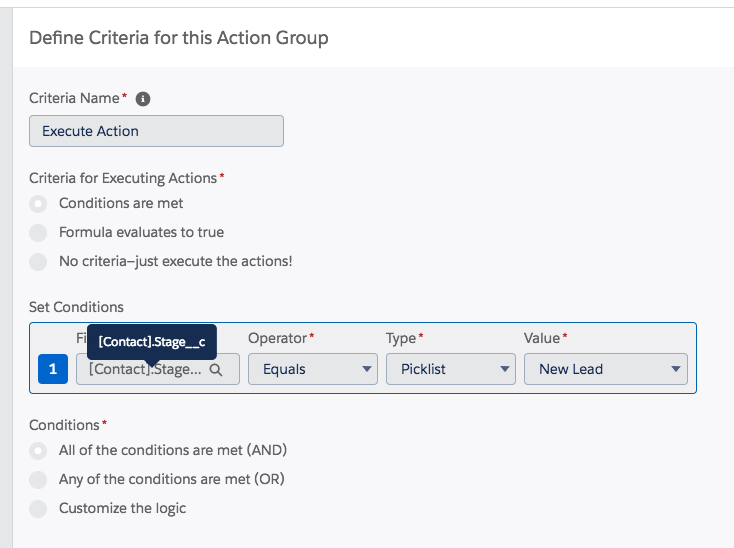
- Type Execute Action for Criteria Name and enter the data as shown below.
- Click Save.
- Click Add Action.
- Copy the data below into the select and define action window.
Note: For instructions on how to locate Snippet and Template IDs, refer to this article.
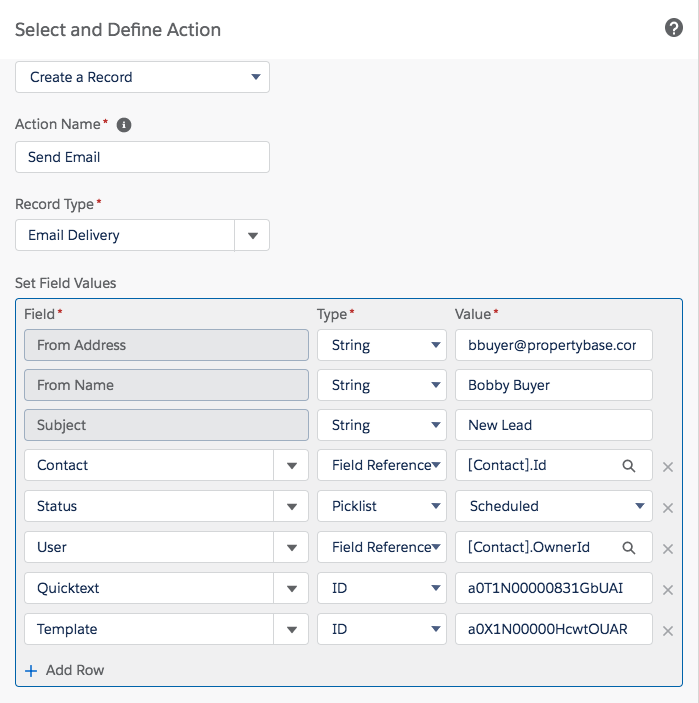
Note: The following are optional fields.

- When finished, click Save.
- Click Activate in the top right corner of the screen.
- When prompted, click Confirm.
Configure Unsubscribe
Next we need to register a Force.com domain and configure the Email Scheduler to support unsubscribe.
Note: If you have previously registered a Force.com domain for webservices, you can start below at the following step: "Next click Edit next to Site Visualforce Pages."
- Click the gear icon in the top right of the screen, then click Setup.

- In the setup menu, select Sites. (You can find this under User Interface > Sites and Domains.)
Next we need to register a Force.com domain. Once you've decided what you want that to be - move to the next step.
- In the available textbox, type your desired domain name.
- If the domain is available, click Register My Force.com Domain.

Note: Once you registered your Force.com domain, you cannot change it.

- Once you've registered your domain, click New next to Sites.

- Select Guest User License for Type of New SIte.
- Click Continue.

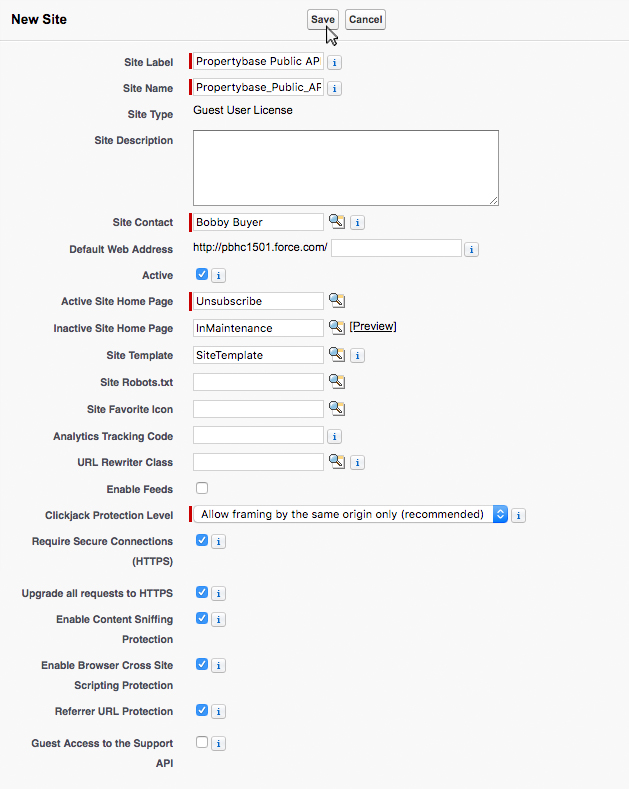
- Using the screenshot below, enter settings for the new site.
Note: Don't forget to check the box next to 'Active' - it's easy to miss.
- Click Save.
- Next click Edit next to Site Visualforce Pages.

- Using the Add button, move pba.Unsubscribe to the Enabled column.
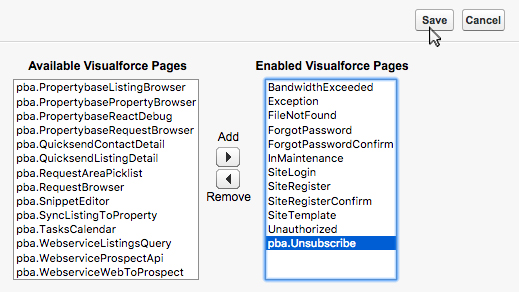
- Click Save.
- Next click Public Access Settings.

- Under Apps, click Apex Class Access.
- Next to Apex Class Access, click Edit.
- Using the Add button, move pba.PublicRouteDispatcher to the Enabled column.
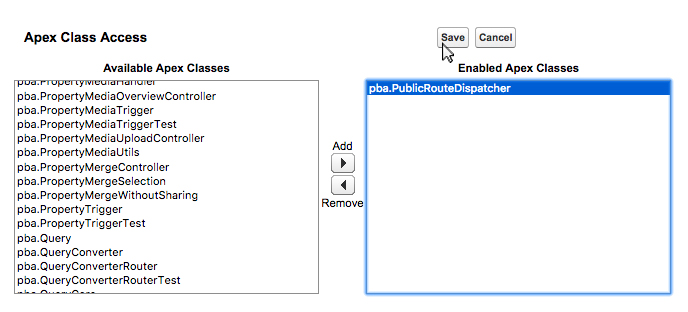
- Click Save.
- Click Profile Overview to return to the main screen.

- Next click Assigned Users.

- Click Site Guest User, Propertybase Public API.

- Scroll to the bottom of the page and click Assign Licenses.
- Toggle the checkbox next to Propertybase V3 (No license available? see note below)
- Click Add.
Note: You might need to request an additional (free) site license for this previous step if you didn't setup a website endpoint (activated Webservices) previously.
Please email Propertybase support and include your Propertybase ID to request your complimentary site license.
Now we need to return to the sites page we started on.
- In the setup menu, select Sites. (You can find this under User Interface > Sites and Domains.)
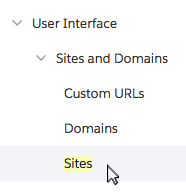
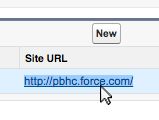
- Right-click the site URL and copy it to your clipboard.
- Click the app launcher in the top left of the page.

- Select Settings.
- Click New in the top right corner of the screen.
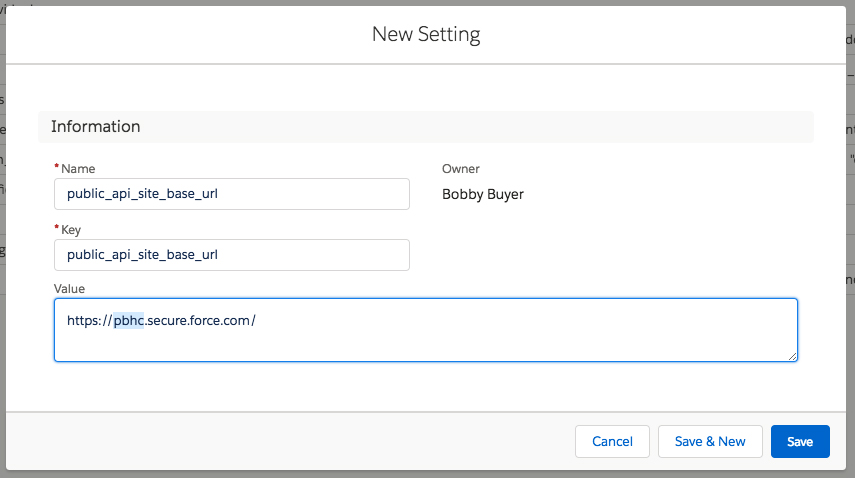
- Using the screenshot below, create a new setting.
- Name and Key enter "public_api_site_base_url"
Note: For "Value" use the domain you just copied to your clipboard, but remember to append ".secure". See the image below for an example. "HTTPS" is required.
- Click Save.
Restart Email Scheduler
Now that our process is built and active, we need to restart the Email Scheduler.
- Click the app launcher in the top left of the page and select Control Center.

- Click "Propertybase Services" (formerly known as Email Settings)
- Click "Automated Emails".
- Click "Restart Scheduler".

- When prompted, click Restart Scheduler.
Testing Trigger
Now that our trigger is built and we've activated the email schedular - it's time to test our new automation.
- Under the Contacts tab, click New Contact.
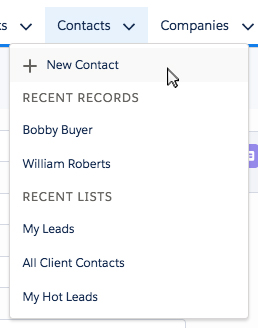
- On the next screen, create a contact using an email address that you have access to.
- Click Save.
Check the email inbox of the address you set for the new contact.
Done! You should have received an automated email via your newly built email trigger.


Comments
0 comments
Article is closed for comments.