How to Use Matching Follow
Overview
Matching in Propertybase can be performed in two ways. First, on Inquiry records. Matching on an Inquiry record searches available Listing inventory for Properties that match the current Inquiry. The second-way Matching can be performed is on Listing records. When done this way, Matching searches Propertybase for Inquiry data that matches the current Listing record - and displays Contacts tied to that Inquiry data.
Inquiry Matching
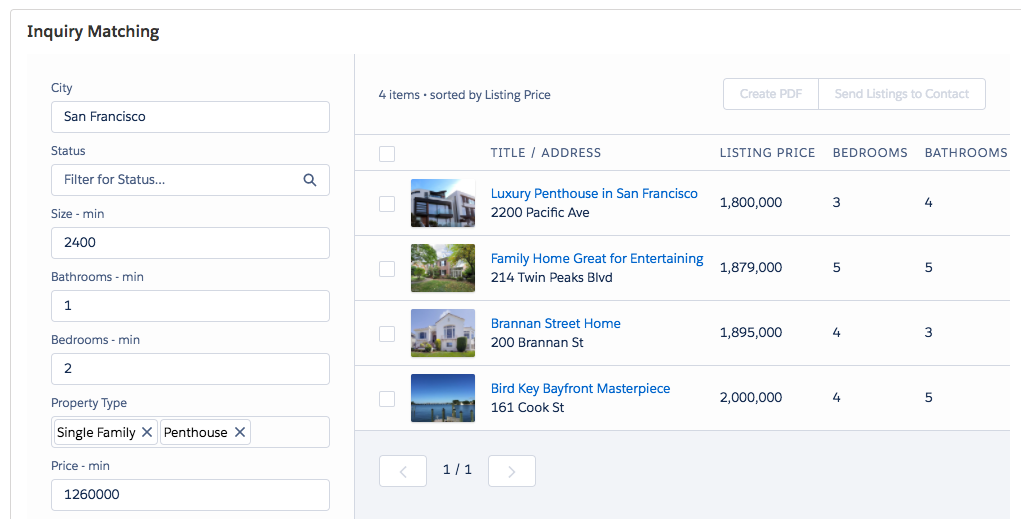
If you are reading this, you probably already know that in real estate, everything starts with an Inquiry. A new inquiry means a new lead, a new contact and potentially a new client. Propertybase was built to model the real estate process as closely as possible, which is why Matching now happens on Inquiry records.
From any Inquiry record, select the Matching tab to search available Listings.
Listing Matching
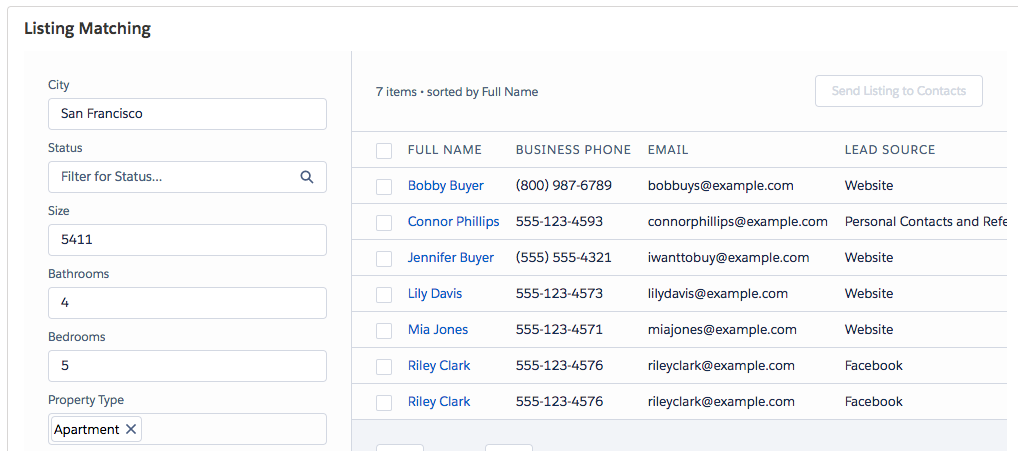
When you use the Matching feature from a Listing record, this performs what could be called "Reverse Matching". Reverse Matching searches Inquiry data across your entire Propertybase account and displays a list of Contacts that match the current Listing. From there, you can email the Listing to all or some, of the matched Contacts - all without leaving the Matching feature.
From any Listing record, select the Matching tab to search available Inquiry data.
Features
In this section, let's dive into the features available in Matching.
Filters

Like any proper search tool, Matching includes filters. These filters allow you to adjust your Matching results - using the same fields used by Listing records. To modify the value in a filter, simply click on it. You can reset all filters to their original values anytime by clicking the icon to the left of the Search button.
Multi-Value Search
In version 1.672 of Propertybase, support has been added for multi-value search filters. This means that you can search for multiple values in any text field by simply typing in a search term and hitting enter or the plus button next to the search filter, and then entering another term. After each value is entered, the matching results will update. The feature is supported on Inquiry and Listing matching, as well as the Contact and Listing Managers.
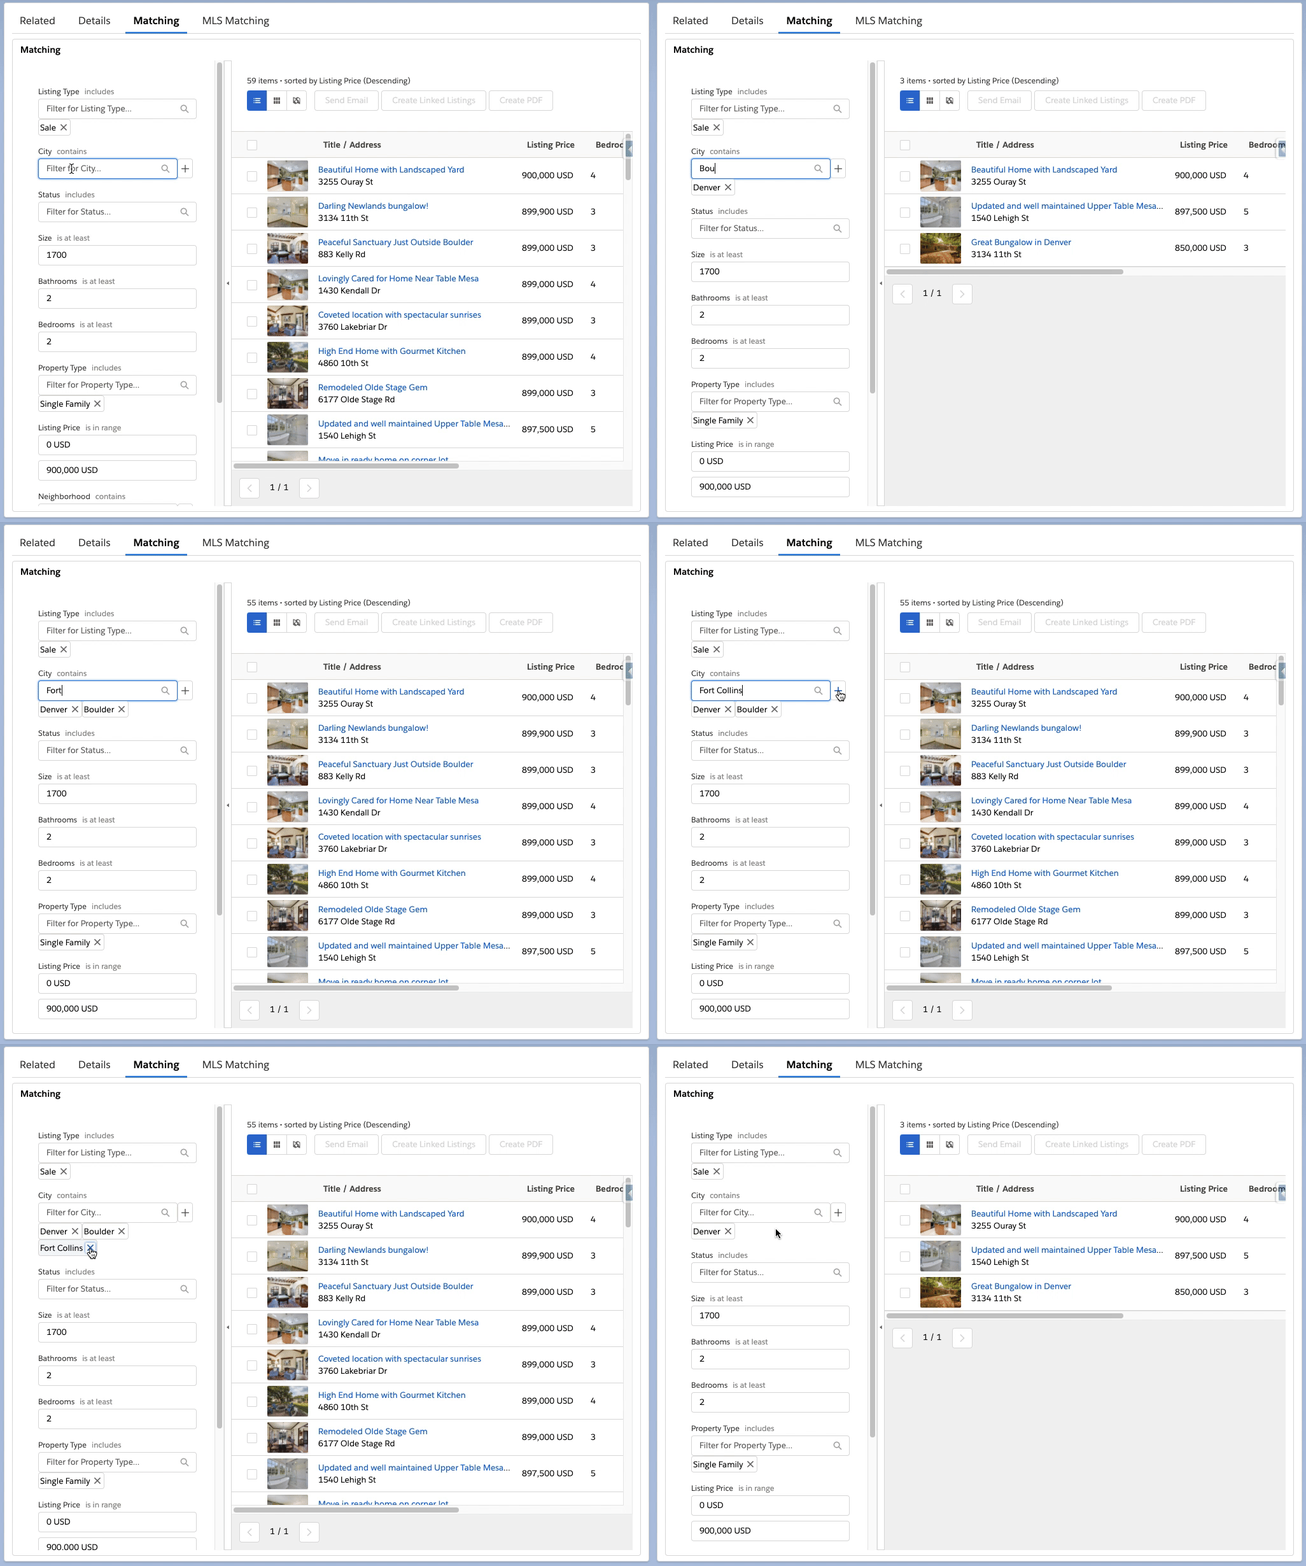
Matching is also smart enough to take data from the Inquiry and search for multiple values when the data is entered in the format <value>;<value>;<value>.
For example, if a client is interested in more than 1 city, like Denver, Boulder, and Fort Collins, you can enter their interests in the city field on their Inquiry as Denver;Boulder;Fort Collins.
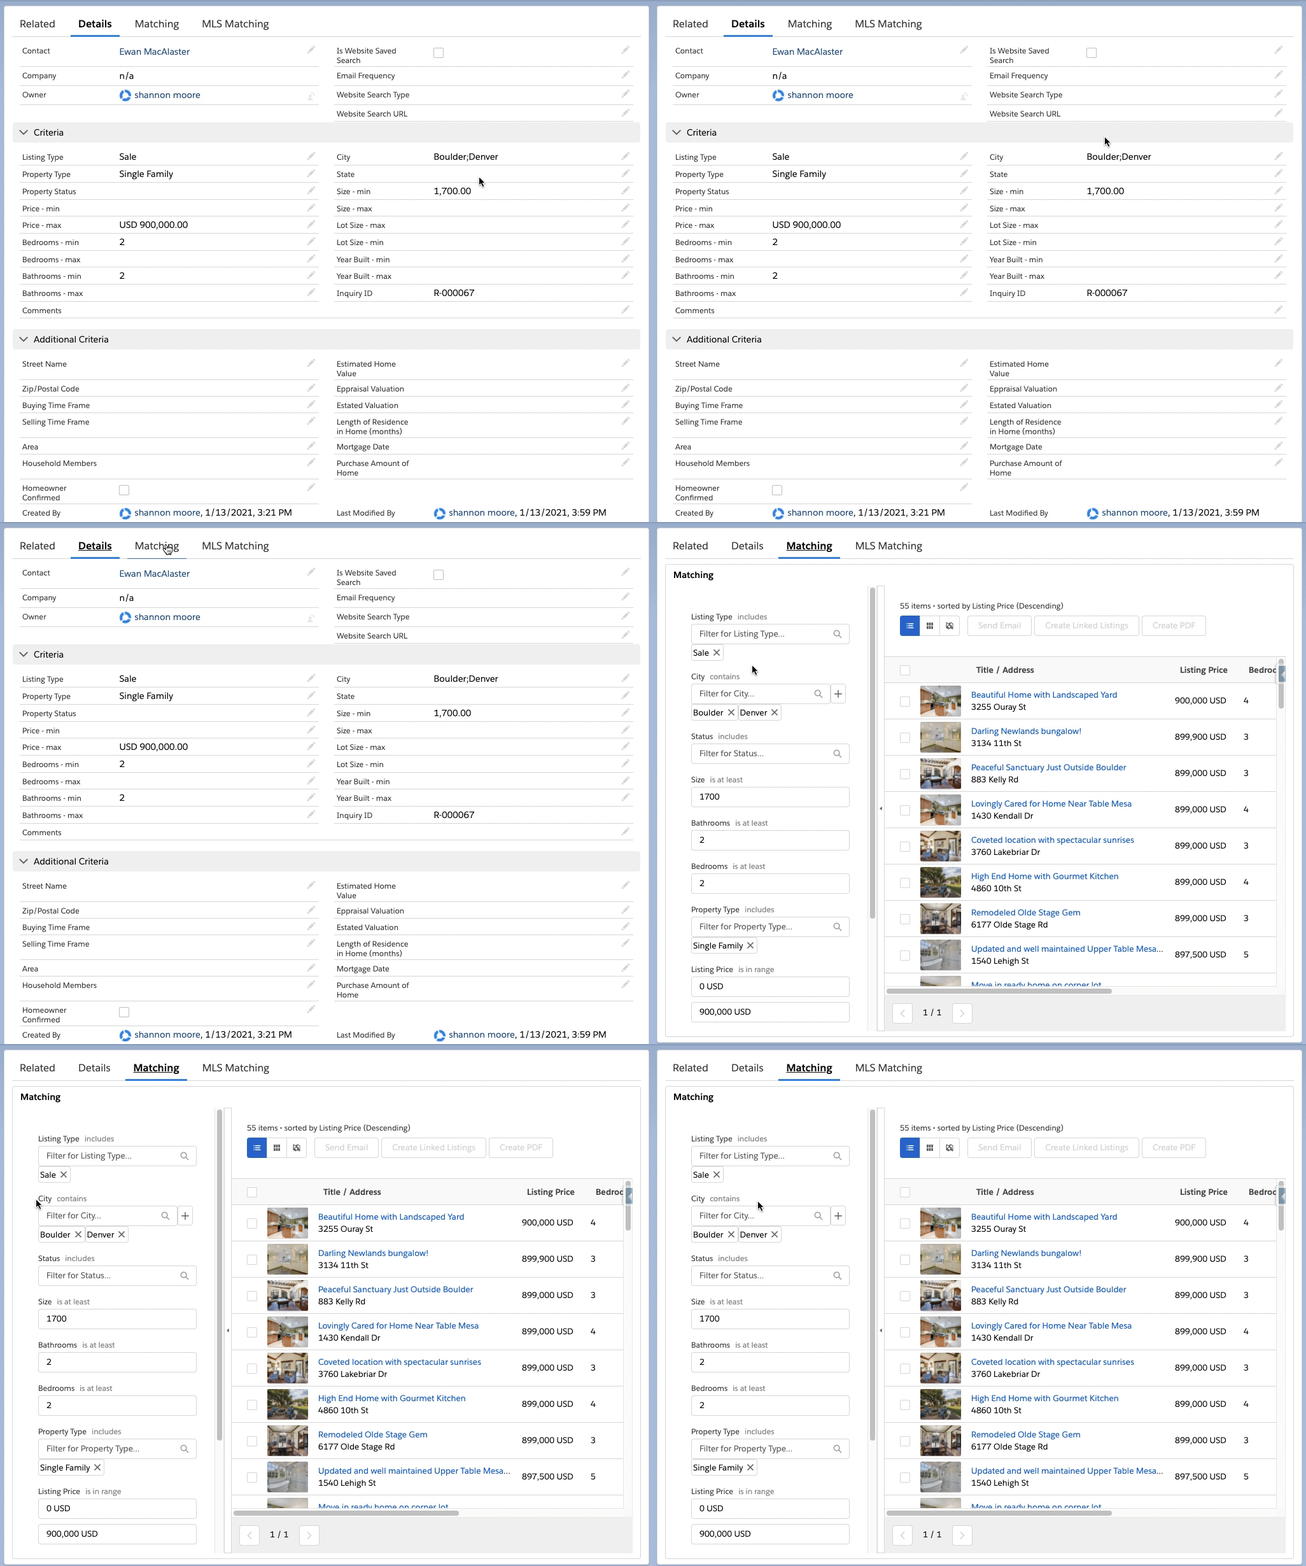
When more than 1 value is added to a text field search filter, it will use the "OR" operator to filter the results. In the example above, matching will search for Denver OR Boulder OR Fort Collins.
Exact Matching
When selected, exact matching tells Propertybase that certain fields must match the results displayed. Users with access to the Control Center can specify which fields should respect exact matching. (See the configuration tab at the top of this article)
For example: If exact matching is not set for the "bathrooms" field. Then the results may appear that do not meet the bathroom criteria, but match other filter fields.

Results
|
|
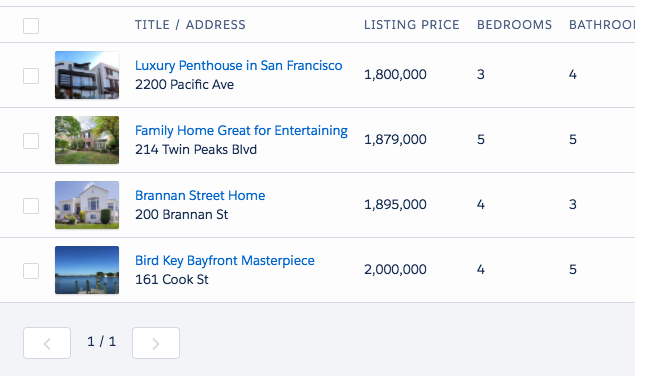
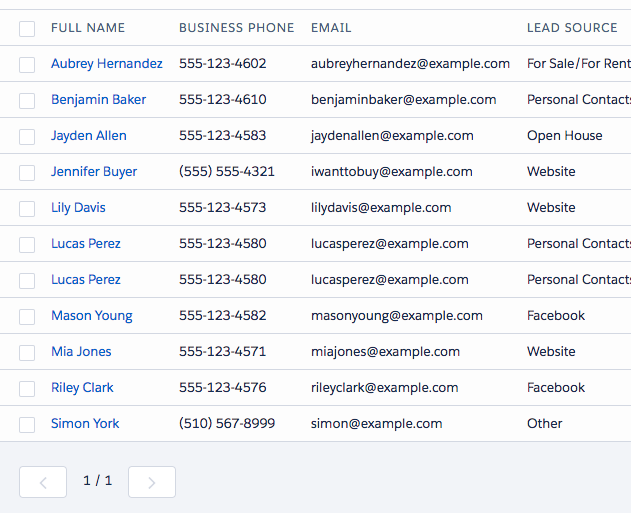
At the heart of Matching are results. Results show records that match search criteria. Results can be adjusted using the Filters described above. Once you are satisfied with the results, you can use the checkboxes to the left to select some or all of the results. Once a selection has been made, you can use actions to create documents and send the selected results to leads.
Actions

|

|
Actions are just that, these buttons allow you to perform an action with the selected results. On Inquiry Matching, you can take Listing results and generate a downloadable PDF, send the selected Listings to Contacts using Quicksend and create a Linked Listing for the Contact on the Inquiry record. On Listing Matching, you can select Contact results and generate a PDF list of those contacts, send the current Listing to them using Quicksend and create Linked Listings for the selected Contacts. Click here to learn more about Quicksend. You can only send less than 100 emails at a time with this feature.
View Options

When viewing Matching results, you have two separate viewing options. List view is enabled by default and shows all fields that have "visible" checked in the configuration options. The second option is card view and can be enabled by clicking the button on the right displayed in the image above. Card view only displays fields that have "card view" checked in the configuration options. For more on configuration options, click the configuration options tab above.
Configuration Options
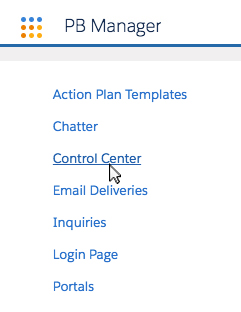
Like all features in Propertybase, Matching is fully configurable. Matching configuration can be accessed in the Control Center. From this screen, you can configure the filters that are used for both types of Matching.
Where is the Control Center?
Always remember to save your changes. The image below shows that unsaved changes have been made.

Tabs

At the top of the page are two tabs. Use these to switch between configuration options for both types of Matching.
Filter Fields
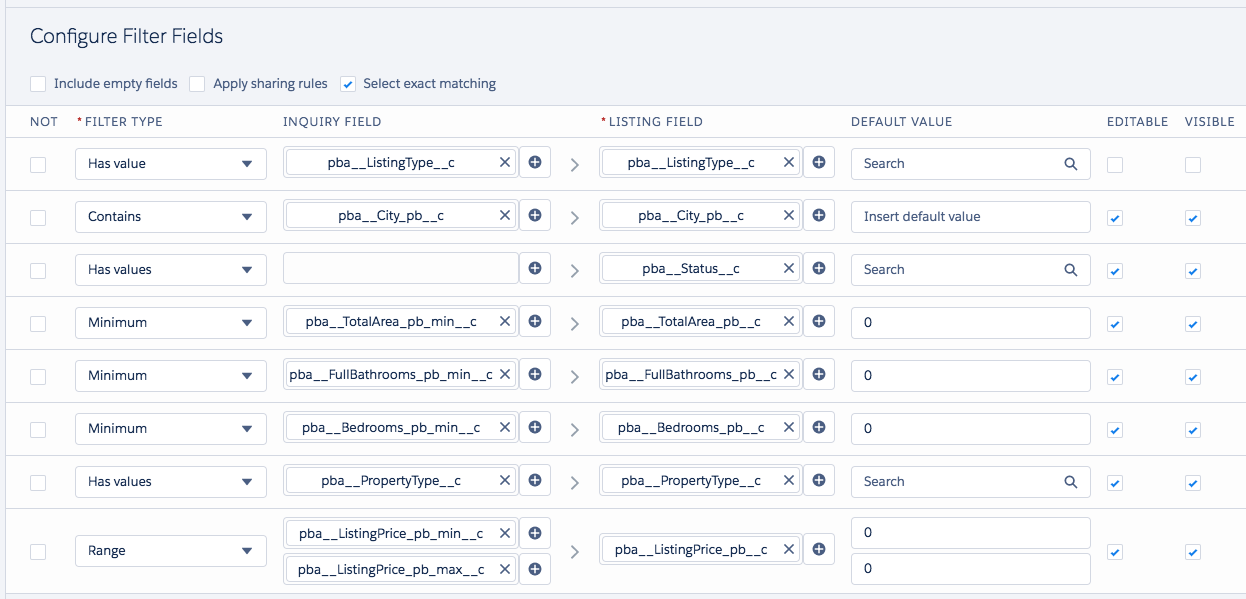
This screen allows you to configure the fields that are used for filtering. Here you can modify filter type, what fields map between the two objects (Inquiry to Listing), the default values, whether or not the field should be editable or visible, the order for all fields, as well as a delete option.
Selecting the "not" checkbox on the left side of a field effectively reverses the search criteria. For example: If I selected "not" on the second field in the image above (pba__City_pb__c), that would mean: show me all Listings that are not located in the selected city.
Show Only Owned Records
Starting with the release of Propertybase 1.506, you now have the option to only display Contacts or Listings that are owned by the user currently logged in.


Exact Matching
Starting with the release of Propertybase 1.504, you can now specify exactly which fields should be included in exact matching. This allows Propertybase admins to specify which fields should apply in exact matching for all users.

Result Fields
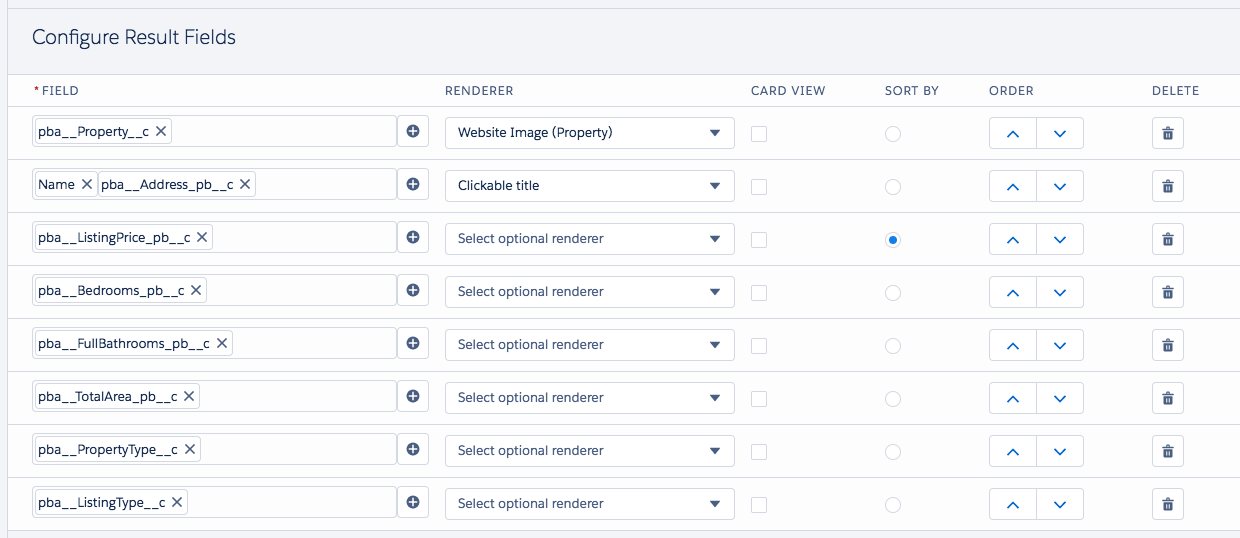
This screen allows you to configure the fields that are used for results. Here you can decide what fields should be shown from the object being returned (Listings or Contacts), what interactions should be possible (if any), if card view should be supported (enabling this makes the field display when using card view), what field to sort by, the order for all results, as well as a delete option.
The Result Fields are the columns you see in your Matching output. You can find this at the bottom of each Matching direction, so please scroll down passed the Matching mapping to define your fields: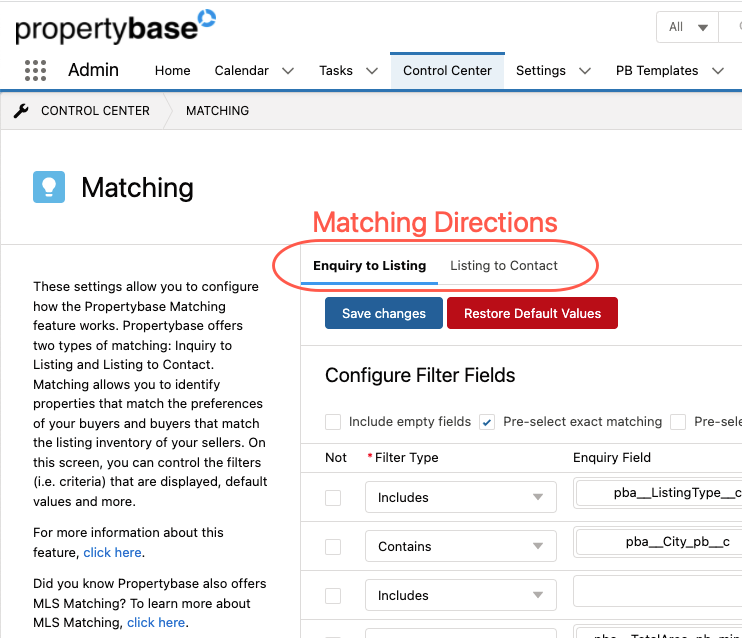
You can "Add new Fields" to add a column and then define the field or fields it will show.
You can move them up and down (to the front or back of the result table the user will see), delete fields, define what to sort by.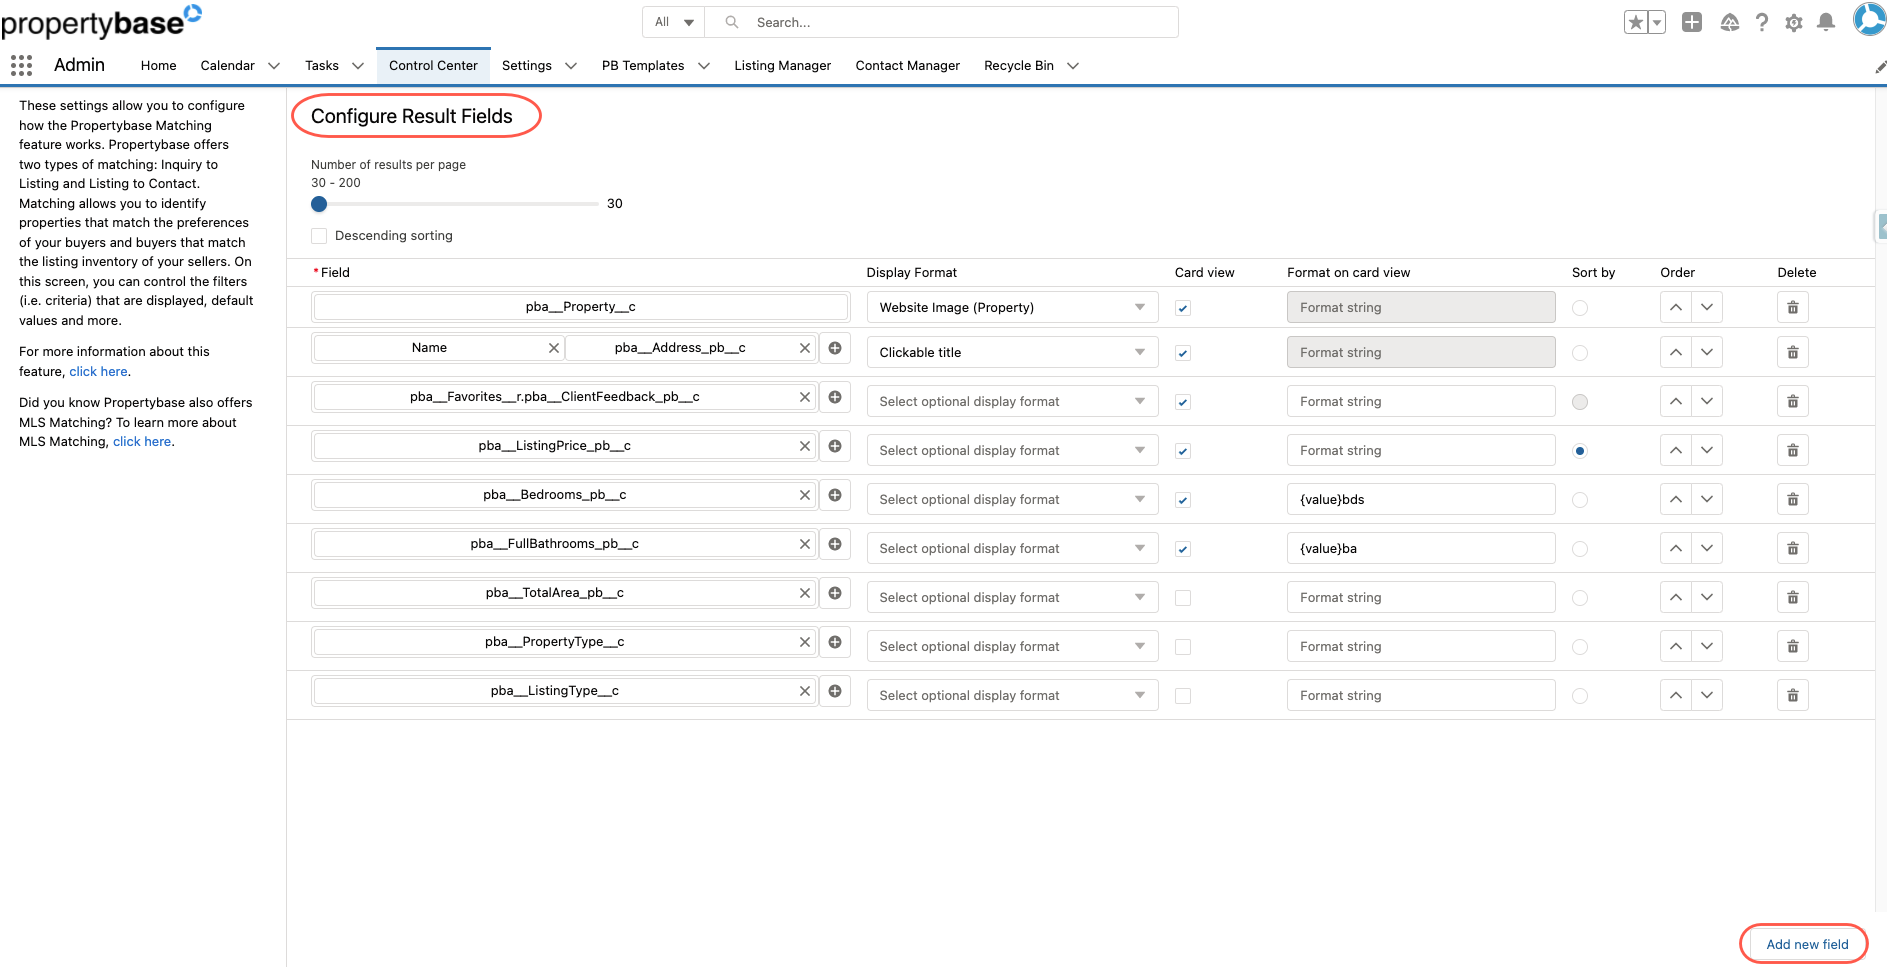
For some result columns it may also make sense to have several fields mapped to one column as you can see in the example for "Name" and "pba__Address_pb__c"). This allows you to combine certain information or show rent or sale related information when only one or the other is available.
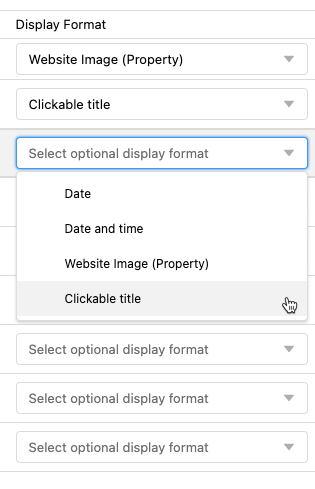
The column "Display Format": Some fields you add allow you to predefine how they should look, for example you can display the thumbnail image from the property instead of the name and link to the property record.
Making the "Name" and "pba__Address_pb__c" a "Clickable Title" allows the user to jump from there to the listing (or contact) record.
For date you may want to display, you can define whether it will show date or date/time. This relates to Date/Time fields you add to the view.
Card View
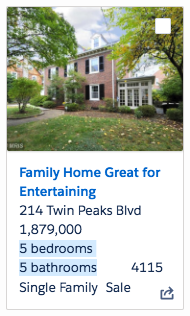
Under configuration options, you must check the card view checkbox for the field to appear (see the View Options section under the Features tab in this article.) You can also change the format of the string that displays. Simply include "{value}" in the "format on card view" text box and prepend or append the text of your choice. In the example shown above, we add "bedrooms" and "bathrooms" to the string format.

|
|



Comments
0 comments
Article is closed for comments.