What are Report Types in Propertybase? Follow
What are report types?
A report type is like a template which makes reporting easier. The report type determines which fields and records are available for use when creating a report. This is based on the relationships between a primary object and its related objects. For example, with the ‘Contacts and Companies’ report type, ‘Companies’ is the primary object and ‘Contacts’ is the related object.
Reports display only records that meet the criteria defined in the report type. Out of the box, Salesforce provides a set of predefined standard report types. Don’t see all the fields you want? You might need to create a custom report type.
An administrator can also add fields from a related object by creating a lookup relationship to that object, allowing for even more reporting possibilities.
Propertybase features several different types of reports. Each one features a different set of functionalities.
Why are report types important?
Understanding the type of report you need to represent your data is the key to using the full power of reports. You can choose between several options in Propertybase, each one gives you different features.
Creating custom report types
One of Propertybase’s important tools is the ability to report on various aspects of your business needs. There are plenty of different pre-made reports, but sometimes users would like a way to have a more specific report tailored to the fields that they need in order to speed up this process. A great tool for creating a report with the precise information that users need is a custom report type.
A custom report type is a set of fields and records specifically chosen by the user to create detailed reports based on relationships between objects. A primary object is chosen, which defines around what the report will be about and secondary objects that would provide the additional related information needed.
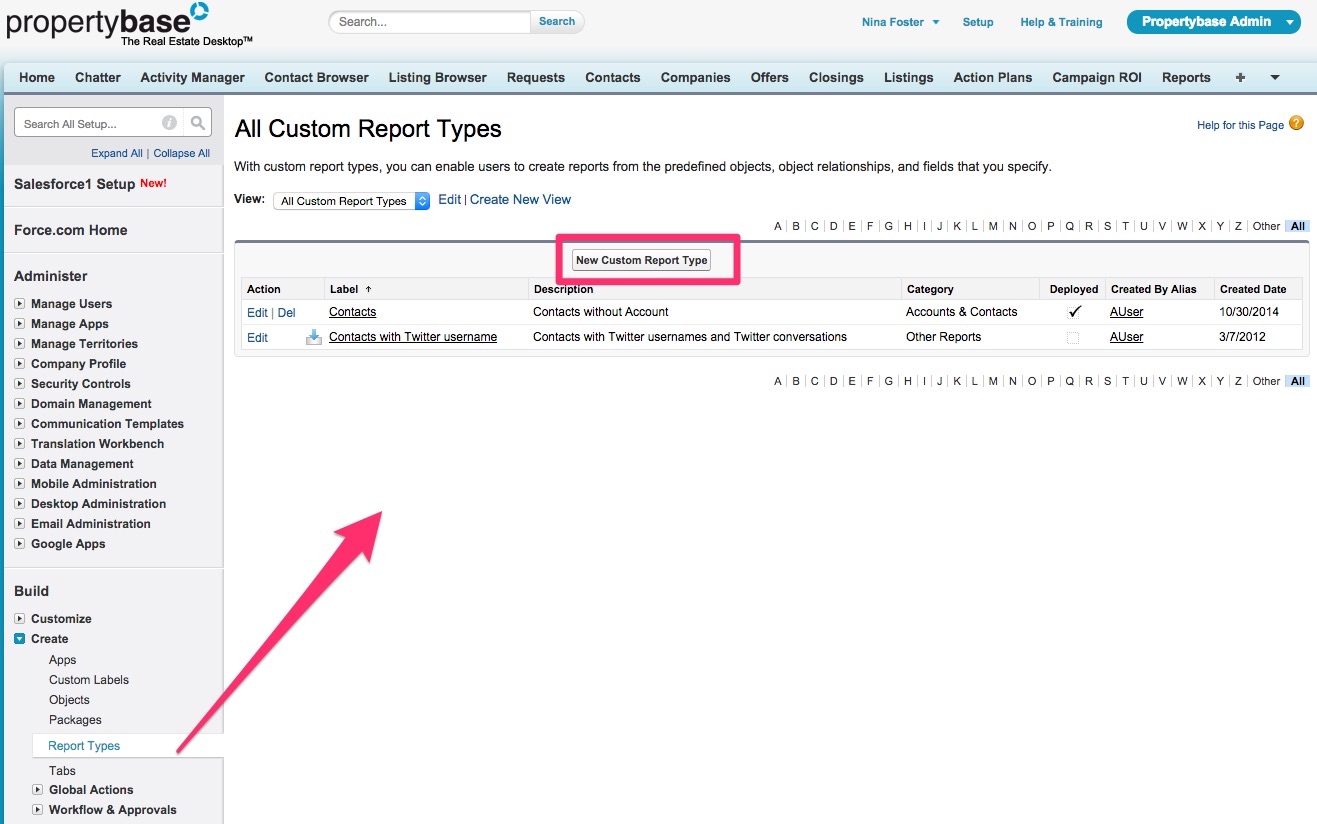
To create a custom report type, navigate to: Setup/Create/Report Types
On the page click the “New Custom Report Type” button.
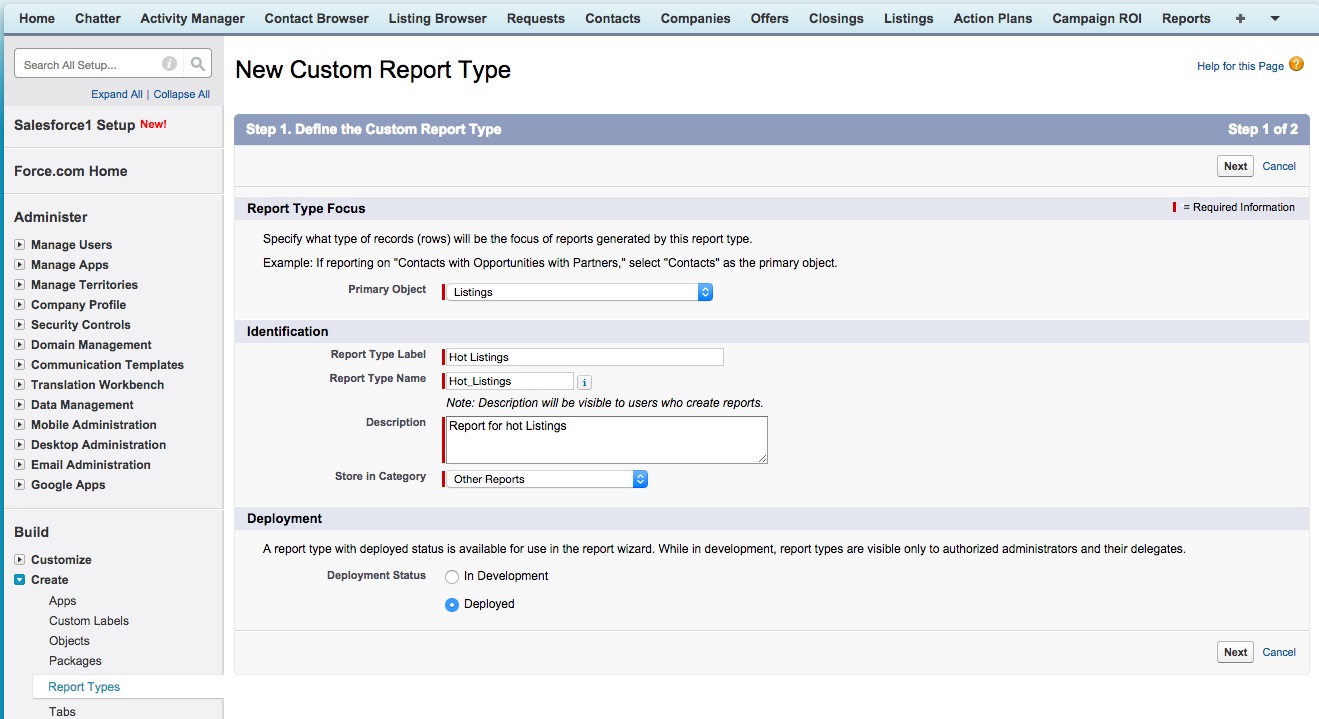
The following page contains various required fields that should be dealt with attention:
- In the Primary Object field choose the object that best defines your report.
- Provide a name and label that describes your report type.
- Add a description to help users understand the purpose of the report type.
- Select a category to store your Report in.
- Under the deployment option two selections are available, In Development and Deploy. Choose In Development when the report type is in the testing phase and users shouldn’t be able to use it yet. Select Deploy if you would like all users to be able to create reports from this type.
- Click next.
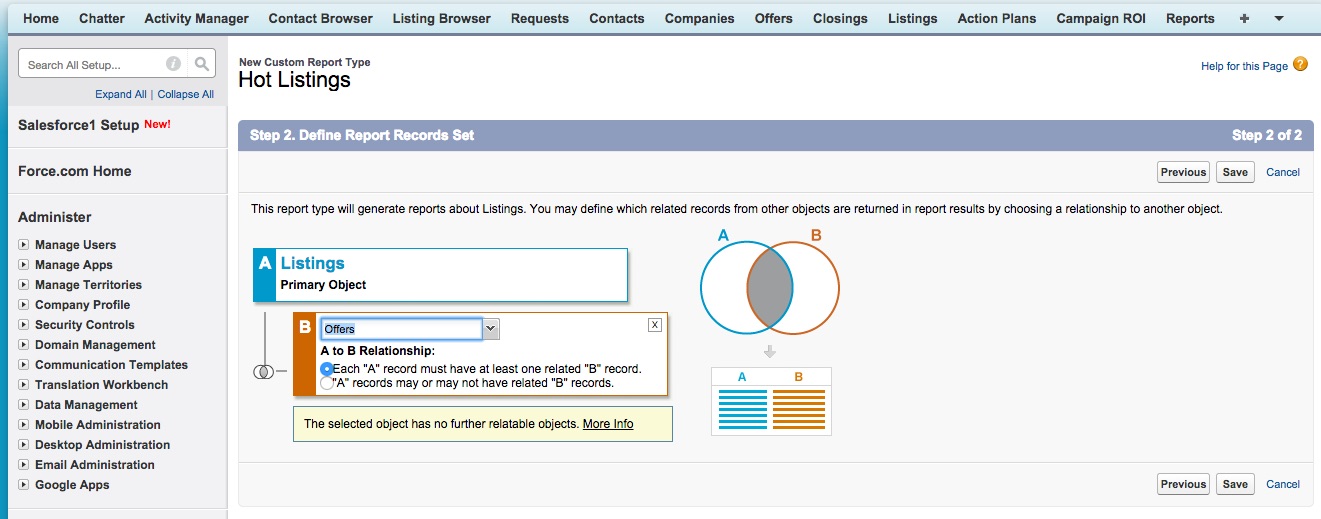
The next step is to decide whether a related object is needed in the report type. If so, simply add the object to the report type. This way the exact fields from all the objects will be available for reporting. Afterwards, click the save button.
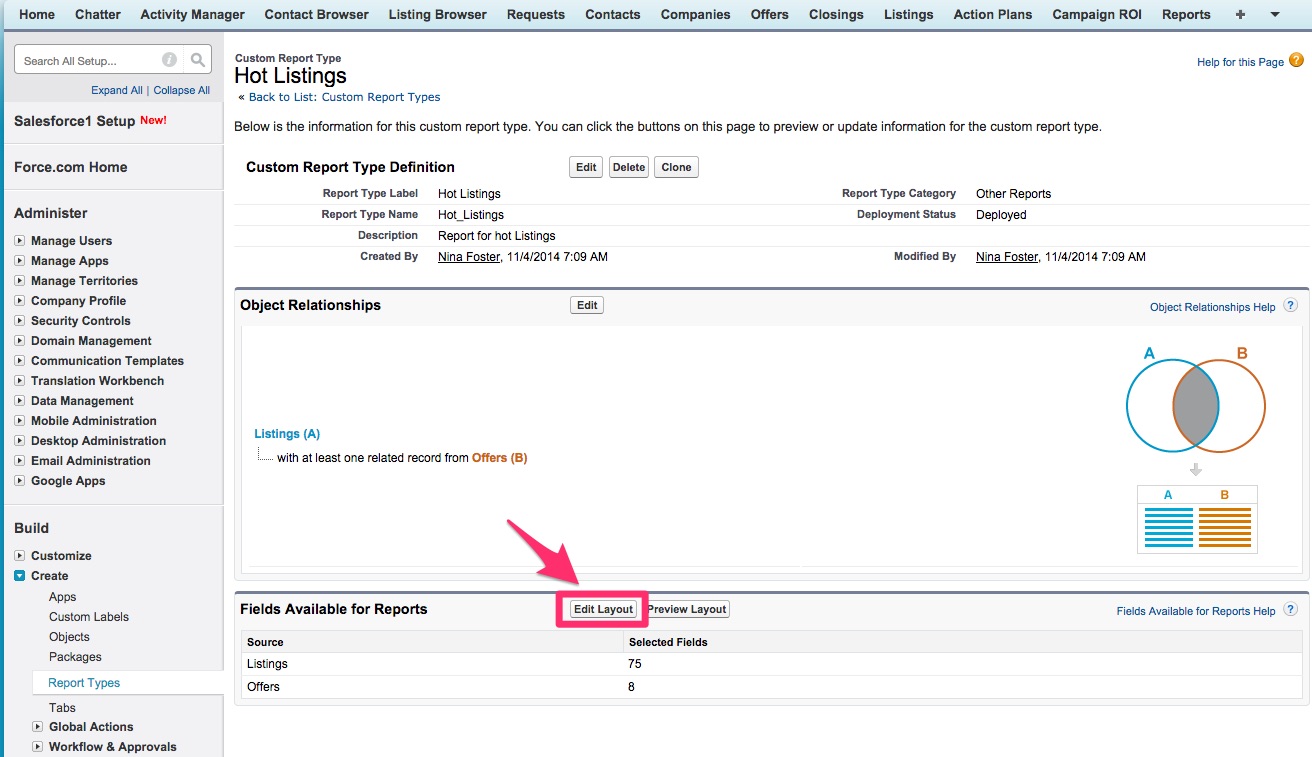
Now the custom report type is created, but it’s not finished just yet. The necessary fields that will be available for the report must be chosen. Click on the “Edit Layout” button at the bottom of the page.
In this next page, all the fields of each of the objects chosen will be displayed. To eliminate the fields that are not valuable for the report, simply drag and drop them from the Inventory table to the smaller Inventory Fields table on the right. If for some reason a field that is needed is not displayed, you can find it clicking on the Add fields related via lookup. After fields have been selected, finally click the save button.
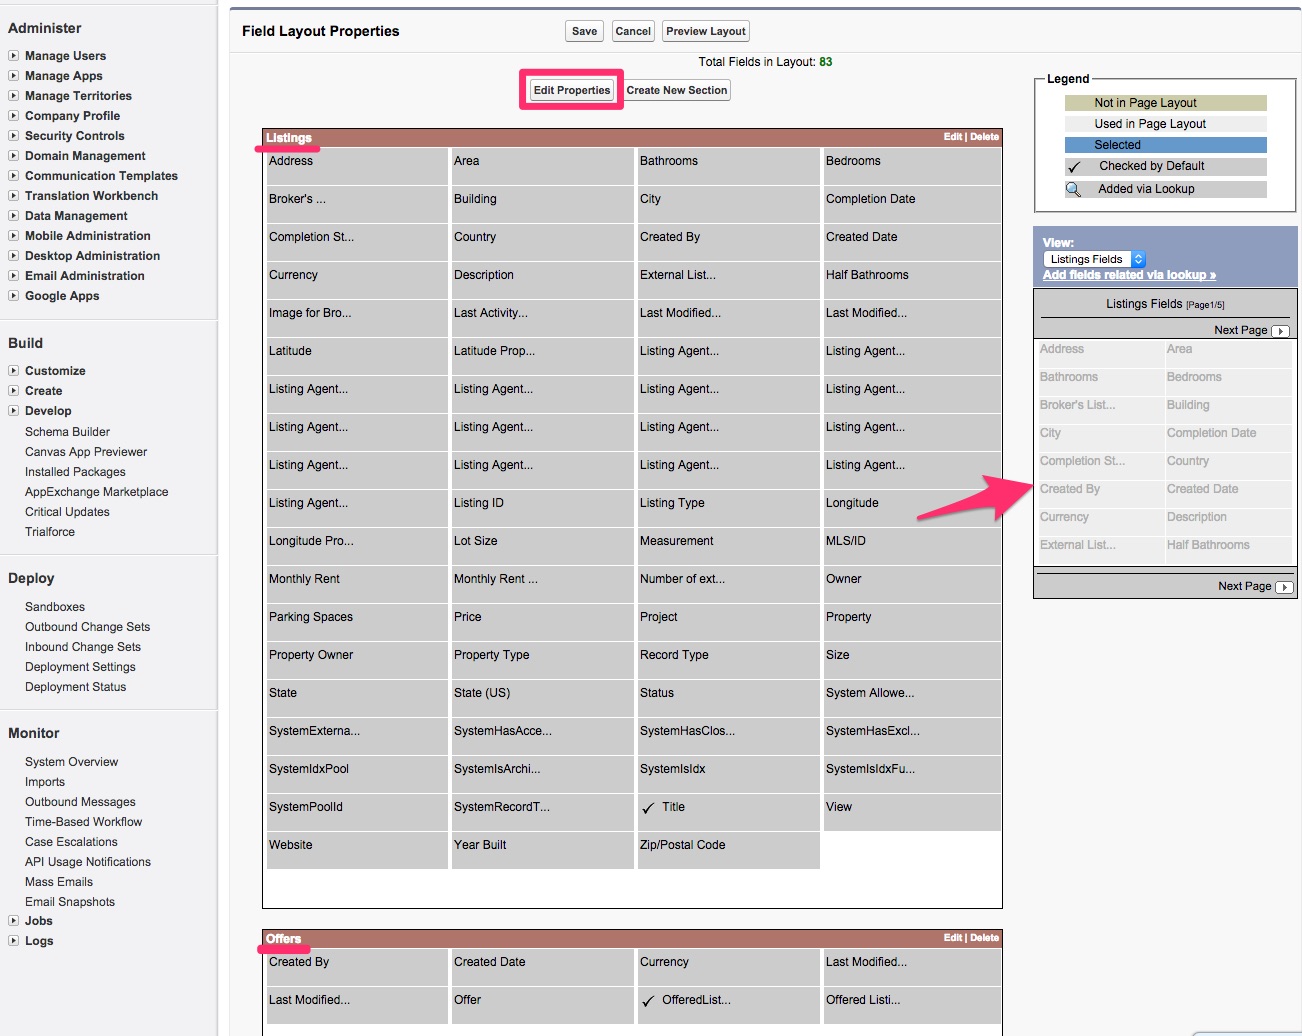
The new report type is now complete. In order to use this newly created report type, navigate to the reports tab and click "Create a new custom report". Select the primary object and the newly create type.
TIP: If new fields were created after the custom report type, please go back to the report types option in the setup and add the new fields to the layout. Means once you miss fields in a report it might be required to add them to the properties within your custom report type(s)!


Comments
0 comments
Please sign in to leave a comment.