

Build Custom Reports: Conversion Times Follow

In Propertybase version 1.466 we added a new configuration that tracks conversion time between contact stages. This article will walk through building custom reports to display that information.
Note: Before building these reports, your Propertybase account must support conversion times.
Conversion: New Lead to Working
- Click Reports in the main navigation bar.
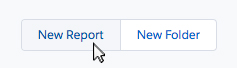
- Click New Report in the top right corner of the screen.
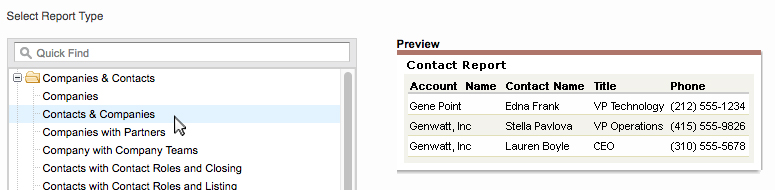
- Select Contacts & Companies for report type.
- Click Create.
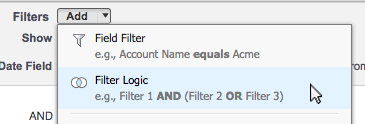
- Next Click Add next to Filters, then select Field Filter.

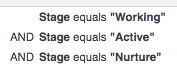
- Enter Stage, equals, Working for the new Field Filter.

- Click Ok.
Repeat that process to add Field Filters for Active and Nurture.
- Click Add next to Filters, then select Field Logic.
- Enter "1 OR 2 OR 3" for Field Logic then hit Enter.
- Next to Range select All Time.

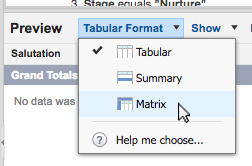
- Next to Preview, change the Format from Tabular to Matrix.
- Click the arrow next to Salutation, then click Remove Column.
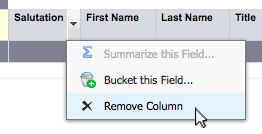
- Continue removing columns until only First Name and Last Name remain.
- In the Quick Find menu, type Stage then add it to the report by dragging it to the right of Last Name.
- Repeat the previous step to add "Conversion: New Lead to Working" and "Conversion: New Lead to Working (Mins)".
- Next drag Add Bucket Field on the left and drop it where it says "Drop a field here to create a row grouping".
- Enter "Conversion: New Lead to Working (Mins)" for Source Column.
- Enter "Conversion Time" for Bucket Field Name.
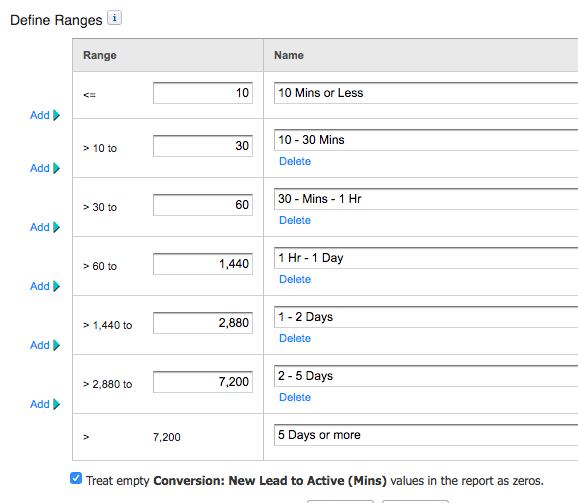
- For Define Ranges, replicate the data below.
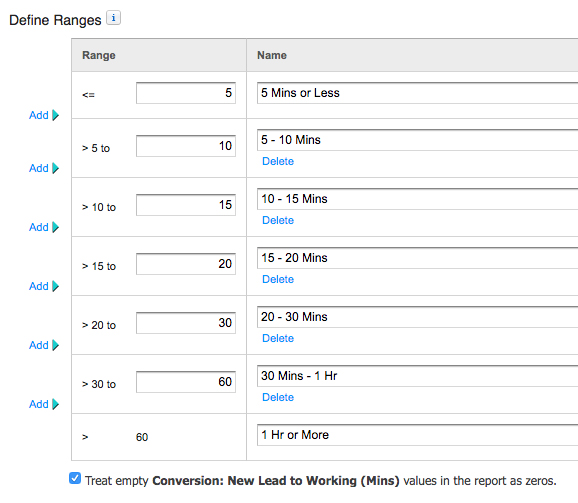
- Next drag Contact Owner from the left menu and drop it next to Conversion Time.

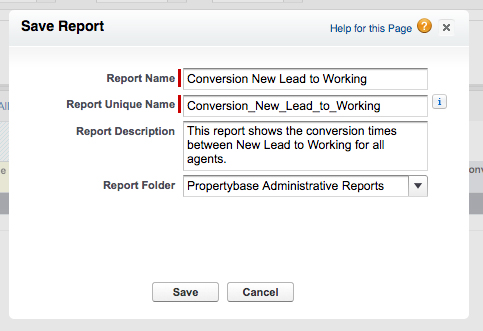
- Click Save.
- Enter the data below in the Save Report window.
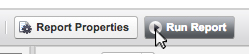
- Click Run Report.
- Click the toggle chart button in the top right corner of the screen.
Done! You've just created a custom report to analyze conversion times for New Lead to Working.
Conversion: New Lead to Active
- Click Reports in the main navigation bar.
- Click New Report in the top right corner of the screen.
- Select Contacts & Companies for report type.
- Click Create.
- Next Click Add next to Filters, then select Field Filter.
- Enter Stage, equals, Active for the new Field Filter.
- Click Ok.
- Next to Range select All Time.
- Next to Preview, change the Format from Tabular to Matrix.
- Click the arrow next to Salutation, then click Remove Column.
- Continue removing columns until only First Name and Last Name remain.
- In the Quick Find menu, type Stage then add it to the report by dragging it to the right of Last Name.
- Repeat the previous step to add "Conversion: New Lead to Active" and "Conversion: New Lead to Working (Mins)" and "Conversion: Working to Active (Mins)".
- Next drag Add Bucket Field on the left and drop it where it says "Drop a field here to create a row grouping".
- Enter "Conversion: New Lead to Active (Mins)" for Source Column.
- Enter "Conversion Time" for Bucket Field Name.
- For Define Ranges, replicate the data below.
- Next drag Contact Owner from the left menu and drop it next to Conversion Time.
- Click Save.
- Enter the data below in the Save Report window.

- Click Run Report.
- Click the toggle chart button in the top right corner of the screen.
Done! You've just created a custom report to analyze conversion times for New Lead to Active.
Conversion: Working to Active
- Click Reports in the main navigation bar.
- Click New Report in the top right corner of the screen.
- Select Contacts & Companies for report type.
- Click Create.
- Next Click Add next to Filters, then select Field Filter.
- Enter Stage, equals, Active for the new Field Filter.
- Click Ok.
- Next to Range select All Time.
- Next to Preview, change the Format from Tabular to Matrix.
- Click the arrow next to Salutation, then click Remove Column.
- Continue removing columns until only First Name and Last Name remain.
- In the Quick Find menu, type Stage then add it to the report by dragging it to the right of Last Name.
- Repeat the previous step to add "Conversion: Working to Active" and "Conversion: Working to Active (Mins)" and "Conversion: Working to Active (Hrs)".
- Next drag Add Bucket Field on the left and drop it where it says "Drop a field here to create a row grouping".
- Enter "Conversion: Working to Active (Mins)" for Source Column.
- Enter "Conversion Time" for Bucket Field Name.
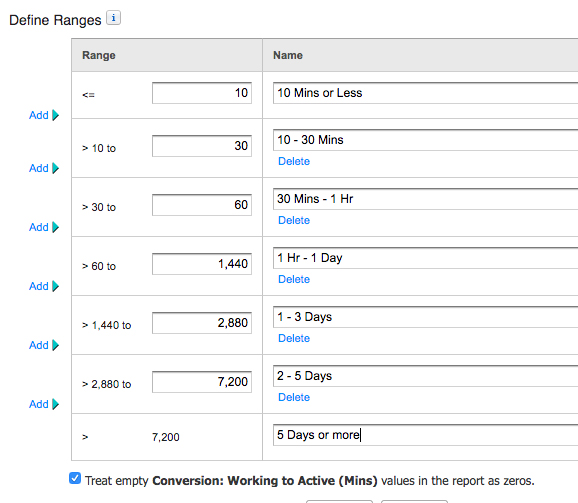
- For Define Ranges, replicate the data below.
- Next drag Contact Owner from the left menu and drop it next to Conversion Time.
- Click Save.
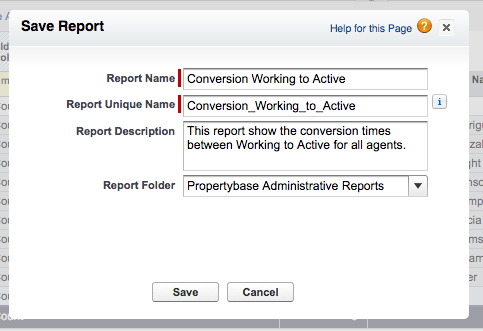
- Enter the data below in the Save Report window.
- Click Run Report.
- Click the toggle chart button in the top right corner of the screen.
Done! You've just created a custom report to analyze conversion times for Working to Active.
Conversion: New Lead to Disqualified
- Click Reports in the main navigation bar.
- Click New Report in the top right corner of the screen.
- Select Contacts & Companies for report type.
- Click Create.
- Next Click Add next to Filters, then select Field Filter.
- Enter Stage, equals, Disqualified for the new Field Filter.
- Click Ok.
- Next to Range select All Time.
- Next to Preview, change the Format from Tabular to Matrix.
- Click the arrow next to Salutation, then click Remove Column.
- Continue removing columns until only First Name and Last Name remain.
- In the Quick Find menu, type Stage then add it to the report by dragging it to the right of Last Name.
- Repeat the previous step to add "Conversion: New Lead to Disq. (Mins)".
- Next drag Add Bucket Field on the left and drop it where it says "Drop a field here to create a row grouping".
- Enter "Conversion: New Lead to Disq. (Mins)" for Source Column.
- Enter "Conversion Time" for Bucket Field Name.
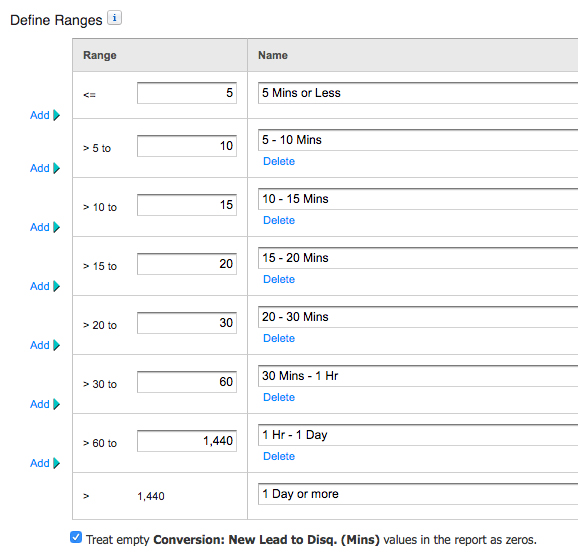
- For Define Ranges, replicate the data below.
- Next drag Contact Owner from the left menu and drop it next to Conversion Time.
- Click Save.
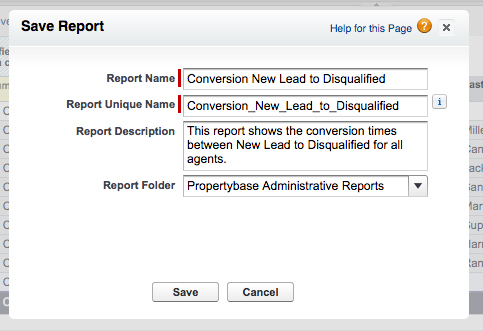
- Enter the data below in the Save Report window.
- Click Run Report.
- Click the toggle chart button in the top right corner of the screen.
Done! You've just created a custom report to analyze conversion times for New Lead to Disqualified.
Comments
0 comments
Article is closed for comments.