Creating and Modifying Apps Follow
Propertybase comes with several default applications, more commonly referred to as "apps". These apps determine how a user will experience Propertybase. We regularly evaluate and modify our default apps to match the needs of today's real estate professionals. Currently, Propertybase has five default apps: Agent, Manager, Administrator, Transactions and Leads. Depending on the role you perform or the task at hand, selecting the right app will help you succeed. In this article, we will show you how to modify apps and create new ones.
App Manager
Both creating a new app and modifying an existing one is done through the App Manager.
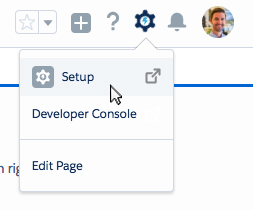
- Click the gear icon in the top right of the screen, then click Setup.

- On the left side navigation, click App Manager.

The following screen will show all of the apps in your Propertybase account. The majority of these apps are included by default by both Salesforce and Propertybase. If you have custom packages installed, you may see apps from those packages as well.
Use the table below to identify the default Propertybase apps.
| App Name | Developer Name | Description | App Type | Visible In Lightning |
| PB Agent | Propertybase_Agent | For standard Propertybase user experience | Lightning | Yes |
| PB Manager | Propertybase_Manager | For advanced Propertybase user experience | Lightning | Yes |
| PB Admin | Propertybase_Administrator | Configuration Settings for Propertybase Admins | Lightning | Yes |
| PB Leads | Leads | For Lead Generation Specific Users | Lightning | Yes |
| PB Transactions | Transactions | For Advanced Transaction Management | Lightning | Yes |
Note: The table above reflects the default Propertybase apps as they exist in the most recent version. The exact naming of apps in your version of Propertybase may differ slightly.
- To modify an app, click the far right arrow and then click Edit.

To learn more about editing apps, click the "Modifying Apps" tab at the top of this page.
Modifying Apps
Once you have accessed the App Manager and reached the edit screen (described in the "App Manager" tab on this page), review the table below to learn about the various editing options available.
When making changes in the App Manager, always remember to save your work.
- Click Save at the bottom of the screen to save your changes.

Note: The following documentation applies to Propertybase Classic only.
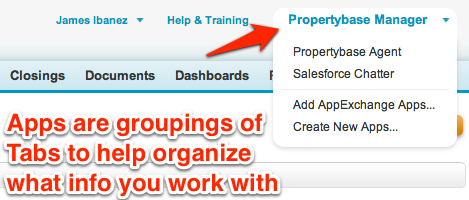
In Propertybase, Apps are a grouping of tabs created for specific users, to avoid clutter on the screen. They can be used to give different types of users (Sales, Marketing, etc.) quicker access to the information they work with daily. Apps can be found in the right hand corner of the Propertybase screen. Depending on your user permission, you may be limited in your selection.

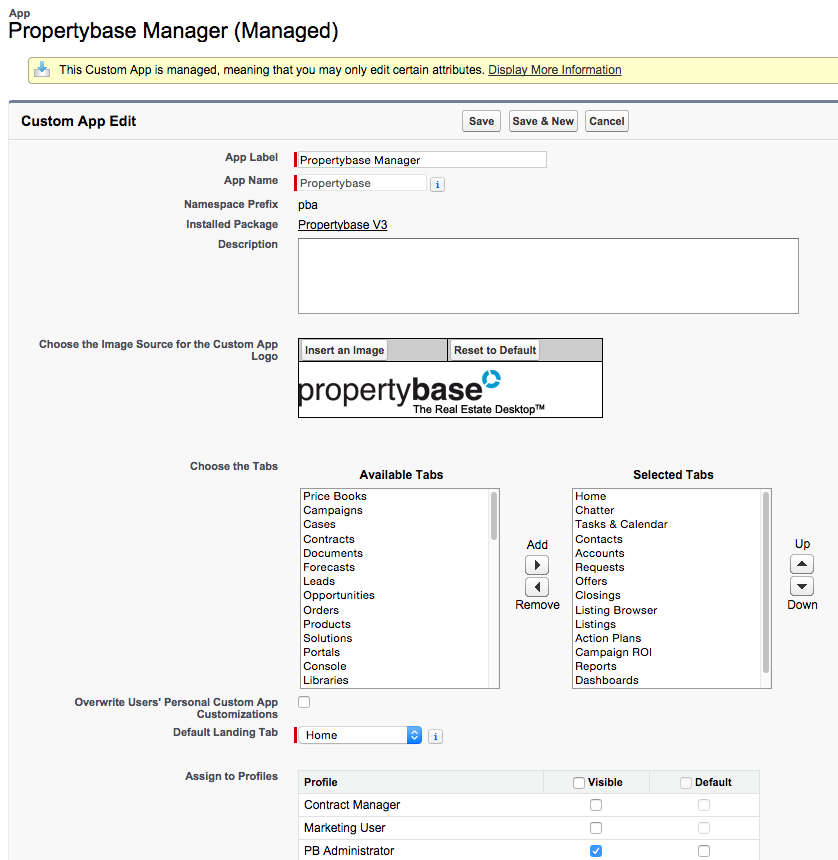
Editing Apps in Propertybase is simple. Just go to: Setup/ Create/ Apps. Select the App you would like to adjust and click on 'Edit' next to the name. On this page you're able to edit the name of the App, the custom logo that appears in the upper right-hand corner, the tabs that are available, the default landing page, which profile will be able to use it, and if your changes will overwrite the users' current App setup. 
To make sure that all users have the same app make sure to mark the "Overwrite user's personal custom app customizations" Checkbox.
Finally click 'Save'. Now when you jump into that specific App you will see your new changes.
*If your users are still not able to see the tabs on their menu, they probably do not have profile permissions to see the object. You will need to verify which Profile the user has and edit the Profile to enable the user to see the object. To find out more about Profiles see: User Profiles


Comments
0 comments
Article is closed for comments.