BombBomb Overview Follow
This page will explain how to install, configure and use BombBomb with your existing Propertybase account.
Installation
Follow the steps below to install the BombBomb integration in your Propertybase account.
- Click here to log into your BombBomb account.
- Once logged in, click the integrations link in the top right corner of the screen.

- Next, select Salesforce from the list of real estate integrations.

- Click Connect under Setup on right side of the screen.

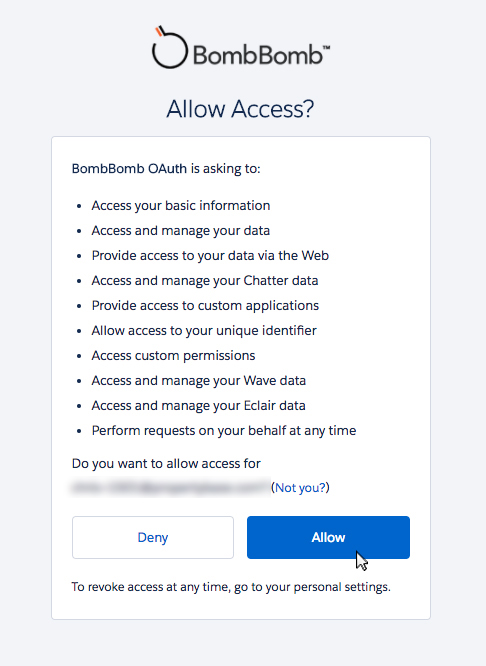
- Click Allow when asked for account permissions.
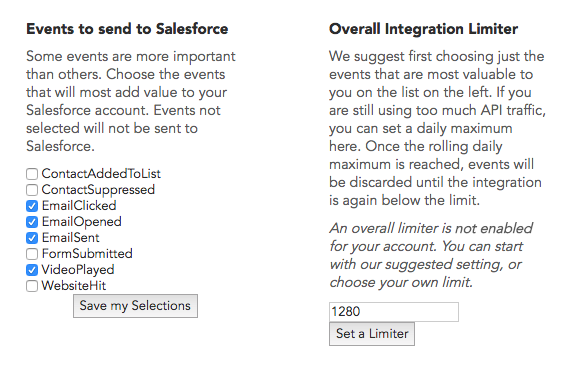
- Update the integration settings to match those shown below.
Package Installation
Next, we need to install the BombBomb package. This will add the necessary components to Propertybase.
- Click the link below to start the installation process.
https://login.salesforce.com/packaging/installPackage.apexp?p0=04t0a000001qUXX
- On the following screen select Install for Specific Profiles. DO NOT click Install yet.

- Scroll down the page and assign access levels according to the screenshot below.
Note: If you have created any custom profiles, set the access level of those profiles to "Full Access" as well.
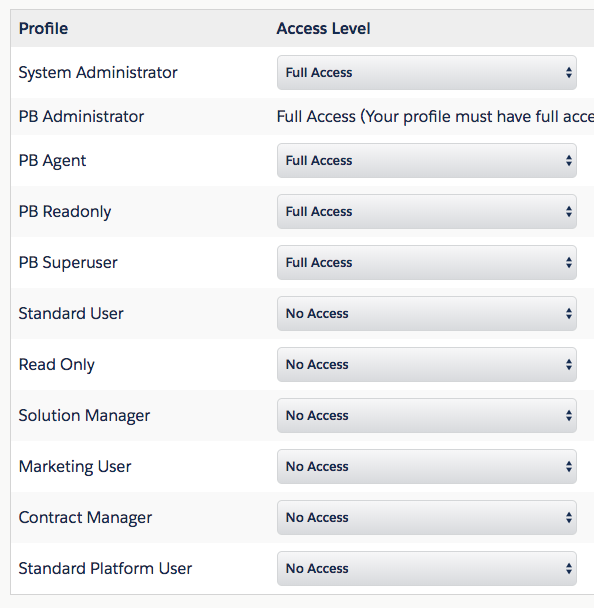
- After setting the proper access levels, scroll up and click Install.
- Once you receive the "Installation Complete" message, click Done.
Done! You have successfully integrated BombBomb with Propertybase and installed the latest package.
Next, click the 'Configuration' tab on this page to learn how to configure BomBomb with Propertybase.
Configuration
Once you've connected your BombBomb and Propertybase account there are a few configurations that need to be made. Follow the steps below to add the BombBomb component to the Contact page layout in Propertybase.
- From any Contact record, click the gear icon at the top of the page, then click Edit Object.
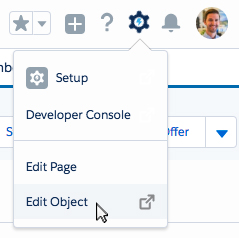
- On the left side of the screen, click Page Layouts.

- Click Individual Contact Layout from the list of available layouts.
- In the grey box at the top of the screen, click Visualforce Pages.

- Drag a new 'Section' into the page layout, as shown in the animation below.

- Copy the settings shown below for the new section and then click OK.

- Next, drag the BBContactQuicksender Visualforce Component into the new section.
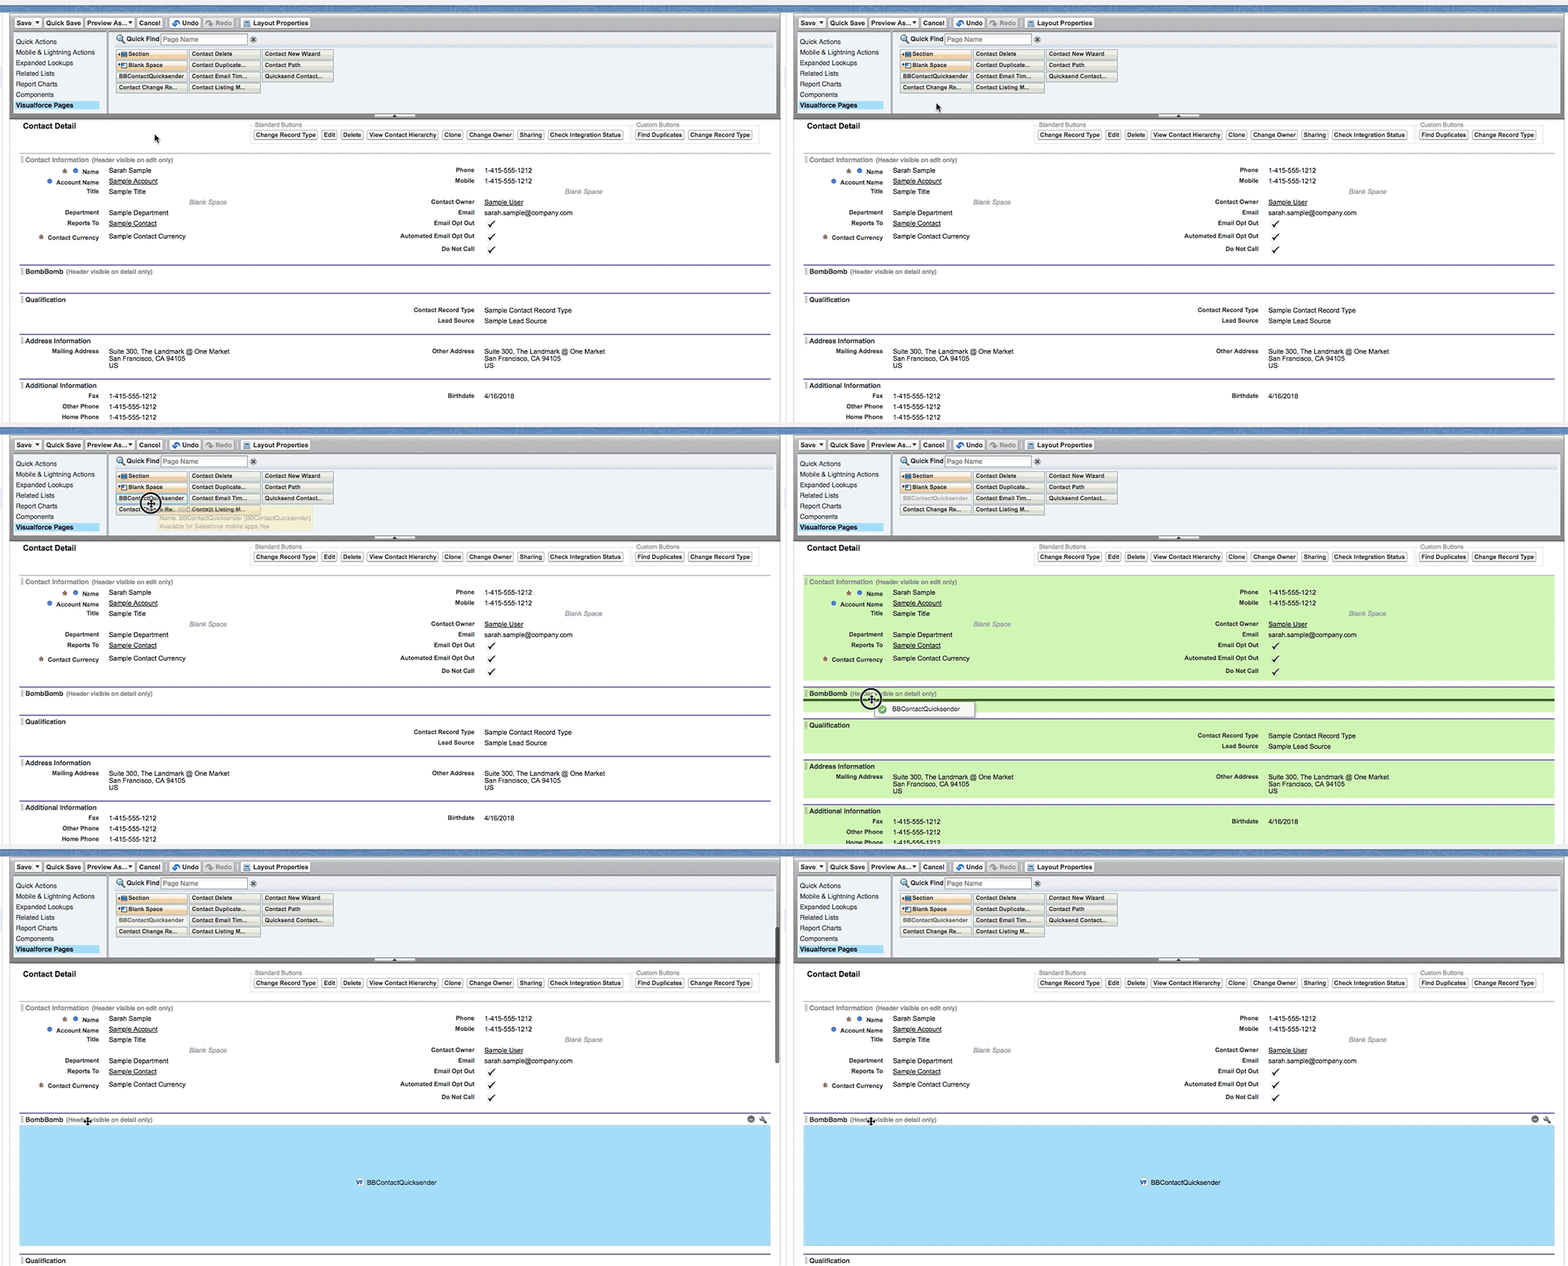
- Next, click the small 'wrench' icon in the top right corner of BBContactQuicksender.
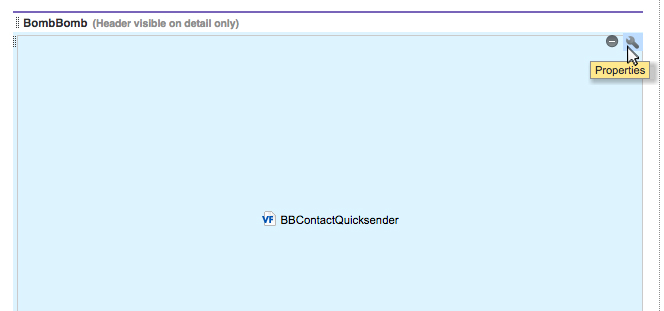
- Edit the Properties to match the image below and then click OK.
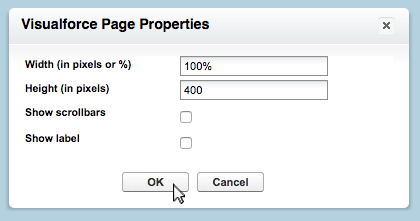
- In the grey box at the top of the page, click Save.

Note: You will need to repeat the configuration steps above for all Contact page layouts.
Done! You are now ready to use BombBomb in Propertybase.
Next, click the 'Using BombBomb' tab on this page to learn how to use BombBomb inside Propertybase.
Using BombBomb
Note: This section assumes you have already installed and configured BombBomb in Propertybase.
(See the 'Installation' & 'Configuration' tabs above.)
To use BombBomb in Propertybase, open any Contact record. Once you've opened a Contact record, click the Details tab and scroll down until you see the section titled "BombBomb" (or whatever you named it during configuration.) To send a video, simply click "Send A Video". Once you've recorded a video, enter a Subject and Message, then click Send. Your video will automatically be sent to the currently selected Contact record!

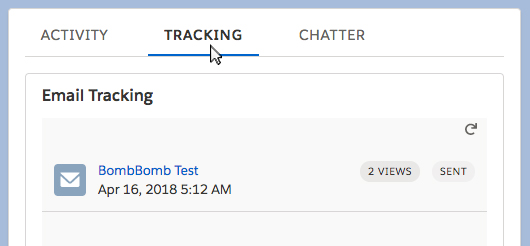
You can view stats for all BombBomb correspondence by clicking the 'Tracking' tab on any Contact record.


Comments
0 comments
Article is closed for comments.