Dotloop Overview Follow
*After Salesforce Summer 21 upgrade DotLoop will need to be updated*
Please install the latest version of DotLoop Package. Here is the link just append it after the .com when you are logged into Salesforce.
/packaging/installPackage.apexp?p0=04t3l000002Knmz
Example:
http://[myorgurl].force.com/[URL above goes here]
When installing be sure to select the option to give everyone access
This page will provide a general overview and configuration requirements for the Propertybase dotloop integration.
Prerequisites
The following requirements must be met before configuring the dotloop integration.
- The dotloop integration package must be installed in your Propertybase account. Contact Propertybase Support for more information.
Setup
Once dotloop has been installed in your account, follow the steps below to activate this integration.
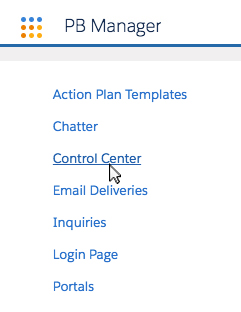
- Click the App Launcher in the top left corner of the screen, then click Control Center.
- From the Control Center, click Dotloop.
OAuth Setup
First, we need to setup OAuth. This is how Propertybase communicates with your Dotloop account.
- Click Setup OAuth in the lower right corner of the screen.

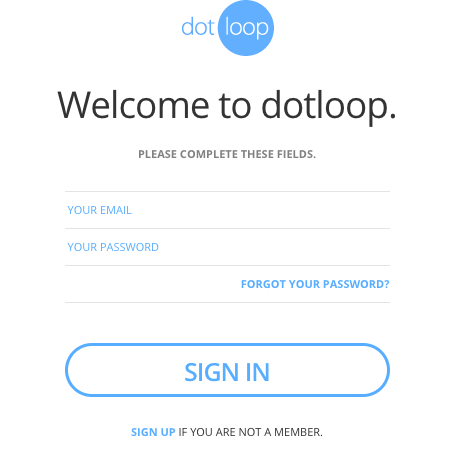
- On the next screen, sign into your Dotloop account.
- When prompted, click Approve.
- Once successfully authorized, click Close Window.
Load Templates
- Next click Get/Refresh Profiles and Templates to load in necessary template files.

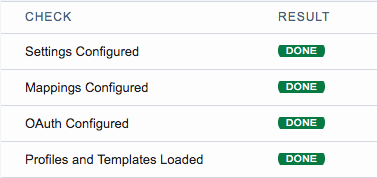
At this point, all checks should be resulting "Done" under Integration Status (as shown below.)
Nice work! Your Propertybase and Dotloop accounts are now connected.
Configuration
Next let's add the Dotloop component and appropriate fields to our page layouts for Listings, Offers, and Closings.
- Open any Listing record, then click the gear icon in the top-right menu and click Edit Page.

- Drag the Dotloop component (under the left side Custom - Managed list) to right above Activity and Chatter.
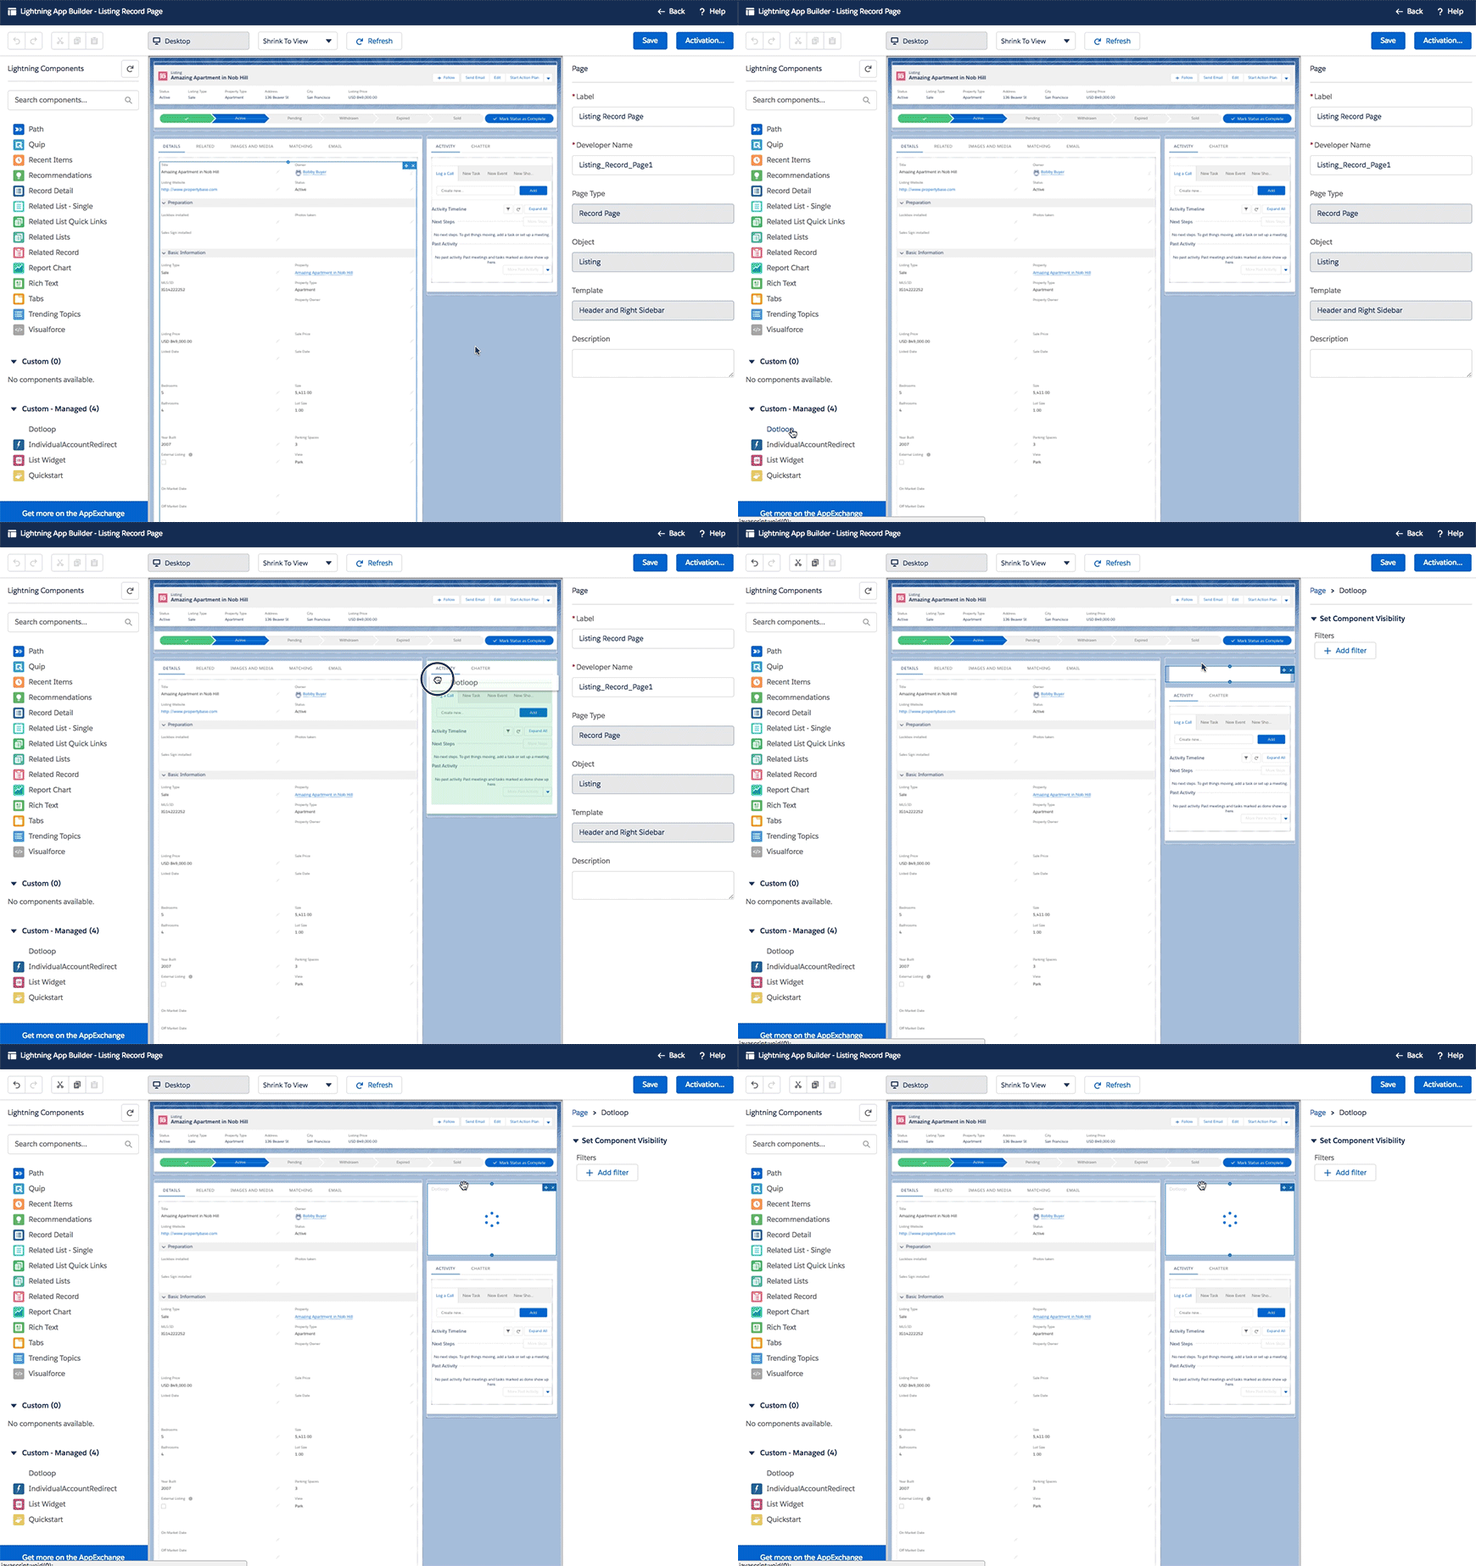
- Click Save in the top right corner of the page.
- Click Back.
Now that we've added Dotloop to our Listing page layout, let's create our first loop!
- Open a Listing record that you would like to integrate with Dotloop.
- Click the LOOP IT button on the right side of the screen.

Magic! You just created your first Loop with Propertybase.
- Log into Dotloop and you should see your new Loop.
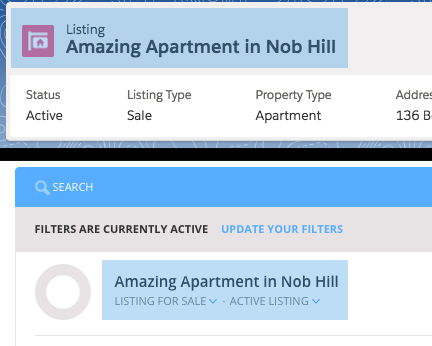
The image below shows our Propertybase Listing on top and the Loop we just created on the bottom.
- Click the new Loop from your Dotloop account.

- Click view details under the Loop title.

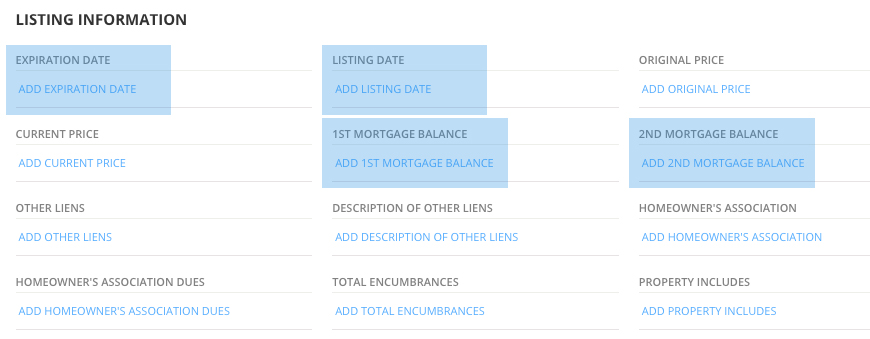
On the next page, scroll down until you get to the "LISTING INFORMATION" section. Let's add some of those fields to Propertybase. After that, we'll populate them with data and demonstrate how to import that data back into Propertybase.
- From any Listing record, click the gear icon in the top right menu and click Edit Object.

- On the left side of the screen, click Page Layouts.

- Click Sale under Page Layouts.
Let's add the following fields from the "LISTING INFORMATION" section in Dotloop, to our page layout. Don't worry - you can always add or remove additional fields later.
- Expiration Date
- Listing Date
- 1st Mortgage Balance
- 2nd Mortgage Balance
The image below demonstrates how to add "Expiration Date" to the page layout.
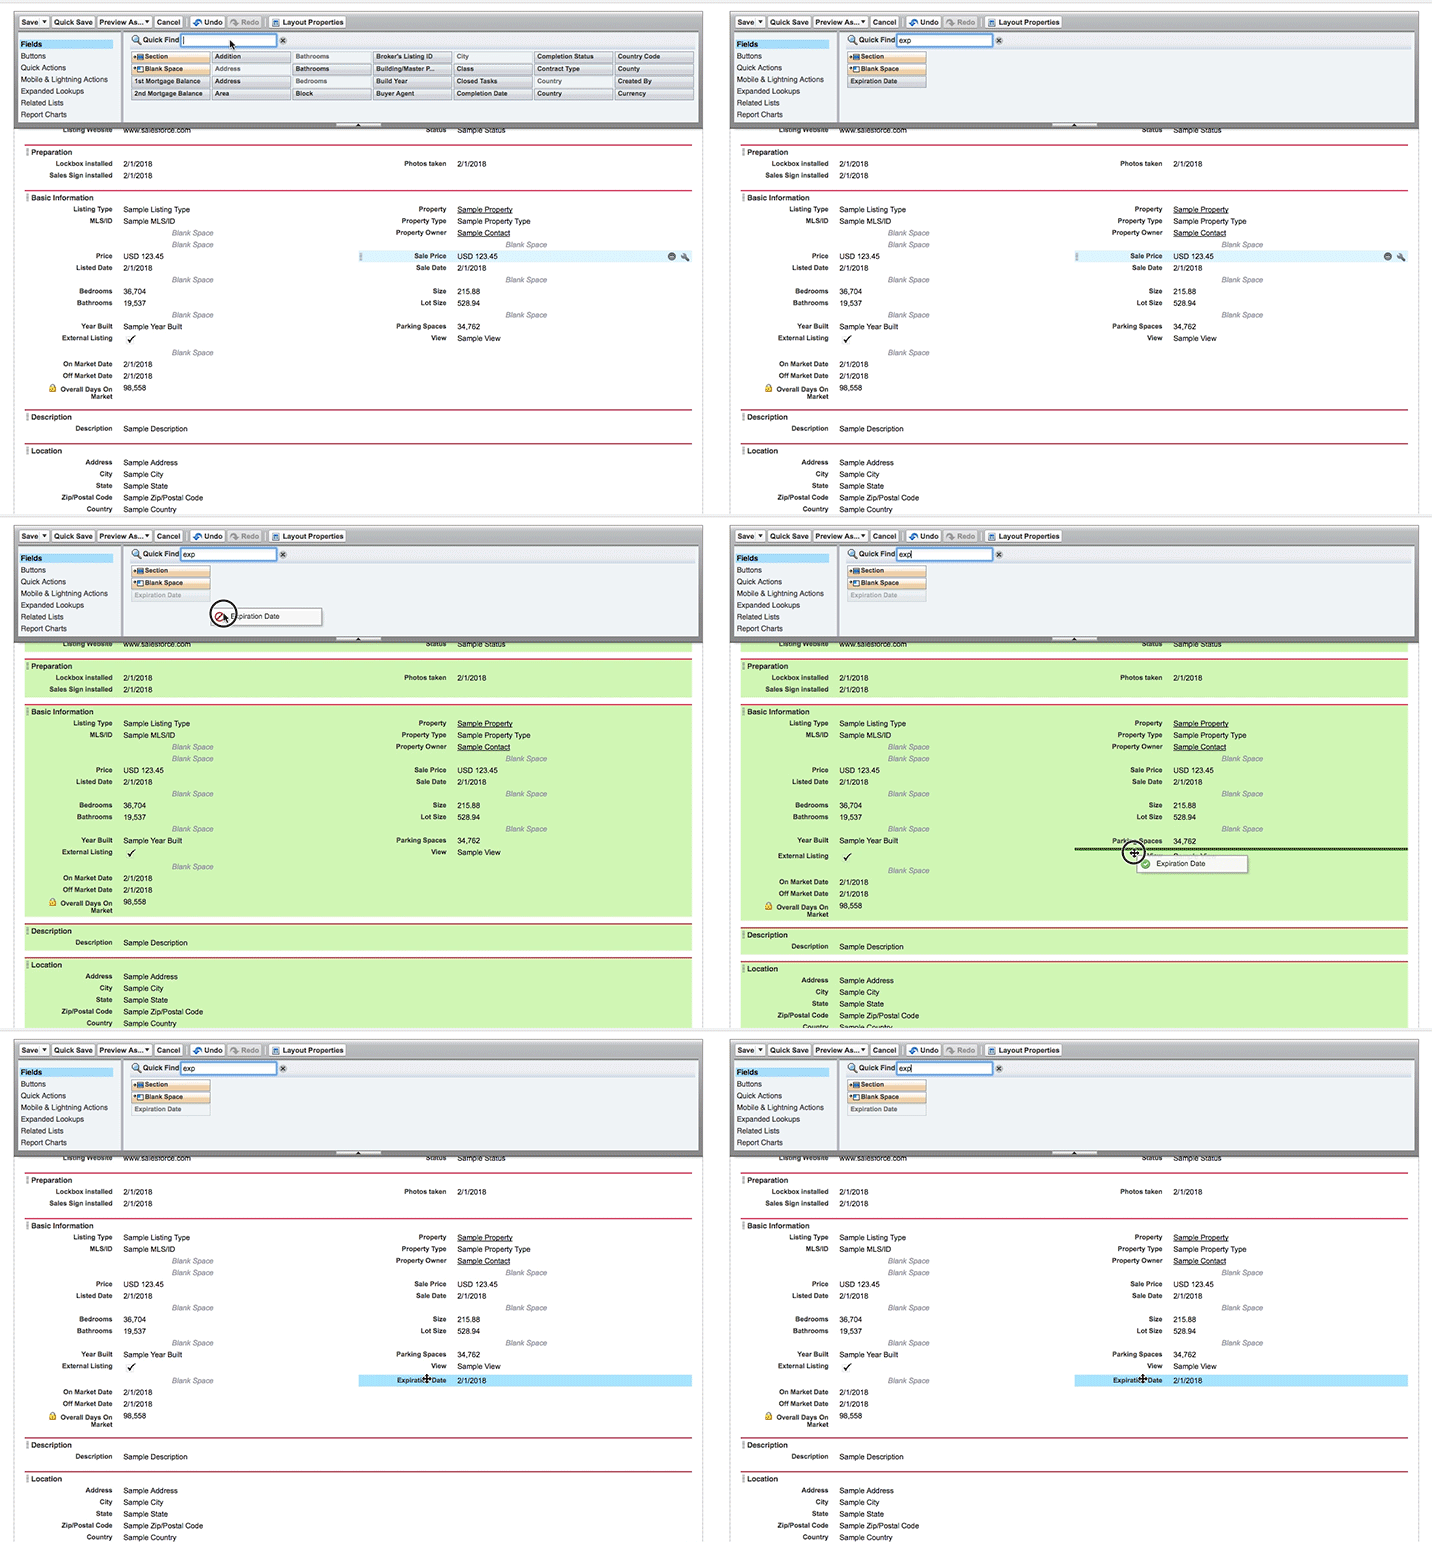
- Continue adding fields until you have added the four fields listed below.

Note: Hovering over a field will display the API Name. All Dotloop fields start with "pba_dl.".

- When finished, click Save at the top of the screen.

Configure Offers and Closings
Repeat all steps above for the Offers and Closings objects.
Note: Skipping this step will result in your Dotloop integration failing. A full list of custom fields included in the dotloop integration can be found in the "Custom Mappings & Fields" tab on this page.
If an Offer or Closing record is not associated with a Listing with a Loop, the system will display an error.
Synchronizing Data
Once you have set up communication between your Propertybase and Dotloop accounts and configured page layouts for Listings, Offers and Closings - you are ready to synchronize some data. Let's explore that below.
Data synchronization between Propertybase and Dotloop is a two-way process. Data syncs from Propertybase to Dotloop and also from Dotloop to Propertybase. Any available Dotloop field can be mapped to a Propertybase field.
- Open any Listing, Offer or Closing record (in the example below, we use a Listing.)
- Scroll down until you find a Dotloop field.
- Enter data into those fields (demonstrated below.)
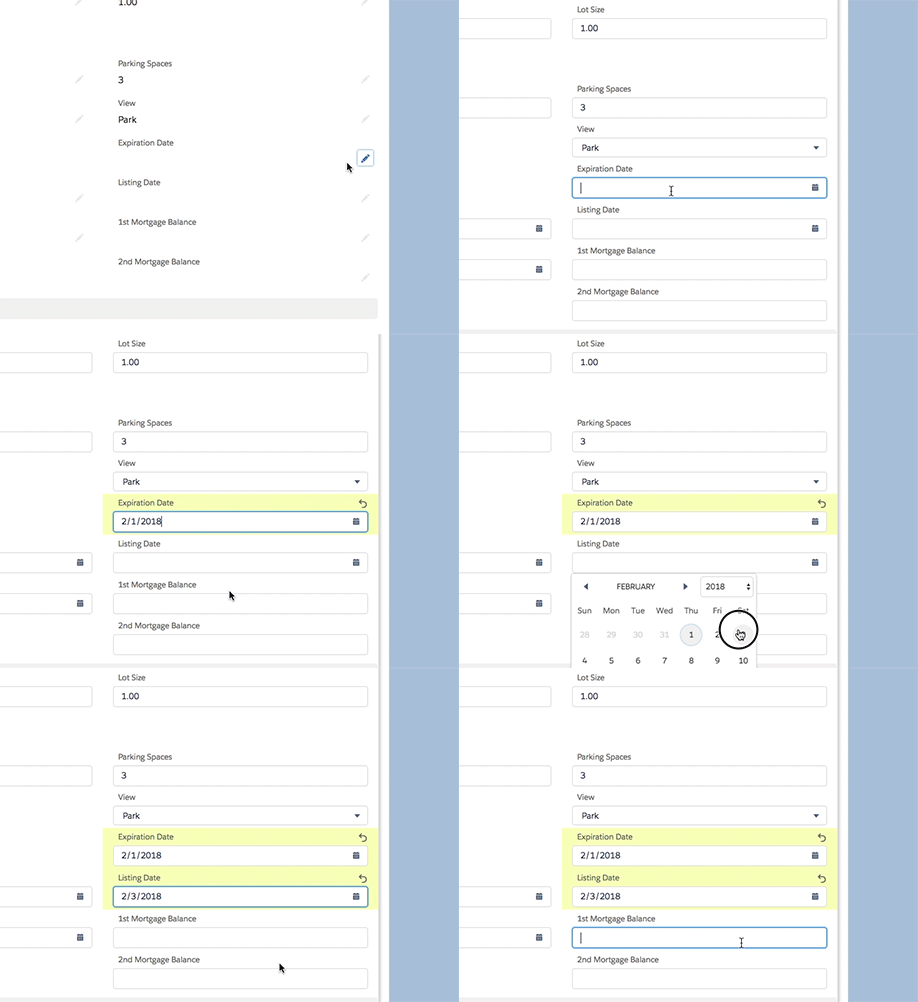
- Once you've saved your changes, scroll to the top of the page and click Update Loop.
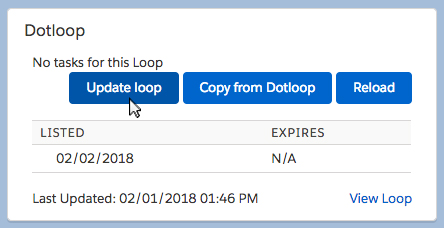
Done! Your Propertybase data is now in Dotloop.

Note: You can also pull information from Dotloop by clicking the Copy from Dotloop button.
Listing Status
When you create a new Listing in Propertybase, the status is automatically set to Off-Market. For obvious reasons, Dotloop does not accept "Off-Market" as a Listing status. Default Propertybase/Dotloop mappings for Listing status are shown below.
| Propertybase Listing Status | Dotloop Listing Status |
| In Preparation | PRE_LISTING |
| Private | PRIVATE_LISTING |
| Active | ACTIVE_LISTING |
| Under Contract | UNDER_CONTRACT |
| Sold | SOLD |
| Archived | ARCHIVED |
| Sold | LEASED |
Changing the Listing status to one shown above will resolve the "Status of "Off-Market" is not mapped for dotloop" error.
Custom Mappings
In addition to the default mappings that come with the Dotloop integration, it is possible to create your own custom mappings. Custom mappings can be added through the Settings object.
| Setting Name | Description |
| dotloop_offermappings | These are all mappings for the Offer object. |
| dotloop_listingmappings | These are all mappings for the Listing object. |
| dotloop_closingsmappings | These are all mappings for the Closing object. |
| dotloop_* | All other settings that start with dotloop_ are simply for use by the system. |
Table of Contents
- Mapping a Propertybase Field to Dotloop
- Supporting Custom Dotloop Fields
- Custom Fields Included with the Dotloop Package
Creating a Custom Mapping
In the steps below we explore how to create a custom mapping. This section assumes you are familiar with how to create a custom field in Propertybase. In this example, we are going to map a custom Listing field to the Dotloop field "MLS Number".
- Open the Settings tab.
- In the list of settings, click dotloop_listingmappings.
- Click Edit in the top right corner of the screen.

- Remove the current field name for MLS Number and replace with your custom field name.
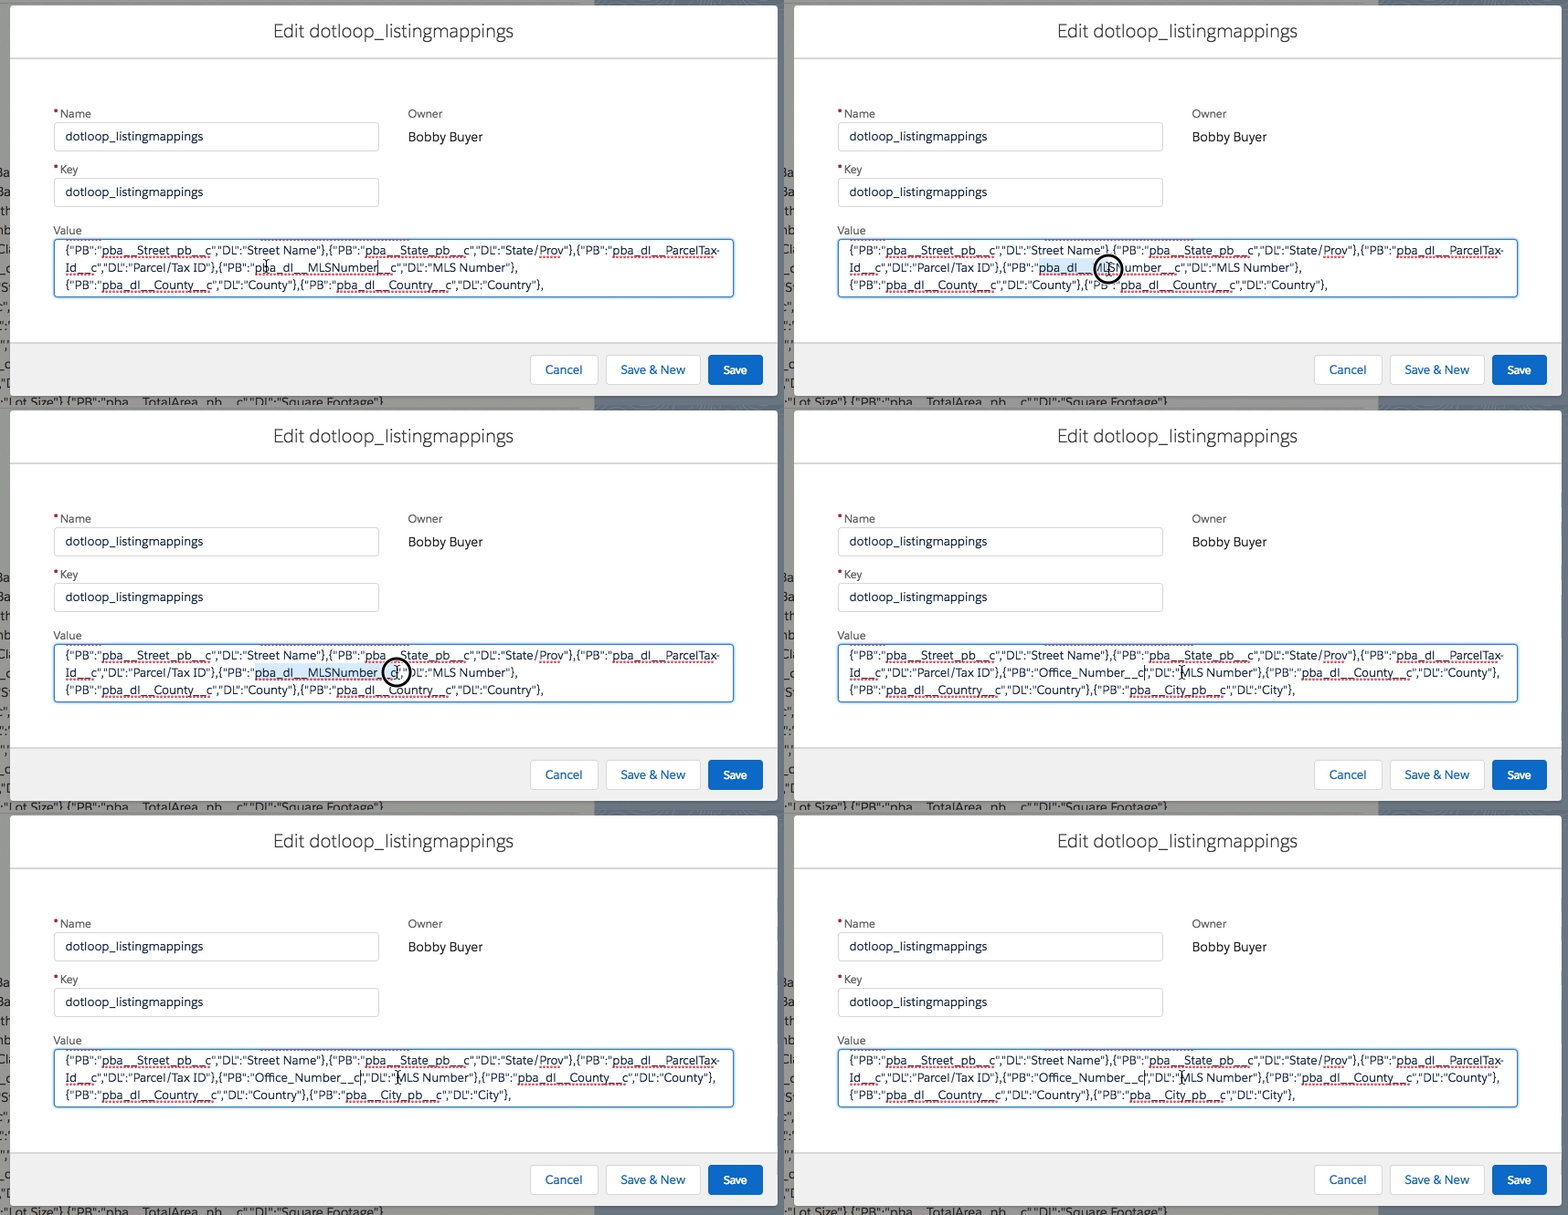
- Click Save.
Done! You can now sync data between your custom field and dotloop.
Note: To reset defaults mappings, click the Reset Default Mappings button in the control center.
How To Support Custom Dotloop Fields
Note: You must be on version 1.26 of the Dotloop package to support custom dotloop fields. To update to the latest version of the dotloop Propertybase integration, please contact Propertybase Support.
In dotloop, it is possible to create custom fields. Adding the setting shown below will allow custom dotloop fields to appear in Propertybase. Not sure how to add settings in Propertybase? Click here.
|
Setting Name/Key |
Setting Value |
|
dotloop_customfields |
Section:Field,Section:Field,Section:Field |
The "[Section]" is the section header for a group of fields. The "[Field]" is the complete field name of any field. In this example, the complete setting value would be Financials:Sales Commission Total.
Note: Custom dotloop fields must still be mapped to a corresponding Propertybase field.
Custom Fields Included with the Dotloop Package
The following is a list of all custom fields included within the dotloop package.
| Field Name | Parent Object |
| Closing Date | Closing |
| Class | Closing |
| Contract Agreement Date | Closing |
| Earnest Money Amount | Closing |
| Earnest Money Held By | Closing |
| Loop Closed Tasks | Closing |
| Loop refreshed At | Closing |
| Loop Id | Closing |
| Loop Url | Closing |
| Loop Total Tasks | Closing |
| Loop Profile Id | Closing |
| Referral Source | Closing |
| Referral % | Closing |
| Sale Commission Split $ - Buy Side | Closing |
| Sale Commission Split % - Buy Side | Closing |
| Sale Commission Rate | Closing |
| Sale Commission Split % - Sell Side | Closing |
| Sold Price | Closing |
| Sale Commission Split $ - Sell Side | Closing |
| Sale Commission Total | Closing |
| Type | Closing |
| Transaction Number | Closing |
| 2nd Mortgage Balance | Listing |
| 1st Mortgage Balance | Listing |
| Addition | Listing |
| Buyer Agent | Listing |
| Block | Listing |
| Country | Listing |
| Class | Listing |
| County | Listing |
| Contract Type | Listing |
| Closed Tasks | Listing |
| Deed Book | Listing |
| Description of Other Liens | Listing |
| Deed Page | Listing |
| Expiration Date | Listing |
| Homeowner's Association | Listing |
| Homeowner's Association Dues | Listing |
| Lot | Listing |
| Loop Url | Listing |
| Listing Date | Listing |
| Loop Refreshed At | Listing |
| Loop Id | Listing |
| Lot Size | Listing |
| Legal Description | Listing |
| MLS Number | Listing |
| MLS Area | Listing |
| Map Grid | Listing |
| Original Price | Listing |
| Other Liens | Listing |
| Profile Id | Listing |
| Property Includes | Listing |
| Property Excludes | Listing |
| Parcel/Tax ID | Listing |
| Section | Listing |
| School District | Listing |
| Subdivision | Listing |
| Street Number | Listing |
| Transaction Number | Listing |
| Total Tasks | Listing |
| Total Encumbrances | Listing |
| Type | Listing |
| Unit Number | Listing |
| Closed Tasks | Offer |
| Inspection Date | Offer |
| Loop Refreshed At | Offer |
| Loop Id | Offer |
| Loop Url | Offer |
| Offer Expiration Date | Offer |
| Offer Date | Offer |
| Occupancy Date | Offer |
| Profile Id | Offer |
| Total Tasks | Offer |
Note: dotloop does not currently support team profiles through 3rd-party integrations. If and when dotloop supports this feature, it will be implemented in Propertybase. Until then please contact dotloop regarding this issue.
Have questions about your dotloop account? Click here for dotloop support.


Comments
0 comments
Article is closed for comments.