EstateMaster Overview (AUS) Follow
Propertybase and ARGUS EstateMaster have worked together to deliver an integrated CRM and Cashflow solution. The integration directly connects your revenue forecasts in EstateMaster DM product to the Listings, Offers and Closings in Propertybase.
Note: EstateMaster is available for Propertybase customers in Australia only.

EstateMaster DM enables you to manage and track all facets of your property development cashflow and budgets. The Propertybase integration brings real-time sales data into EstateMaster from Propertybase.
For more information about EstateMaster or to download a trial visit their website
http://www.estatemaster.com/products/development-management
Install The Package.
The EstateMaster integration is an addon package to the Propertybase package and can be installed using the link below.
https://login.salesforce.com/packaging/installPackage.apexp?p0=04t7F000002OFZM
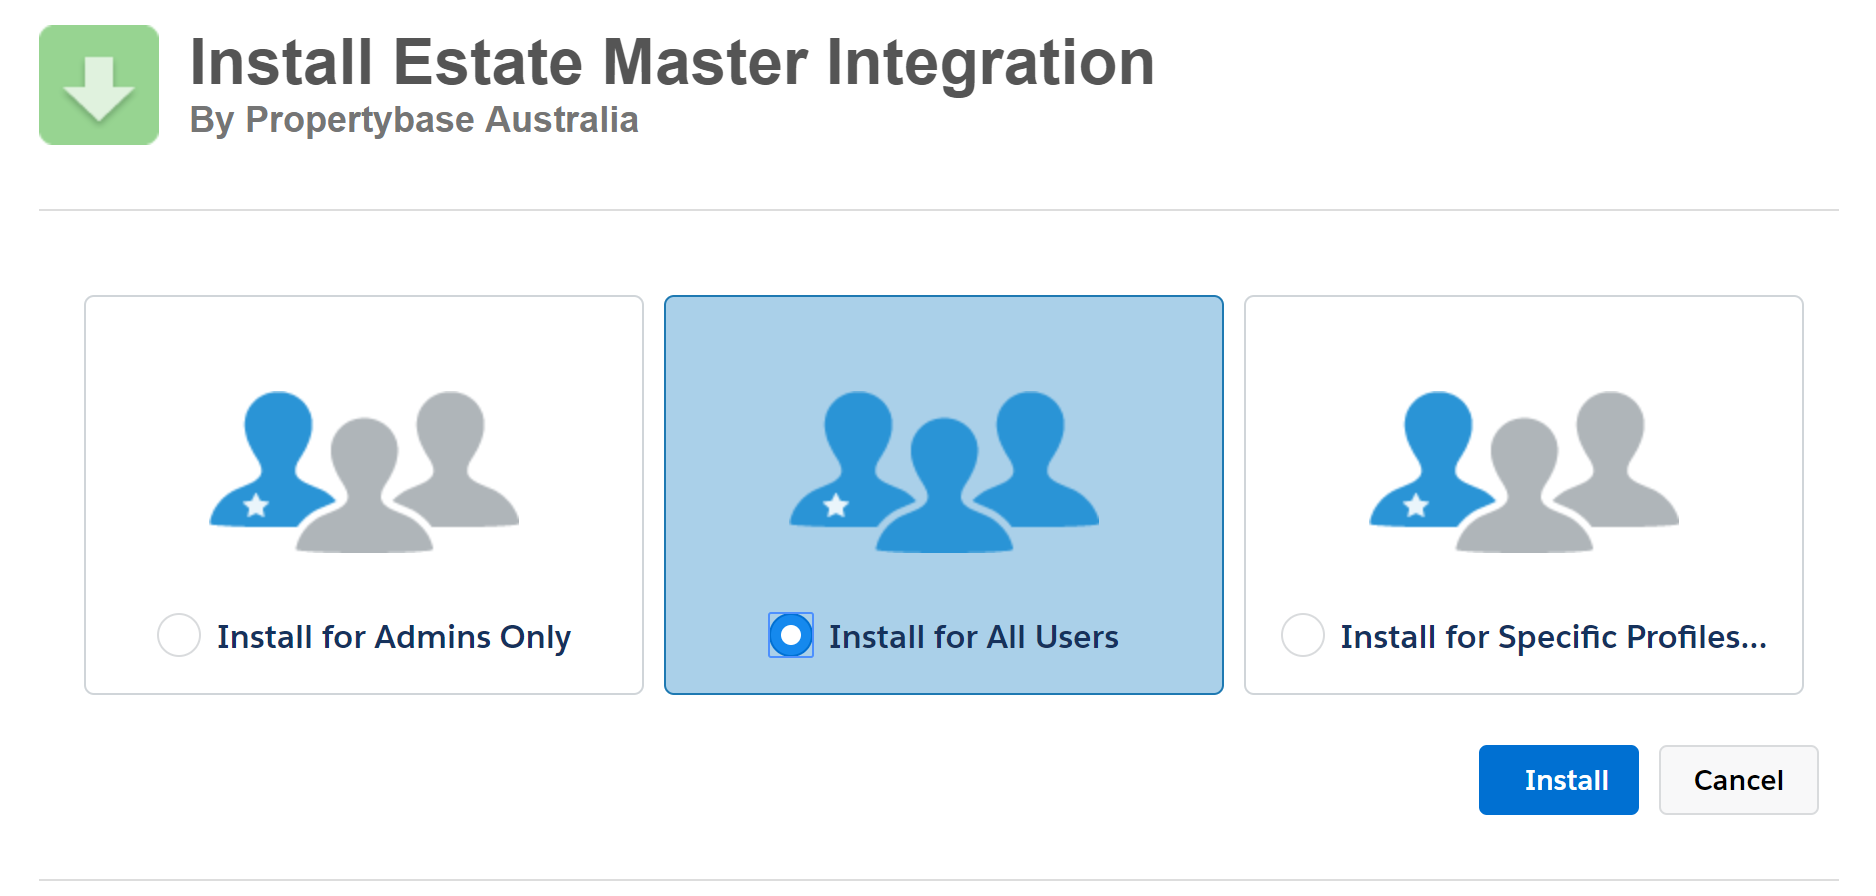
During the installation you will be requested who has access to the package. Select Install for All Users.

The integration requires access to the apex code through the Salesforce Sites object. and you will need to create a Site and assign permissions.
If you already have an active Site you can add the permissions to that site.
If you do not have an active Site you will need to create one.
Activate Sites
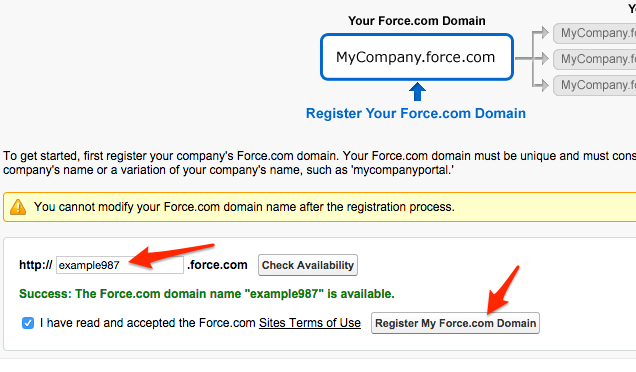
If not already activated, you have to create a force.com site.
To do this go to Setup > Develop > Sites > Then enter a new domain name.

We recommend to try your company name first. (mentioned below as: XXX.force.com).
Finally click "Register My Force.com Domain".
On the next page click the "New" button.
Add the following details to the new site:
Site Label: Webservices
Site Name: Webservices
Active: checked
Active Site Home Page: e.G: "UnderConstruction"
The next picture display the above described details:
For additional information on this topic you may go to:
http://wiki.developerforce.com/index.php/An_Introduction_to_Force.com_Sites#Creating_a_Force.com_Site
Enable Access to the EstateMaster Apex Class
The website user requires permission on the following Apex Classes.
- EstateMasterAPI
To enable permissions go to the Site and edit the Public Access Settings

Access the Apex Class Access and enable access to the Apex Class

Ensure that EstateMasterAPI is in the Enabled Apex Classes list.

Map the Propertybase fields to the EstateMaster inputs.
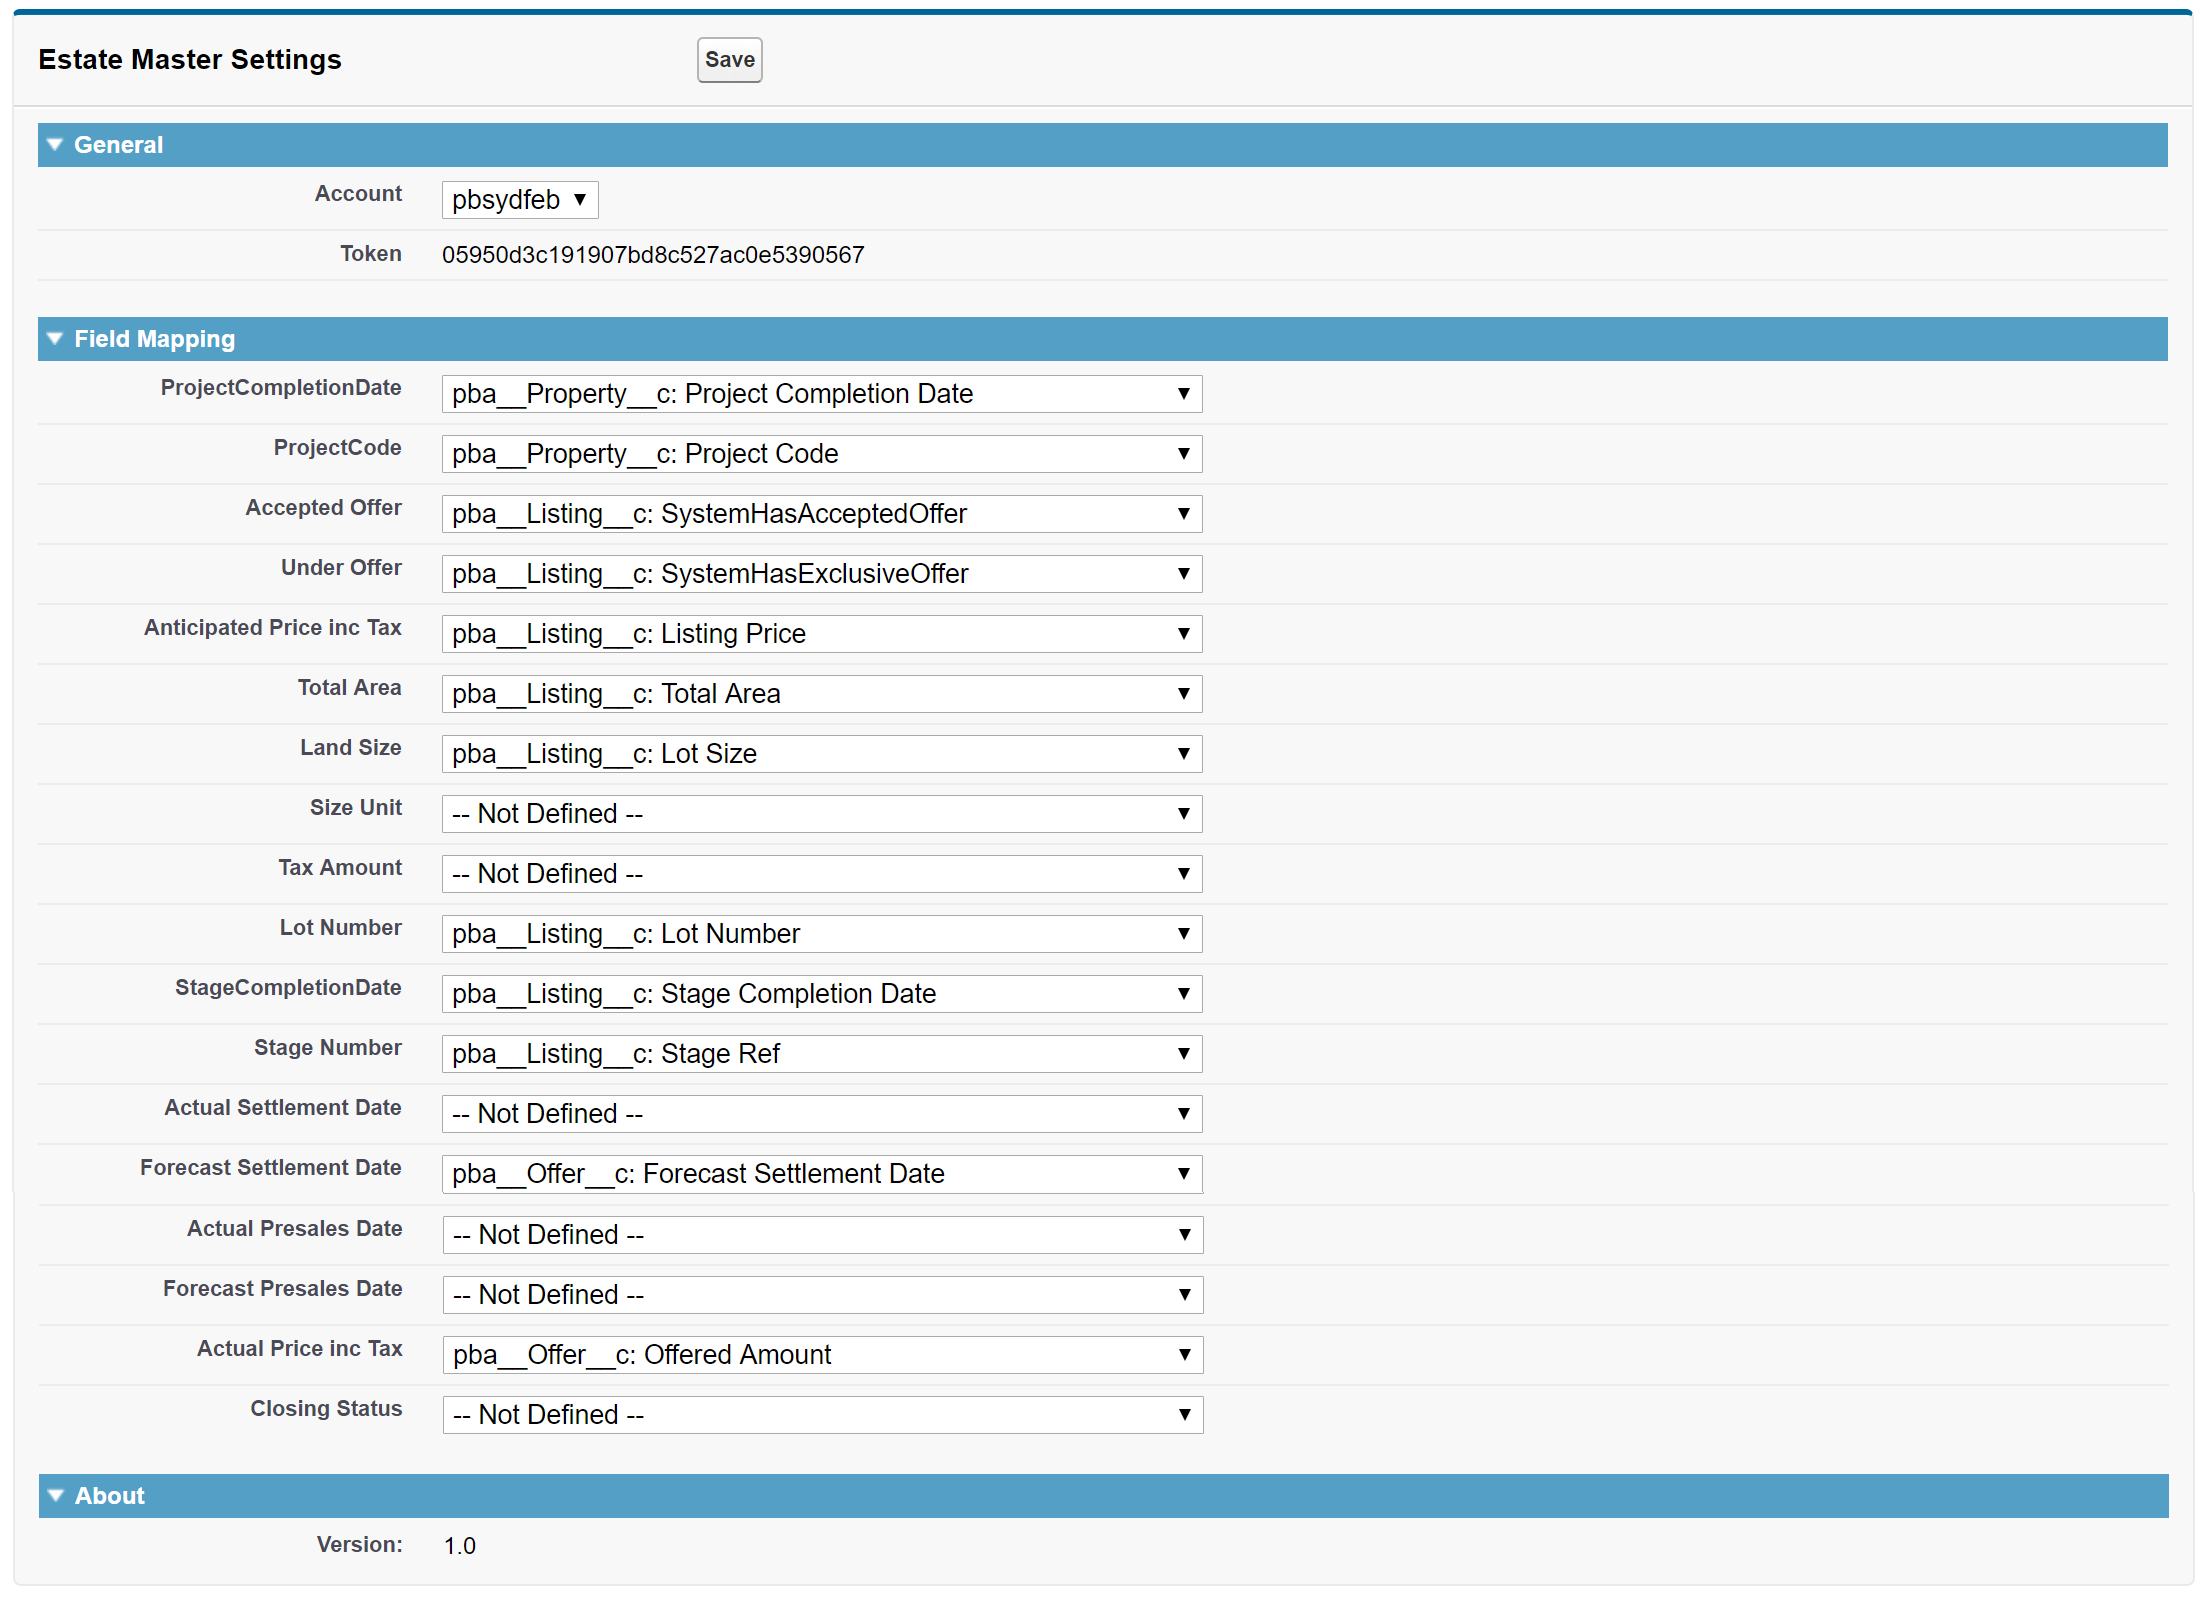
As every Propertybase customer can have differing custom fields we have created a EstateMaster Setting tab that will enable you to map your Propertybase fields to the required EstateMaster dataset.
The Project details are held on the Property Object and there is a Project field on the Listing that is a lookup to the Project record.
The Project required the Project Code and Project Completion Date.
General
In the General section you can select the correct Site that you have assigned the permissions to and also retrieve the security Token. You will need to enter both of these in EstateMaster.
Field Mapping
The Field Mapping allows you to map the required fields.
EstateMaster has a number of required fields to enable the forecasting, these include.
- Project Code
- Lot/Unit Number
- Lut/Unit Area
- Stage Number
- Project Completion Date or Stage Completion Date or Forecast Settlement Date (for sales still Available for sale)
- Anticipated Price inc Tax (for sales still Available for sale)
- Actual Settlement Date or Forecast Settlement Date (for sales with an 'Accepted Offer')
- Actual Price inc Tax (for sales with an 'Accepted Offer')
The default mappings are based on standard Propertybase fields. Change as required.
Fields can be mapped to the Property, Listing, Offer and Closings as required.
Details of Sold Listings should be contained on the Offer or Closings record in accordance with your internal processes.
A Forecast Settlement Date has been added to the Offer Object as part of the integration. You can use this field to forecast the settlement / handover of the Listing or map it to your own custom field.

Connect EstateMaster to Propertybase
In EstateMaster you need to enter your Propertybase Endpoint and Token so that EstateMaster can retrieve the data from your Propertybase account.

Select Propertybase in the Input Source.

Select the Connection Settings and enter your credentials from the EstateMaster Settings tab in Propertybase

Data Viewer allows you to test the connection and view the retrieved data from Propertybase.
Save Settings and Update Cashflow.
For more information about the forecasting in EstateMaster contact EstateMaster.
FAQ
Q: How do I define which Project I am extracting from Propertybase.
A: The Project Account Code is set on the Intro Page in EstateMaster and will need to match the Project Number in Propertybase.


Comments
0 comments
Article is closed for comments.